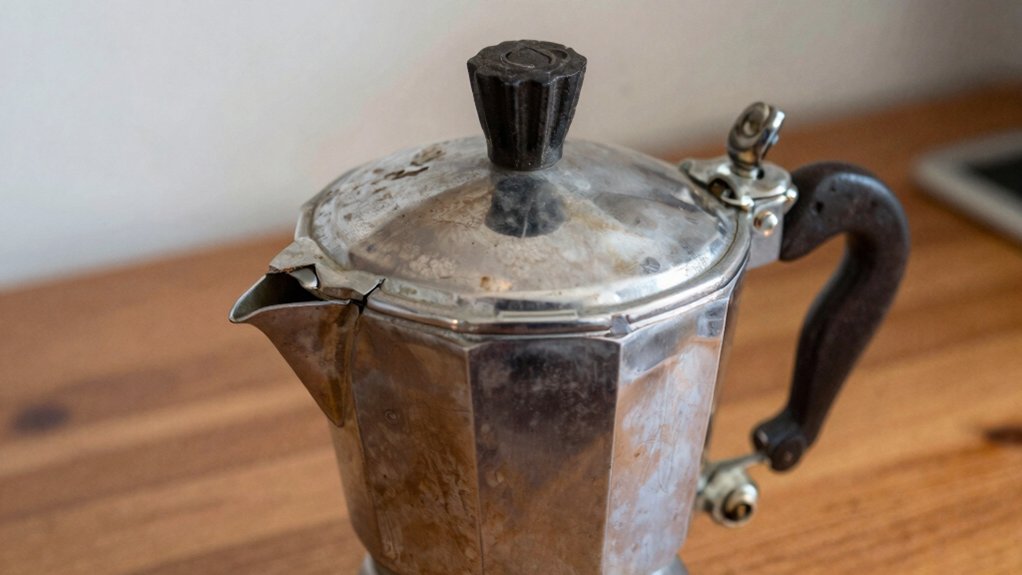
Check the bottom for the maker’s mark or logo, then compare the handle shape—straight‑down signals pre‑1961, a swooped curve means later. Look at the glass top for stamped numbers like #645, #2689, #687, or #415, and note any capacity labels (4, 6, 8, 10 cups) or “T/L” markings. Identify the basket, lid, and stem style; old‑style parts have tighter rectangular geometry and vertical handles, while newer ones feature outward‑sweeping handles and broader profiles. Cross‑reference these clues with brand catalogs to pinpoint the exact model and era, and you’ll discover how to match replacement parts correctly.
Identify Your Vintage Percolator: Brand, Model & Era

Where do you start? You inspect the bottom of the percolator for a maker’s mark or logo, which drives vintage brand identification and narrows the era. Next, you compare the handle shape: straight downward handles signal pre‑1961, while swooped ones point to a later era‑specific design. Examine the glass top assembly for part numbers such as #645 or #2689; those numbers link directly to model and part references. Look at capacity labeling—4, 6, 8, or 10 cup—and any cup‑type markers like “4 T” or “L 9.” Identify core percolator parts: glass carafe, glass stem, perforated basket, and aluminum or stainless base. Spot mismatched components, then cross‑check each piece with period catalogs or community references to confirm the exact model and era. The presence of a glass top and specific basket design can also help narrow the production period brand identification and guide restoration decisions.
Decode Vintage Percolator Markings & Part Numbers
When you spot a stamped number on the bottom or handle of a vintage percolator, you’re looking at the key that opens its identity and part compatibility. Those percolator markings often double as part numbers that tell you whether you have a vintage glass top, an Old Style or New Style handle, or a specific cup‑size designation. Cross‑reference the number with brand catalogs—626 for old‑style screws, 687 for a 6‑cup top, 645/2689 for glass tops—to confirm era and capacity. Remember, New Style appeared around 1961, while Old Style parts vanished after 1967, so the style clue narrows your search dramatically. Power outlets and built‑in outlets are emphasized across several coffee bar cart models to reduce extension cords and simplify power management, which is a practical consideration when identifying compatible parts or accessories for a vintage setup.
Match Vintage Percolator Basket, Lid & Handle to Era Style
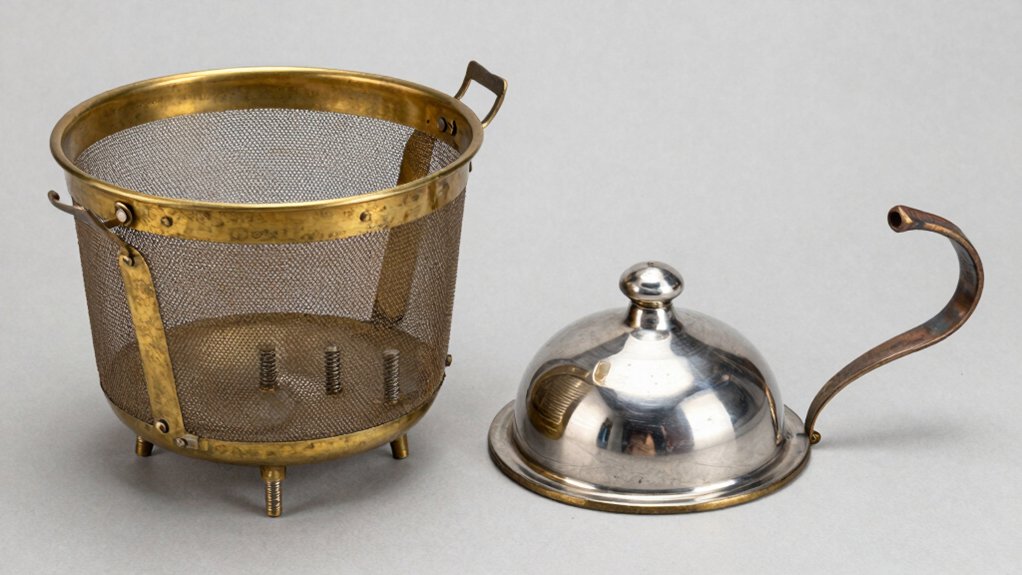
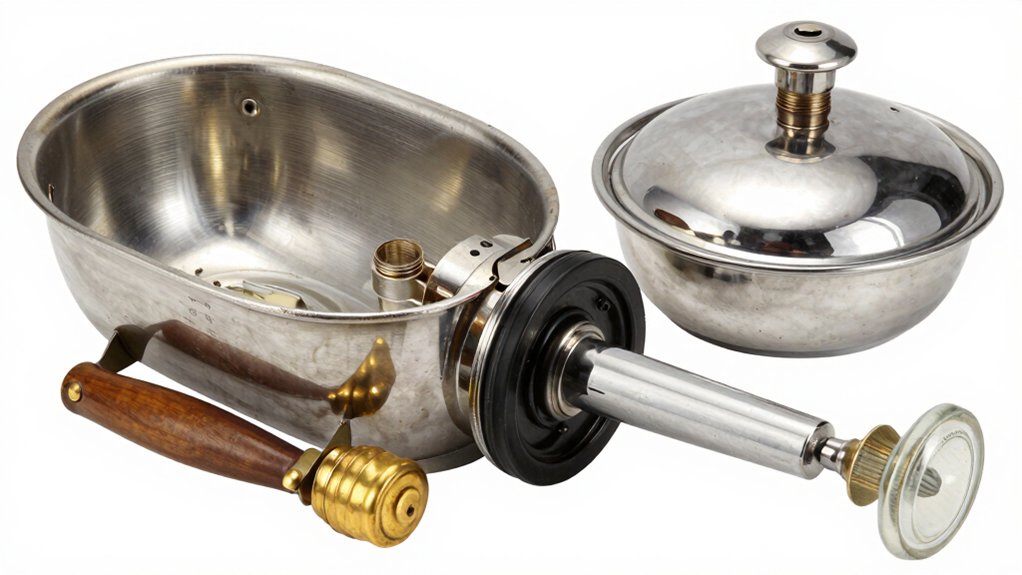
How can you tell if a Revere Ware basket, lid, or handle belongs to the old‑style era or the post‑1961 “new‑style” line? First, examine the percolator basket: old‑style baskets have straight‑down handles and a tighter, more rectangular geometry, while new‑style baskets feature outward‑sweeping handles and a slightly broader profile. Next, check the lid: an era‑compatible lid will have the classic top knurl or knob marked #645, later #2689, and the gasket will sit flush on the glass carafe. The handle design is a quick clue—old‑style handles stay vertical, whereas post‑1961 handles curve outward. Finally, cross‑reference part numbers: 626 screws and 36110 tops signal old style, while 687 (6‑cup) and 415 (8‑cup) denote newer models. Matching these details ensures glass carafe compatibility and proper fit. In addition, consult the relevant model ranges for compatibility notes and any era‑specific variations in the basket and lid design. Era‑specific
Find Vintage‑Specific Replacement Parts & Verify Fit
Curious about getting the right vintage part without a costly guess? First, locate the percolator top and glass carafe, noting any stamped part numbers like 645, 2689, 526, 687, or 415. Cross-reference those numbers with Revere Ware catalogs or online databases to pinpoint the exact model. Then, compare the basket and stem assembly to your unit, checking gasket compatibility—many vintage baskets use aluminum bottoms, but stainless‑steel inserts often fit Pyrex‑bodied tops. When you find replacement parts, verify the fit by measuring the opening diameter and stem length against your glass carafe. Finally, confirm the match with community photos that show marks such as “4 T” or “6 T,” ensuring the new gasket and basket will sit securely, induction compatibility can be a helpful consideration for compatible modern replacements where applicable.
Fix Fit Issues and Restore Functionality Safely
Ever noticed a loose basket or a leaky seal after swapping parts? First, double‑check percolator parts compatibility by measuring the stem opening and basket diameter; even a millimeter off can cause leaks. Use replacement catalogs to verify that your vintage coffee maker parts match the original dimensions—look up the glass top percolator series numbers and compare them side‑by‑side with your unit.
If the basket sits unevenly, gently sand the metal rim until it seats flush, but never alter the glass top percolator’s seal; instead, replace the gasket with a matching OEM piece. For stubborn misalignments, photograph the assembly and post it to a vintage parts forum for part identification and fit advice.
Tighten all screws evenly, test with a small water fill, and you’ll restore functionality safely. Lid design can influence spill resistance and seal integrity, so ensure that any replacement lids maintain the original fit and gasket type.
Frequently Asked Questions
Why Are Percolators Not Used Anymore?
You stop using percolators because drip and single‑serve machines brew faster, need less attention, and avoid glass‑top breakage or aluminum leaching, making coffee preparation simpler, safer, and more convenient.
What Year Was the Corningware Percolator Made?
You’ll find most Corningware stovetop percolators dated between the early 1950s and the mid‑1980s; specific model numbers, glass stem designs, and patent stamps pinpoint the exact year within that range.
Do Vintage Percolators Make Good Coffee?
Yes, you’ll find vintage percolators brew strong, bright coffee if you respect their quirks—use cold water, medium flame, and avoid metal‑acid contact. Clean regularly, replace worn gaskets, and you’ll enjoy their unique flavor.
How to Use a 1960S Percolator?
Fill the percolator with cold water, add ground coffee to the basket, place it on medium heat, watch the coffee rise, then remove from heat after three to four minutes once percolation steadies.
In Summary
Now you’ve got the brand, era, and markings down, you can spot the right basket, lid, and handle in seconds. Hunt down the exact replacement parts, double‑check the fit, and tackle any alignment quirks with care. With those steps nailed, your vintage percolator will brew like it did the day it left the factory—ready for every cup and every coffee‑lover’s nostalgia.

Leave a Reply