
First, scan the grinder for rust, corrosion, and any missing parts, then snap photos from every angle to remember how it comes together. Next, carefully disassemble, labeling springs, washers, and screws, and soak each metal piece in a mild solvent to strip grease. Polish brass and steel with progressively finer pads, then dry and coat them with oil or wax. Check burrs and spindle for wobble, align them, and lightly lubricate with food‑grade oil. Finally, reassemble, run a test grind, and decide if it’s functional or just for display—keep going to discover the details.
Assess Your Vintage Turkish Grinder’s Condition
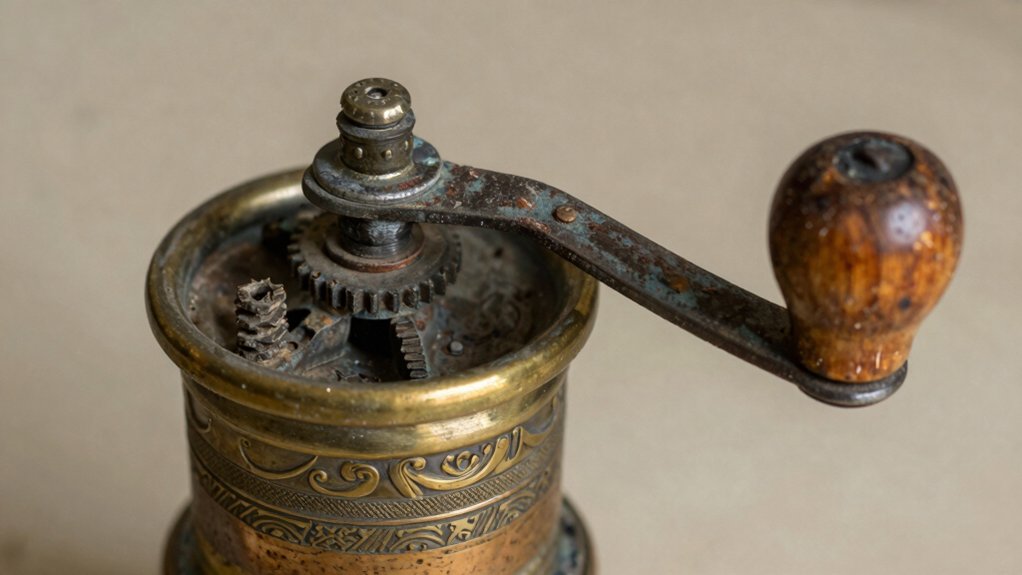
How can you quickly gauge a vintage Turkish grinder’s health? First, scan the exterior for brass corrosion; note whether rust stays on steel parts or seeps into joints and burrs.
Quickly assess a vintage Turkish grinder: scan for brass corrosion, rust on steel, and joint seepage.
Then, feel the iron spindle and burr assemblies for wear, wobble, or misalignment—these clues reveal mechanical integrity before any grinder restoration work.
Next, hunt for missing or damaged internal pieces such as bearings, springs, or screws, because replacements may be needed to restore performance.
Identify model‑specific features—like Zassenhaus Zenzi variations—to anticipate typical assembly steps and compatible parts.
Finally, snap photos from multiple angles, documenting visible condition to guide disassembly order and reassembly orientation during the restoration process. Careful documentation
Disassemble and Document Every Grinder Part
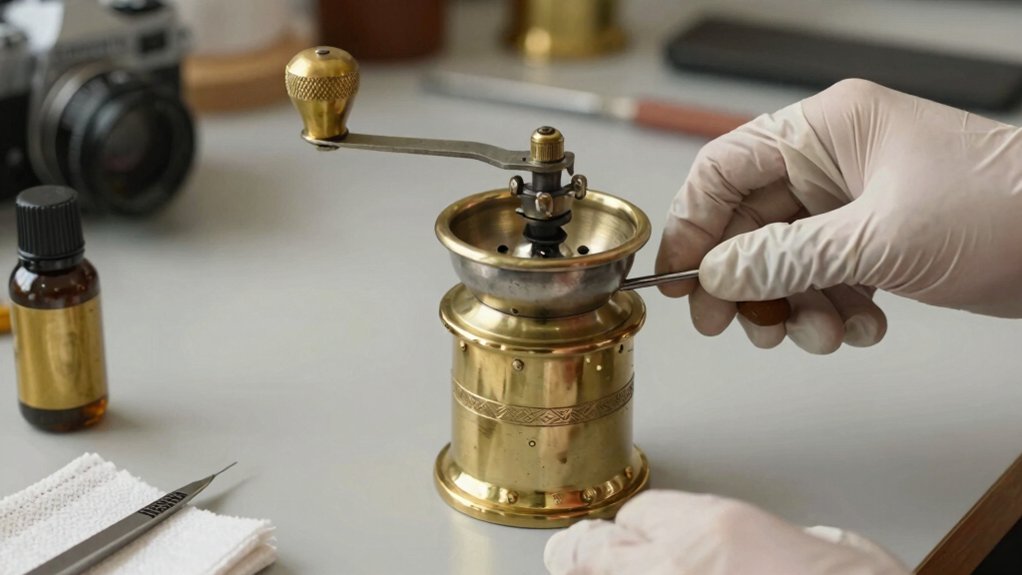
Ready to tackle the grinder’s internals? First, lay out a clean surface and gather a camera or smartphone. Snap a clear photo of each step, showing how every grinder part sits, its orientation, and any screws, springs, or washers. Capture multiple angles so you can reference the exact layout later. Before you pry anything loose, spray a little penetrating oil on stuck components and let it soak; this reduces the risk of breaking delicate pieces. As you remove springs, washers, and adjustment mechanisms, place them in labeled containers or a magnetic tray, noting their original positions. Test moving parts gently—don’t force anything—to feel any binding. Your visual and written record will guide a flawless reassembly orientation reference.
Clean, De‑Rust, and Polish Brass & Steel
Now that you’ve documented each component, focus on cleaning and polishing the brass and steel parts. Remove burrs and disassemble every metal piece, then soak them in a mild solvent to dissolve grease and old polish. Rinse thoroughly and dry before you begin brass polishing. Start with a soft brush or non‑abrasive pad, applying a gentle compound to lift surface rust without scratching. Progress to a finer abrasive, using circular motions to reveal the metal’s natural sheen. For steel, repeat the same gradual steps, ensuring rust is fully removed before the final polish. After you’ve achieved a uniform luster, wipe the parts dry, then coat them with a thin layer of oil or wax to guard against future tarnish and corrosion. The process benefits from choosing appropriate finishes to preserve the grinder’s original look and extend longevity care and material finishes.
Inspect, Align, and Lubricate Burrs & Spindle
Ever wondered how to keep your grinder’s burrs humming smoothly? First, hold the mechanism with the burrs facing up and rotate the inner burr by hand. You should feel an even, centered rotation and hear a consistent tone. If it wobbles, loosen the adjusting cam, reposition the outer burr, then tighten the cam fully to lock it.
Next, visually check the mating surfaces of both burrs; any gaps mean you need to tighten the nuts or screws a bit more. Once the grinder alignment feels solid, give the spindle a light coat of food‑grade oil, wiping away excess.
Finally, run a quick, light‑load test grind to confirm there’s no binding or odd noise before you move on. Regular maintenance, including using clean, unblemished filters and proper micro‑filtration techniques, helps ensure a smoother, fuller-bodied grind and consistent extraction over time. grinder maintenance
Reassemble, Test Grind, and Choose Use or Display
How do you bring those vintage burrs back together and confirm they still grind like new? Start by greasing the bottom bearing, then thread the axle shaft through the top bearing, aligning every part before reattaching the mechanism. Clear any glue or debris, and make sure the burrs spin freely. Next, test grind a few beans, listening for odd noises and watching for consistent particles. Adjust the cam half‑turn counter‑clockwise from burr lock, then repeat the grind to verify stable settings. Finally, decide if the grinder restoration yields a functional tool or a decorative piece.
- Apply fresh grease to bearings.
- Verify smooth burr rotation.
- Perform test grind and tweak cam.
- Choose use or display based on results.
To extend the guidance, consider noting how precise control and reliable power sources—such as a stable heat or temperature management—can influence overall performance, especially if you plan to repurpose parts or stages of the grinder for different tasks. PreciseControl
Frequently Asked Questions
How to Restore an Old Meat Grinder?
You should document the grinder’s model, disassemble it carefully, clean rust with degreaser, polish surfaces, check and align burrs, replace worn bearings, lubricate anew, then reassemble and test with small meat batches.
How to Clean a Turkish Coffee Grinder?
You empty the grinder, soak removable parts in a degreaser overnight, scrub burrs and metal pieces, rinse quickly, dry thoroughly, reassemble using your notes, then grind fresh coffee to confirm it’s spotless.
How Much Is an Antique Coffee Grinder Worth Today?
You’ll typically find an antique Turkish grinder priced between a few hundred and several thousand dollars, depending on brand, condition, originality, rarity, and market demand.
What Are Some Common Mistakes in Turkish Coffee Prep?
You often use pre‑ground beans, grind too coarse, apply too much pressure, skip fine‑tuning the dial, neglect cleaning the burrs, and ignore the proper water‑to‑coffee ratio or foam formation.
In Summary
You’ve now got a solid plan to bring your vintage Turkish grinder back to life. By checking its condition, documenting each piece, cleaning and polishing the metal, aligning and lubricating the burrs, and finally reassembling and testing, you’ll preserve its heritage while ensuring it works perfectly. Whether you keep it for daily brewing or display it as a piece of history, your careful restoration will let you enjoy its timeless charm for years to come.

Leave a Reply