Test your water hardness first, then use a citric‑acid descaler mixed at 50 g/L. Pump the solution through the grouphead for 5–10 seconds per pass, repeating until it’s clear. Open the boiler’s access ports with a plastic tool, and soak the grouphead and valves for 15 minutes to a few hours depending on scale. Flush the system four times with filtered or RO water, inspecting with a flashlight for any residue. Replace worn gaskets and O‑rings, then verify pressure and temperature stability; the next steps will show you how to keep your boiler humming.
Measure Water Hardness Before Descaling Your Espresso Boiler

How hard is your water? First, grab a hardness test kit and dip the strip into a sample from your tap. The kit will give you a clear reading of water hardness, letting you gauge how much mineral buildup to expect in your espresso boiler. Record the result; a high number means scale will form quickly, so you’ll need more frequent descaling. Remember, standard coffee filters like Brita won’t strip those minerals, so they won’t help with scaling. Instead, consider a dedicated filtration system that targets calcium and magnesium. By matching your descaling schedule to the hardness reading, you avoid unnecessary chemical use and keep vintage boiler passages clean. Regularly inspecting your equipment for signs of mineral buildup can help you catch scaling before it affects flavor and performance precise readings. This simple test saves time, money, and preserves flavor.
Choose a Gentle Citric‑Acid Descaler for Vintage Boilers
Looking for a safe way to strip scale from a vintage boiler? Choose a gentle citric‑acid descaler solution that balances effectiveness with corrosion protection. Regular maintenance with proper descaling helps protect copper and steel components from mineral buildup, ensuring consistent heat and flavor.
Mix 50 g of citric acid per litre of water, then pour the descaling mixture into the reservoir and introduce it through a serviceable hole or the temp‑probe area.
Mix 50 g citric acid per litre, pour into reservoir, and introduce via serviceable hole or temp‑probe.
Let the solution dwell for several hours—overnight works well—so the acid dissolves mineral deposits without attacking copper or steel.
After the soak, drain the boiler and flush repeatedly with fresh water to erase any citrus taste and residue that could affect espresso flavor.
Finally, reseal, reassemble, and verify that wiring and the temp probe remain intact, ensuring proper auto‑fill and heating for your vintage boilers. descaling process
Run a Controlled Descaling Cycle With the Machine’s Pump
Start the pump‑driven descaling cycle by activating the machine’s pump to push the citric‑acid solution through the group head for 5–10 seconds per pass, repeating until the water runs clear of suds and grounds. You’ll watch the pressure and flow; if any grounds or gunk appear in the portafilter, keep cycling until the discharge is clean. Regular maintenance reduces residue buildup and preserves performance Strix temperature control and consistency across uses. When using CAFIZA, sprinkle about 2 g onto the backflush disc and run the pump until the detergent fully clears. After the descaling cycle, skip a direct soak through the group head; instead, perform a rinse flush with hot water or the steam wand. Finish by flushing the entire system with fresh water from both the group head and steam wand to eliminate any residual descaler.
Open the Boiler Access Ports Without Breaking Anything
You’ll first spot any existing port openings and decide which one gives the best access.
Grab a non‑metal screwdriver or plastic pry bar and use gentle leverage, avoiding any sudden twists that could strip threads.
Once the port yields, you can peek inside with a pipe endoscope before resealing everything tightly.
Universal compatibility can help ensure that you’re using a descaler designed for a wide range of machines, reducing the risk of compatibility issues during maintenance.
Locate Existing Port Openings
Where do the hidden ports lie on your vintage espresso boiler? You’ll find them by scanning the exterior for tiny access ports, probe holes, or a vacuum‑breaker valve. Use a flashlight or a simple imaging tool to get a clear view inside without applying pressure. When you spot the temperature‑probe opening, attach a syringe and tubing to peer into the boiler interior, then you can assess scale before any descaling steps. Loosen any nearby screws with a Phillips or Allen driver, turning them just enough to create an inspection window without stripping threads.
- Identify small access ports and probe holes on the boiler shell.
- Use light or imaging to inspect the boiler interior through those openings.
- Prepare tubing and a syringe for the temp‑probe hole, then verify scale presence before descaling.
Use Non‑Metal Tools
After locating the temperature‑probe opening, you’ll need to open the surrounding access ports without damaging the brass or copper surfaces. Grab a plastic or nylon pry tool and gently wedge it into the seam; the flexibility lets you pry the boiler access cover loose while keeping the finish intact. If a port is tighter, use a silicone‑tipped pick or a wooden dowel to nudge the fitting—these non‑metal tools won’t scratch threads or nick the temperature sensor. Keep a lint‑free cloth handy for gasket protection, and place any removed pieces in a magnetic tray to keep metal shavings away from the descaling chamber. Working slowly and feeling for resistance ensures you avoid gouging seals and maintain the boiler’s integrity. This approach aligns with careful handling practices to protect sensitive components and avoid damage to internal fittings, especially when dealing with precision temperature sensors and seals. Boiler Components
Apply Gentle Leverage Techniques
Ever wondered how to pry open a vintage boiler’s access ports without cracking the brass or copper? You’ll descale safely by using gentle leverage, keeping gasket protection front‑and‑center. First, inspect for hidden set screws or retained gaskets; choose the right Phillips or Allen driver to avoid thread damage. Apply gradual, even pressure, and if a port resists, back off, add a drop of penetrating oil around the gasket, then re‑apply steady, alternating torque. Keep the area clean with protective wipes to stop debris from entering the boiler passages. Document torque limits and replace seals or O‑rings if you notice any deformation.
- Inspect and choose the correct tool.
- Apply gradual pressure, oil if needed.
- Clean, protect gaskets, and record torque.
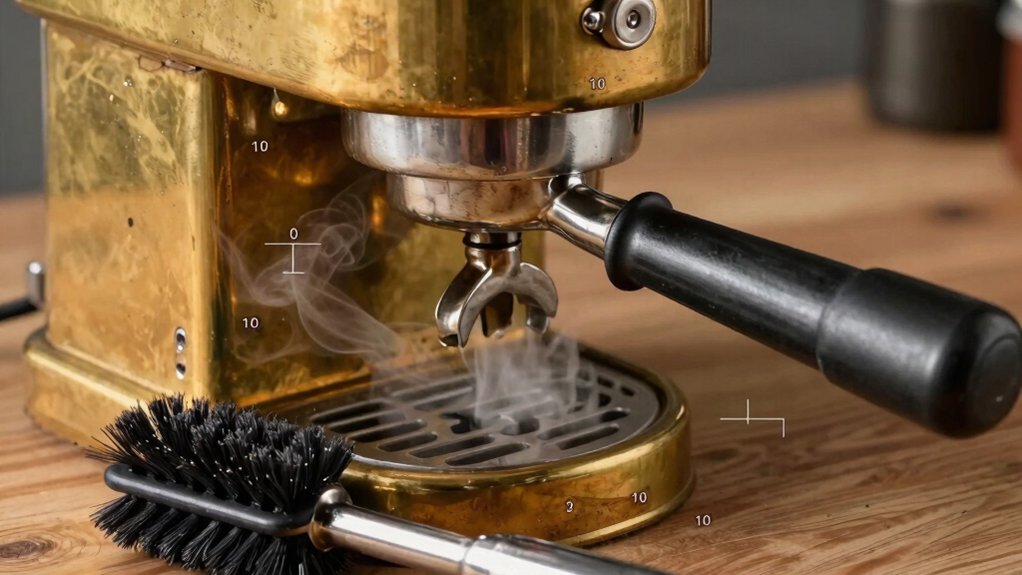
Soak the Grouphead and Valves in a Descaling Bath
You’ll submerge the grouphead and valves in an acid‑based descaling bath, making sure the solution coats the shower screen, plates, and valve seats. Adjust the soak duration to the hardness of the scale—15 minutes for light buildup, up to several hours for stubborn deposits. After the soak, rinse everything thoroughly before reassembling to avoid off‑flavors. The process should be conducted with attention to maintaining USA‑roasted premium beans standards and avoiding contamination of any caffeinated components.
Head Submerge
Typically, you’ll soak the grouphead and its valves in a descaling bath to dissolve mineral deposits that restrict water flow and heat exchange. Choose a solution that’s safe for espresso hardware, then submerge the grouphead, shower screen, and gaskets fully. Keep the soak time within the manufacturer’s range—usually 20 minutes to a few hours—to avoid softening o‑rings. After the descale soak, flush fresh water through the valves, then inspect the shower screen and gaskets for wear, replacing any damaged parts before reassembly.
- Fill a container with the recommended descaling mixture.
- Immerse the grouphead, ensuring the shower screen and valve seats are completely covered.
- Time the soak, then rinse and dry before re‑installing.
Acid Bath Duration
After the grouphead has been submerged, the acid bath should sit for roughly 20 minutes to break down mineral buildup before you move on. Use a citric acid descaling solution that fully covers the grouphead and valves, ensuring the soak time is consistent. Be sure to monitor the temperature and avoid overheating, as heat can affect gasket integrity and lead to leaks gasket safety. If the machine’s manual allows, you can extend the soak to several hours, but watch for swelling or corrosion and stop immediately if anything feels off. Keep the solution at room temperature; higher heat can degrade gaskets. After the soak, flush the entire circuit with fresh water to clear any residue. This controlled soak time balances effective scale removal with the safety of seals and gaskets, keeping your vintage espresso machine in peak condition.
Flush the System Thoroughly With Filtered Water
Four full reservoir cycles of filtered water are essential after descaling to purge any remaining solution. You’ll notice the taste of the water improve after each pass, confirming the boiler flush is working. Using filtered water or RO water with a mineralizer helps prevent mineral buildup in the vintage boiler, extending its life and keeping temperature stability intact.
- Fill the reservoir with fresh filtered water, run two cups through the group and two cups through the wand, then repeat until the reservoir empties.
- Drain no more than 8 oz at a time from the hot‑water tap to protect the heating element.
- Taste‑test the water after each cycle; stop when it’s clear and free of descaler flavor.
Follow these steps, and you’ll finish the descaling process with a clean, ready‑to‑brew system.
Inspect the Boiler for Residual Scale After Flushing
After you finish flushing, give the boiler a quick visual inspection by peering into the passages and checking for any white crust or coated surfaces. Use a pipe endoscope or pull out the water‑level probe to see if scale remains on the heat‑exchanger tubes or fittings. If you spot residue, run another descaling cycle and re‑flush until the water runs clear, then note the findings for future maintenance decisions.
Level Visual Inspection
A bright light helps you spot any remaining white or chalky deposits on the boiler’s inner surfaces and tubing after you’ve finished flushing. You’ll notice scale clinging to the metal, especially around the probe hole, vacuum‑breaker valve, and any removed probes. By turning the light on and rotating the boiler, you can see whether the visual inspection reveals a uniform clean surface or isolated chalk‑like patches that signal incomplete descaling.
- Shine the light into every accessible port and watch for lingering white crust.
- Move the light along the boiler walls and fittings to catch hidden scale.
- Extend the scan to adjacent passages—group‑head heat exchanger and distal tubing—to confirm the flush reached all corners.
Post‑Flush Scale Test
Ever wonder how to confirm that your boiler is truly clean after a flush? Perform a post‑flush scale test by lighting the interior with a bright flashlight and scanning the heat exchanger, walls, and tubes for white crust. Note any stubborn sediment, its color, and location. If you spot residue, run another gentle descaling pass, cycling fresh water through the group and steam wand. Record observations to decide whether further disassembly is needed. A successful test ends with clear, residue‑free water and a spotless visual inspection.
| Observation | Location | Action |
|---|---|---|
| White crust | Top wall | Extra descaling pass |
| Light gray film | Side tube | Rinse longer |
| No visible scale | All areas | Test passed |
| Persistent sediment | Heat exchanger | Targeted cleaning |
| Clear water | Final rinse | Done |
Replace Worn Gaskets, O‑Rings, and Seals
Replacing worn gaskets, O‑rings, and seals is essential to keep your vintage espresso boiler leak‑free after descaling. After the scale is cleared, inspect the expansion valve gasket, boiler fill solenoid seal, and vacuum‑breaker O‑ring; any flattening or cracking means a new part. The HX line valve gasket often flattens under pressure, so swap it out to preserve flow. Don’t forget the E61 group shower‑screen seals—15‑year‑old gaskets and o‑rings become dry and hard, risking leaks when the boiler heats up again. Source replacements from Espresso Parts, McMaster‑Carr, Mouser, or Newark to match brass, copper, aluminum, or stainless components.
Replace worn gaskets, O‑rings, and seals after descaling to keep vintage espresso boilers leak‑free.
- Remove old gaskets, o‑rings, and seals carefully.
- Clean mating surfaces with a non‑abrasive brush and isopropyl alcohol.
- Install new parts, ensuring proper fit and torque.
Verify Boiler Pressure and Temperature Stability
After swapping out the old gaskets and seals, you’ll want to confirm the boiler holds steady pressure and temperature before you consider the job done.
Start the boiler, let it reach normal operating temperature, then watch the pressure gauge; steady boiler pressure indicates the scale isn’t choking the flow.
Use a reliable temperature probe to check temperature stability, ensuring the brew boiler and pot hit target values without lag.
During descaling, verify that heat transfers evenly and that the boiler reaches the set point before you resume pulling shots.
After rinsing, re‑measure; any lingering overheating or under‑heating suggests scale remains in the heat transfer path.
Consistent readings confirm the descale succeeded and the system is ready for regular use.
Set Up a Filtered‑Water System Specifically for Your Espresso Boiler
If you want your espresso boiler to stay scale‑free, install a dedicated filtered‑water system that feeds only the boiler. Choose an RO unit with a mineralizer cartridge or a high‑quality in‑tank filter that targets magnesium and calcium. Keep TDS low, replace filters on schedule, and pair each filtration cycle with a thorough descaling rinse. This routine protects heat exchange efficiency, preserves flavor, and extends component life.
- Select the right hardware – RO membrane plus mineralization cartridge for espresso boiler feed.
- Maintain the system – Check hardness, swap filters every 2–3 months, log TDS readings.
- Integrate with descaling – Flush descaler completely, then run filtered water only for subsequent cycles.
Frequently Asked Questions
How to Descale an Espresso Boiler?
You’ll fill the boiler with a citric‑acid or commercial descaler via the service line, let it soak several hours, then flush with fresh water repeatedly, sealing the probe hole with PTFE tape before reassembly.
How to Flush an Espresso Boiler?
You flush the boiler by running two to three full tanks of fresh water through the steam wand and group head, alternating with clean rinses until no descaling taste remains, then verify with a blank shot.
What Is the 30 Second Rule for Espresso?
You follow the 30‑second rule by flushing the group head for about half a minute after each shot, clearing oils and stabilizing temperature, which prevents channeling and keeps extraction consistent.
Is Descaling Solution Better Than Vinegar?
Yes, you’ll find descaling solutions outperform vinegar. They’re gentler on aluminum and brass, dissolve mineral buildup efficiently, and avoid corrosive damage or lingering vinegar odor, keeping your vintage boiler safe and tasting great.
In Summary
By measuring water hardness, picking a gentle citric‑acid descaler, and running a controlled cycle, you protect your vintage boiler from damage. Keep the access ports open, soak the grouphead and valves, then flush and inspect for leftover scale. Replace any worn gaskets or O‑rings, verify pressure and temperature stability, and install a filtered‑water system. Follow these steps and your espresso machine will stay efficient, safe, and ready for perfect shots.


Leave a Reply