You’ll want to start with the rubber gaskets and the siphon‑tube seal, because they lose flexibility after a few hundred uses and crack from metal expansion. Those parts fail first, causing leaks and loss of carbonation pressure. After they’re swapped, inspect the glass bottle, metal head, and charger holder for hairline cracks, rust‑colored staining, or dull thuds that signal internal stress. If you keep checking, you’ll discover how to source replacements and do the swap yourself.
Mr. Fizz Seals: Which Wear First?
Where do the seals give out first on a Mr. Fizz? You’ll notice the gaskets wear before anything else. The fill‑tube gasket, especially on the SD120R Fill Tube, loses its flexibility after a few hundred uses, causing leaks when you try to seal the bottle.
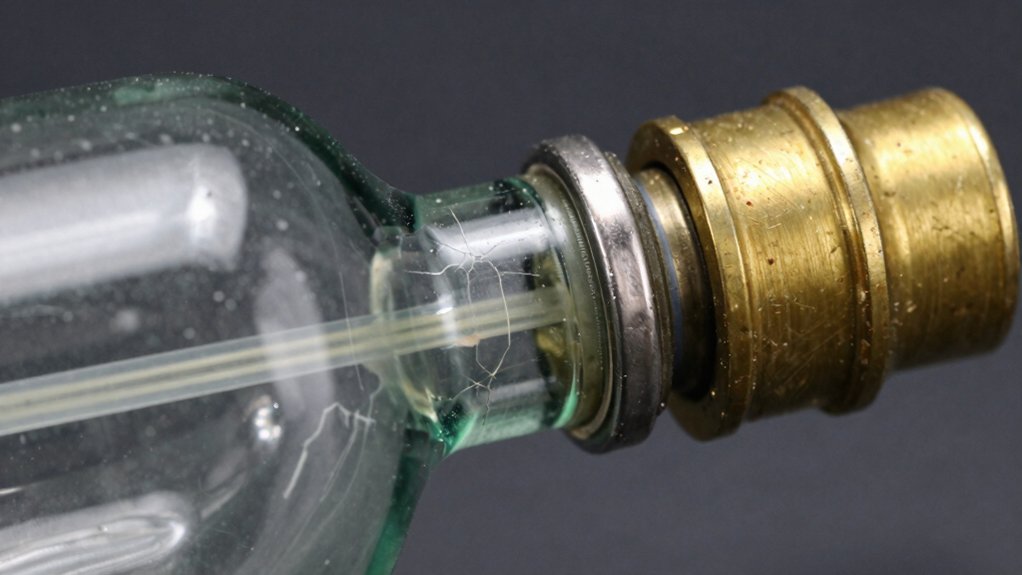
Next, the siphon‑tube seal (SD130/140R) shows cracks as the metal expands and contracts, compromising the airtight seal.
The chrome‑plated brass head (F1113R) and metal charger holder (F1115) also suffer from wear, but they’re secondary to the rubber gaskets that keep the carbonation pressure in. Gasket durability is a key factor in long‑term performance, so replace the gaskets first, then check the sealing components to keep your Mr. Fizz pouring smoothly.
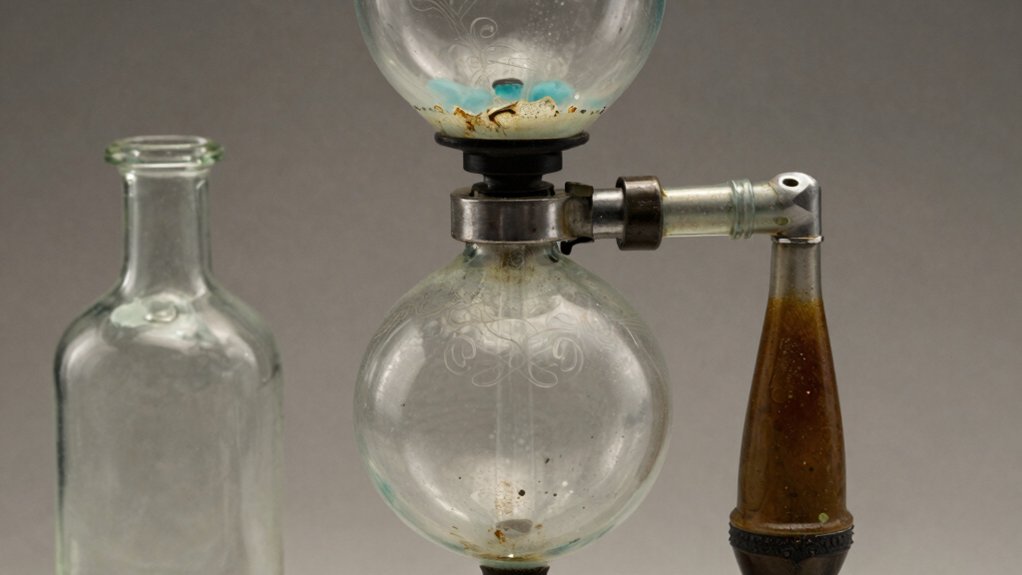
Mr. Fizz Glass: Spotting Cracks and Corrosion
How can you spot cracks and corrosion on your Mr. Fizz glass before they cause leaks? Examine the bottle and siphon tubes under bright light, rotating each piece slowly. Look for hairline fractures that interrupt the smooth surface—these are cracks that can widen with pressure. Pay special attention to the metal‑to-glass junctions; any greenish or rust‑colored staining signals corrosion that may compromise the seal. Tap the glass gently; a dull thud often indicates internal stress, while a clear ring suggests integrity. Compare the part to the original drawings: any deviation in thickness or shape hints at damage. If you notice any of these signs, replace the glass component promptly to prevent future leaks. Regular inspections after cleaning help ensure longevity by catching issues before they worsen critical maintenance practices.
Where to Buy Reconditioned Mr. Fizz Parts or DIY Gaskets
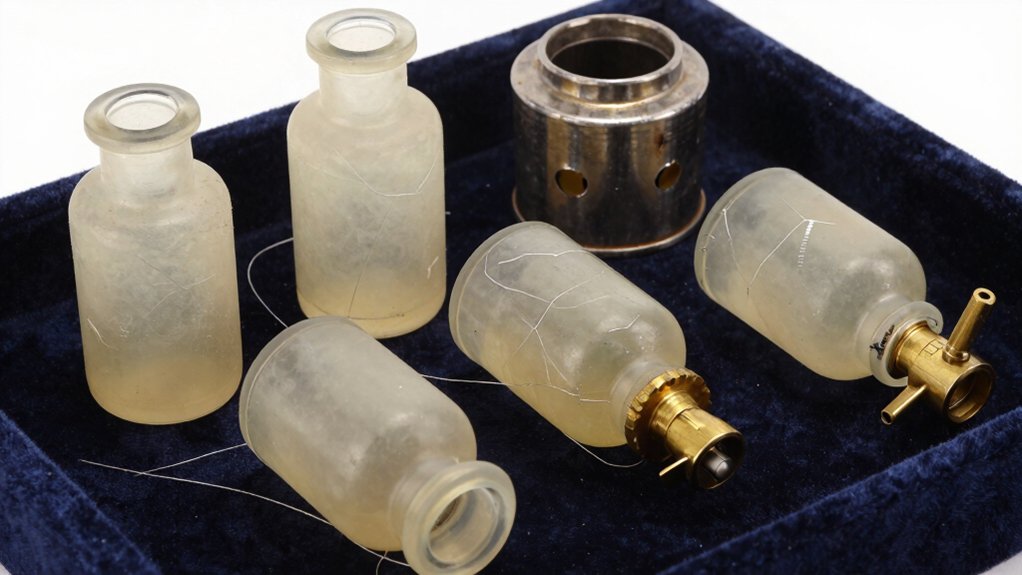
Looking for reliable sources to replace cracked or corroded Mr. Fizz components? You can order reconditioned Replacement parts directly from the manufacturer’s online shop, where the 1 L Soda Siphon and Senior Seltzer Bottle sets run about $110. Individual items like the F1113R Chrome‑Plated Brass Head ($48.05) and the F1112R Tube & Seal ($7.35) are listed, though stock fluctuates. Keep a copy of the parts drawings handy for DIY gasket design, and note that most orders ship the next business day.
Order reconditioned Mr. Fizz parts online—kits around $110, individual items $7‑$48, fast shipping, drawings included.
- Purchase complete bottle sets for a full replacement kit.
- Buy single reconditioned components when you only need a specific part.
- Use the drawings to fabricate your own gaskets if a part is out of stock.
Step‑by‑Step Replacement of Mr. Fizz Siphon Parts
After securing the needed parts—whether you bought a full kit or individual components—start by removing the old head and fill tube. Use a small flathead to pry off the chrome‑plated brass head, then pull the 1 L fill tube out of the base.
Refer to the Mr. Fizz Parts Drawing to locate the retaining clip and check the orientation of the new SD120R tube.
Slide the new head onto the threaded neck, tighten it by hand, and snap the clip into the groove shown in the drawing.
Insert the fresh fill tube, ensuring the seal sits flush against the gasket.
Finally, test the siphon by pressurizing the bottle; if it holds pressure, you’ve completed the step‑by‑step replacement. Patented filter system
Frequently Asked Questions
How to Refill a Vintage Glass Soda Syphon?
You fill the bottle with cold liquid, seal the top, ensure the plunger gasket and charger head sit flush, then attach a CO₂ charger, press the lever, and shake gently to carbonate.
How to Open a Vintage Schweppes Soda Syphon?
Unscrew the head and collar, then pull the lever and plunger out. Use a case wrench for the crown‑cap, check for cracked gaskets, and keep the siphon depressurized before disassembly.
What Is the History of Soda Siphon?
You’ll find soda siphons emerged in the late 1800s, evolving from pressurized water dispensers to iconic household gadgets, with glass bottles, metal heads, and CO₂ cartridges shaping their century‑long popularity.
How to Use a Vintage Soda Siphon?
You’ll fill the bottle, attach the charger head, press the lever, and release carbonated water—just make sure the gaskets are intact, the pressure valve’s clear, and you’re using chilled liquid.
In Summary
You’ve learned which parts wear first, how to spot cracks and corrosion, and where to source or make replacements. Now you can confidently replace the seals, gaskets, and glass components, keeping your Mr. Fizz siphon running smoothly. With the step‑by‑step guide in hand, you’ll restore performance quickly and avoid future breakdowns.


Leave a Reply