Check the maker’s hallmarks and compare them to reference databases, then inspect joinery for hand‑cut dovetails and mortise‑and‑tenon joints that show irregular spacing and tool marks. Examine the wood for solid, period‑appropriate species and avoid modern composites. Use UV light and digital microscopy to spot uneven glazes, inconsistent fluorescence, and hidden repairs. Look for hand‑forged nails, authentic patina, and any modern polymers or synthetic fibers. Evaluate restoration quality, noting sympathetic repairs versus over‑gloss finishes, and you’ll discover deeper insights if you keep going.
How to Verify Vintage Equipment Authenticity
How can you tell if a piece of vintage equipment is truly authentic? You start by eyeing the patina and wear patterns—natural aging shows uneven, soft wear, while fakes sport uniform, glossy surfaces.
Eye the patina and wear patterns—natural aging shows uneven, soft wear; fakes appear uniform and glossy.
Next, examine construction cues: hand‑cut dovetails, mortise‑and‑tenon joints, and hand‑tool marks signal original craftsmanship; machine‑cut joints and perfectly uniform hardware raise red flags.
Check provenance and maker’s marks; cross‑reference receipts, ownership records, and hallmarks with online databases.
Use UV inspection to spot modern glues, overpainting, or synthetic fibers that betray recent repairs.
Finally, apply non‑destructive testing like XRF spectroscopy or infrared imaging to verify material composition and internal structure, confirming the era claim without harming the piece. Atlas Coffee Club World of Coffee Discovery Set (8-Pack) offers an example of how multiple origins and tasting notes can illuminate authenticity and ethical sourcing practices across specialties, which can inspire careful verification of provenance in vintage gear as well ethical sourcing.
Reading Hallmarks and Maker’s Marks on Silver
Ever wondered what those tiny stamps on a silver piece really mean? You’ll find hallmarks that reveal the silversmith, assay purity, and production year, while maker’s marks point to the workshop. First, compare each symbol against a reputable reference database—match the assay, town, and date codes to confirm authenticity and provenance. Check that the patina and wear surround the marks; genuine hallmarks show consistent punch depth and occasional chip edges, whereas later reproductions look too crisp. Cross‑reference all stamps—maker’s, assayed, duty, and town—to spot inconsistencies. If anything feels off, pursue verification from an established dealer or request an expert appraisal. This systematic approach safeguards you against fakes and clarifies a piece’s true history. Proper documentation, including provenance notes and assay certificates, can further support your authentication efforts and verify authenticity for valuable pieces.
Spotting Hand‑Cut Dovetail Joints in Furniture
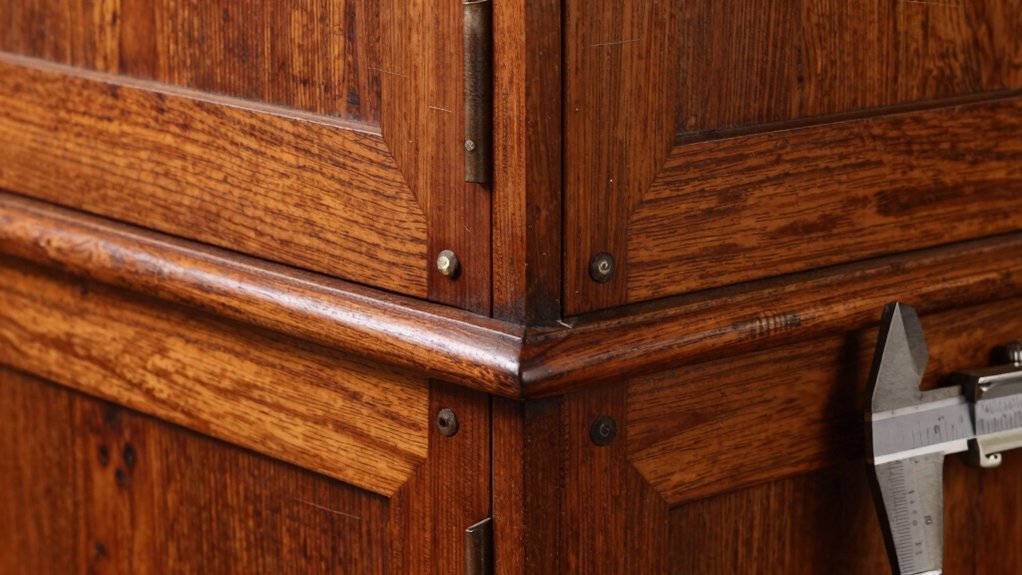
Ever notice the subtle irregularities in a drawer’s joints that hint at genuine hand‑cut dovetails? You’ll spot hand‑cut dovetails when the spacing isn’t uniform and the tails vary in width, showing natural asymmetry. Look for joinery where pin and tail widths differ slightly and the shoulders have uneven, chisel‑scarred lines—hand tool marks that betray pre‑industrial craftsmanship. Period patterns emerge in varied shoulder widths and non‑linear grain alignment, contrasting with the sterile precision of modern machines. These irregular gaps and chatter along the joint edges reinforce authenticity, especially when they match known examples from the same era and region. By comparing these details to documented period pieces, you can confirm the piece’s genuine vintage provenance. Greater Goods Digital Coffee Scale with Timer and Display consistently uses a 0.1 g precision adds a consistency benchmark you can reference when assessing hardware or accessories from the same era, helping you spot mismatches in build quality that might indicate later reproductions.
Identifying Period‑Appropriate Wood and Tool Marks
Wondering how to tell if a piece’s wood and marks belong to its era? You’ll spot hand‑cut dovetails with irregular spacing, a hallmark of period craftsmanship, and note dull, uneven tool marks that betray hand‑carving. Examine the joinery: non-uniform mortise‑and‑tenon connections suggest a pre-industrial workshop, while solid wood—oak, walnut, mahogany—confirms authentic construction. Scan for hand-forged nails with square heads; their rough finish signals 18th‑ or early‑19th‑century origins, unlike modern smooth screws. Avoid plywood or particleboard, which betray later reproductions. By focusing on these tactile clues—hand‑cut dovetails, uneven tool marks, solid wood, traditional mortise‑and‑tenon joints, and hand‑forged nails—you can confidently assess whether the piece truly reflects its historical era. A careful inspection of tangible construction details can further support a genuine vintage assessment.
Using UV Light and Digital Microscopy for Surface Checks
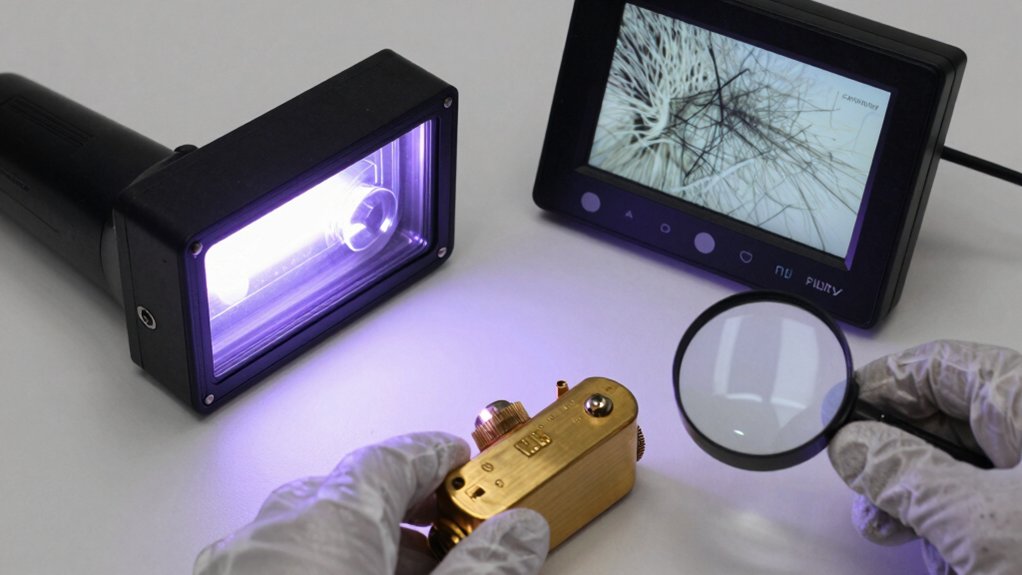
After examining wood grain and hand‑cut joinery, the next step is to inspect the surface with UV light and a digital microscope. You’ll shine UV light across the piece; genuine patina appears uneven and natural, while artificial finishes fluoresce uniformly or oddly. The UV light reveals repairs, overpainting, modern glues, and synthetic fibers that betray later alterations. Then you switch to digital microscopy, zooming in on fluorescing spots to document authenticity indicators and guide targeted sampling. This combination sharpens patina analysis and supports materials testing, letting you differentiate original wear from recent fixes. By integrating UV light and digital microscopy into your surface checks, you quickly spot inconsistencies that would otherwise stay hidden. Patina indicators further guide your sampling strategy for more precise authentication observations.
Cross‑Checking Provenance With Online Auction Databases
How can you verify that a vintage piece’s provenance isn’t just a marketing story? Start by pulling the item’s claimed provenance into online auction databases. Search auction records for the maker’s marks, hallmarks, and any certificates of authenticity that match the era. Cross‑checking those details with documented receipts, family records, or previous ownership transfers lets you spot gaps or vague language. Compare stylistic cues against verified listings to confirm age and attribution. If the auction catalog entry aligns with the piece’s documented path, you’ve built a solid authentication trail. When discrepancies appear, dig deeper, seek primary documentation, and consult multiple reputable sources before accepting the provenance as genuine. Verified provenance information can help distinguish authentic pieces from fakes, and documented tracking further reinforces trust in the item’s history.
Detecting Modern Materials in Antique Ceramics and Glass
You’ll notice uneven glaze patterns and bubble formations that don’t match historic techniques, which often signal modern production. Crown‑glass imperfections like irregular thickness or warped edges are another giveaway that the piece isn’t truly antique. Keep an eye out for these clues to spot contemporary materials before they fool you. Conservation International partnership signals ethical sourcing in related coffee groups, underscoring the importance of provenance and authenticity in evaluating era-accurate materials.
Uneven Glaze Patterns
Ever wondered why some vintage ceramics sport a patchy, uneven glaze while others look flawless? You’ll notice uneven glaze patterns and subtle glaze variation that signal authentic aging in vintage ceramics. Hand‑applied glaze often leaves faint streaks, crawling edges, or slight thickness changes—classic glaze defects that modern factories erase. Look for kiln irregularities: a thicker rim, a faint bubble, or a soft color shift that only a historic kiln could produce. If the surface is perfectly uniform, the piece likely used a contemporary, automated process. Under UV light, older glazes fluoresce inconsistently, while newer glazes glow uniformly. By focusing on these tactile and visual cues, you can separate genuine antique work from recent reproductions.
Bubbles And Crown Glass Imperfections
Uneven glaze patterns often hint at a piece’s age, but the next clue lies in the glass itself. When you examine a vintage vase, look for crown glass flaws—subtle swirls and wavy surfaces that betray hand‑cut glass. Modern reproductions usually sport flawless, flat panes. Check the bubbles irregularity: antique glass shows random, asymmetric air pockets, while contemporary pieces often have uniform or no bubbles at all.
Observe glass optics; hand‑cut glass creates mercurial light reflections that dance across the surface, unlike the steady glare of machine‑made glass. The antique glazing may add a hazy, iridescent sheen, contrasting sharply with the slick polymer gloss of modern finishes. These visual cues let you separate genuine heritage from cheap copy.
Assessing Restoration Quality and Its Value Impact
How can you tell whether a vintage piece’s restoration adds value or erodes its authenticity? First, inspect the joinery—hand‑cut dovetails and mortise‑and‑tenon joints should match the original construction. Check that any new wood or metal matches period‑appropriate materials; mismatched finishes or ultra‑smooth surfaces signal over‑restoration. Preserve the patina; a faint, uneven sheen is a sign of authenticity, while a glossy coat often hides original character. Evaluate restoration quality by comparing the piece’s provenance records with its current state—consistent documentation boosts market value. A sympathetic, historically accurate repair can raise desirability, whereas careless work casts doubt on originality.
| Feature | Good Restoration | Poor Restoration |
|---|---|---|
| Joinery | Hand‑cut dovetails, mortise‑and‑tenon | Modern screws, glue |
| Finish | Natural patina, subtle wear | Uniform gloss, new paint |
| Materials | Period‑appropriate wood/metal | Mismatched, synthetic |
| Documentation | Clear provenance, notes | Missing or vague records |
When to Consult Conservators, Appraisers, and Historians?
When the restoration history of a vintage piece is murky, you should turn to a conservator first; they’ll assess material integrity, identify past alterations, and verify that any repairs align with period techniques. A conservator will also recommend non‑destructive testing—XRF, infrared, UV—to reveal hidden layers without harming the item, and they’ll document findings for later reference.
Once the physical condition is clear, bring in an appraiser. The appraiser compares your piece to verified sale records, evaluates maker marks, and determines market value while cross‑checking provenance.
Finally, consult a historian for stylistic analysis and contextual clues; they’ll confirm the era, identify authentic maker marks, and ensure the narrative matches documented histories. Balancing these three perspectives reduces bias and strengthens your authenticity claim.
Final Checklist: From Inspection to Purchase Decision
You’ll run through the inspection checklist, confirming patina, tool marks, provenance, and test results line by line.
Then you’ll verify each finding against expert opinions and market data.
Finally, you’ll decide whether to purchase, negotiate, or walk away based on that confirmation.
Inspection Checklist
What should you look for when you move from inspection to decision? Start with a visual inspection: feel the age, note uneven patina, natural wear, and slight proportion quirks. Use a UV analysis to reveal repairs, overpainting, modern glues, or synthetic fibers, watching for patina inconsistencies. Check construction methods—hand‑cut dovetails and mortise‑and‑tenon joints scream authenticity, while machine‑cut joints or perfectly uniform screws hint at recent manufacture. Verify provenance by hunting paper trails, receipts, or certificates, and cross‑reference maker’s marks against online databases. Finally, gather expert opinions from appraisers, conservators, and specialists, comparing their condition notes with similar verified pieces before you commit. These authenticity indicators guide you from inspection straight to a confident purchase decision.
Decision Confirmation Steps
After confirming the visual cues and UV findings, move straight to the decision‑confirmation checklist. First, match the provenance you’ve gathered with the item’s documentation; any gaps signal caution. Next, reassess craftsmanship: hand‑cut dovetails, solid joints, and forged nails must still feel authentic. Verify that the materials—oak, walnut, mahogany, or hand‑thrown ceramics—show the expected grain, glaze, or bubble patterns. Cross‑check these physical signs against the provenance records and any expert evaluation you’ve obtained. If multiple experts concur and the documentation aligns, you’ve completed verification. Only then should you commit to purchase, confident the vintage piece truly reflects its claimed era and quality.
Frequently Asked Questions
Is There a Free App to Identify Vintage Items?
Yes, you can use free apps like iIdentify or VintageFinder; they let you snap a photo, compare marks to crowdsourced databases, and then cross‑check results with reputable online reference sites.
What Is the 100 Year Rule for Antiques?
You’ll find that the 100‑year rule classifies anything at least a century old as an antique, separating it from newer vintage pieces, so you must verify provenance, marks, and age documentation to confirm eligibility.
What Are Four Things to Consider When Pricing an Antique?
You should weigh provenance, maker’s marks, condition, and market demand. Strong documentation and authentic hallmarks boost value, while wear, repairs, and limited buyer interest can lower price.
How Do You Authenticate an Antique?
You authenticate an antique by inspecting patina, checking hand‑crafted joinery, verifying provenance documents, and running non‑destructive tests like UV, XRF, or infrared imaging to spot modern alterations.
In Summary
By now you should feel confident spotting fakes and confirming genuine pieces. Trust the hallmarks, examine joints, test materials with UV or microscopy, and watch for modern substitutes. If doubts linger, bring in a conservator or appraiser before you commit. Use this checklist to guide every inspection, and let your informed judgment drive the final purchase decision.

Leave a Reply