Polishing the chrome on your vintage espresso machine restores its mirror‑like shine, prevents oxidation, and keeps the finish looking fresh, which protects its collectible value. A thin, non‑abrasive polish lifts surface oxide without damaging the thin plating, while a light wax seal guards against future wear. Regular, gentle cleaning and proper masking prevent scratches, and maintaining the glossy surface slows wear compared to painted or anodized finishes. Keep reading to discover the exact steps and tools you’ll need.
Identify Chrome vs Polished Stainless on Your Espresso Machine

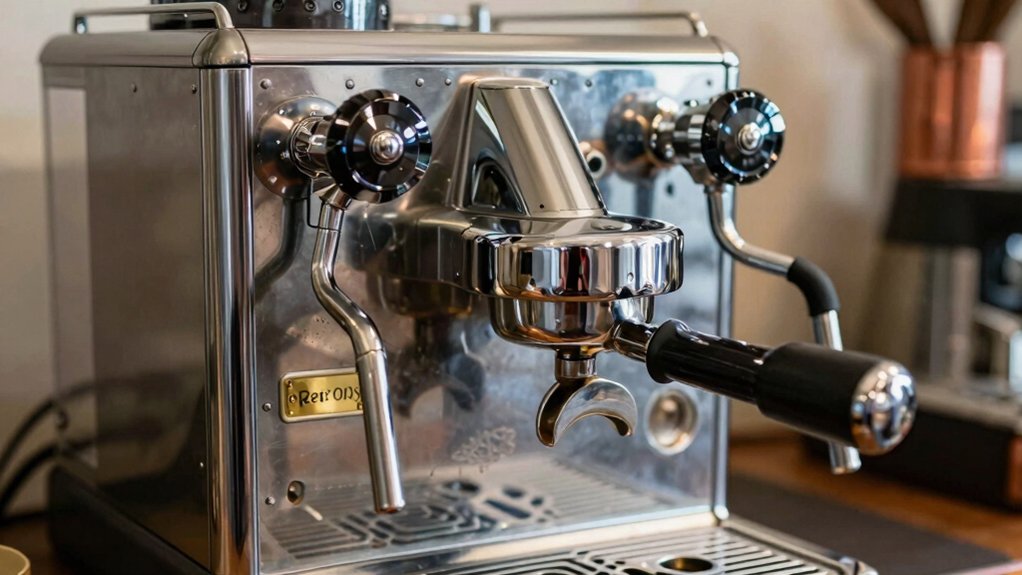
Ever wondered how to tell chrome from polished stainless on your espresso machine? First, look at the color tone: Chrome shows a mirror‑like surface with a cool‑blue tint, while polished stainless reflects a brighter, natural metallic sheen. Next, run your fingernail lightly across a scratch‑prone spot; deep scratches that expose a yellowish metal indicate chrome over brass, not polished stainless. Feel the texture—chrome feels hard and can haze when you polish, whereas polished stainless tolerates gentler polishing without thinning. Finally, check for a coating: Chrome is a thin plating that will dull if you use abrasive polish, while polished stainless is solid metal with no coating. These identification cues let you confidently distinguish Chrome from polished stainless. Bristle Design can influence how you approach cleaning without risking the finish on either surface, so consider selecting appropriate tools and materials when performing maintenance.
Gather Safe Polishing Tools & Supplies for Chrome
A good polishing kit starts with a non‑abrasive metal polish—Flitz or Mothers Mag work well on vintage espresso machine chrome—paired with a plush, edgeless microfiber cloth soaked in warm water. Add a small container for the chrome polish, a soft‑bristle brush for hard‑to‑reach corners, and a dedicated applicator pad to keep the polish from contaminating other parts. Keep a masking tape roll handy to protect trim and rubber gaskets. Include a thin‑film wax or carnauba sealant for post‑polish protection, plus a clean microfiber cloth for final buffing. Store everything in a zip‑top bag to prevent dust and moisture. This compact set lets you work safely, efficiently, and without scratching the delicate chrome finish. Maintaining compatibility with the specific AeroPress filter considerations can help ensure a cleaner workflow as you prep and polish, especially when you’re pairing your routine with mindful cleaning practices edge-to-edge protection.
Clean and Prep the Surface: Warm Water, Microfiber, and Masking
Start by rinsing the chrome with warm water to loosen grime, then grab a soft microfiber cloth that won’t scratch the finish.
Use gentle, circular motions and a dry microfiber to wipe away any moisture, and protect surrounding parts with masking tape before you polish.
This quick prep removes oils, dust, and fingerprints so the polish adheres evenly.
Add a breathable outer layer or apron to keep your workspace cleaner and protect clothing from splashes during the polishing process, especially if you’re working in a busy cafe environment. cross-back design
Warm Water Rinse
Why not begin with a warm‑water rinse? You grab a damp microfiber cloth, dip it in distilled water, and wipe the chrome to lift oils and dust without scratching. Follow with a dry microfiber cloth to prevent mineral spotting and swirl marks. For tight crevices, a soft‑bristled brush dislodges residue before the final wipe.
| Step | Tool | Goal |
|---|---|---|
| 1 | Warm‑water + microfiber cloth | Lift grime |
| 2 | Dry microfiber cloth | Eliminate water spots |
| 3 | Soft brush (optional) | Reach crevices |
| 4 | Final dry wipe | Ensure spotless surface |
Microfiber Cloth Selection
Looking for the best microfiber to prep your espresso‑machine chrome? Choose edgeless, plush microfiber cloths that glide without leaving swirls. Warm water loosens oils and grime, then you wipe the entire surface with a damp cloth, letting the fibers lift residue gently. For tight crevices, a soft‑bristled toothbrush can dislodge particles before you move to polishing. After the damp pass, swap to a separate dry microfiber cloth to blot dry and prevent water spots. Keep the cloth clean; wash it without fabric softener to retain its static‑catching ability. This routine ensures optimal chrome care, reduces the need for harsh abrasives, and sets a flawless base for the polishing stage. The careful handling aligns with maintaining long‑term luster and preventing micro‑scratches on delicate chrome surfaces. static‑resistance
Masking Tape Application
Masking tape is your first line of defense when you’re about to polish the chrome on a vintage espresso machine. You’ll start by cleaning the surface with warm water and a microfiber cloth, wiping away dust and oils that could trap grit under the tape. Once dry, apply masking tape around the area you’ll work on, covering any stainless or painted parts. Press the tape firmly to avoid gaps, then proceed with a thin layer of chrome polish, using gentle circular motions. After polishing, remove the tape promptly and buff the edges with a clean microfiber. Finally, inspect for any adhesive and perform residue removal with a damp cloth before the machine returns to service.
- Clean with warm water and microfiber
- Apply masking tape around chrome edges
- Use chrome polish sparingly, circular motion
- Remove tape, buff, and perform residue removal
To help prevent scratching the chrome, keep the buffer motion light and steady and avoid pressing too hard on delicate areas. Surface protection
Select the Right Non‑Abrasive Chrome Polish for Vintage Machines

You’ll want a non‑abrasive polish that lifts oxidation without scratching the thin plating, so choose a formula like Mothers Mag or Flitz.
Apply the product in a thin, even layer using a microfiber cloth and gentle circular motions.
This method keeps the chrome intact while delivering a smooth, lasting shine.
A suggested technique includes testing on a hidden area first to confirm compatibility with the vintage finish non‑abrasive polish and to ensure no adverse effects on the plating.
Polish Non‑Abrasive Formula
Which non‑abrasive chrome polish will keep your vintage espresso machine’s patina intact while lifting light tarnish? You’ll want a formula that’s non‑abrasive, free of ammonia, acid, and bleach, and safe for delicate vintage finishes. Work a pea‑size amount into a soft microfiber cloth, then gently rub the surface. You’ll see the cloth darken as oxide lifts—this is normal and signals you’re removing tarnish without scratching. After the polish is absorbed, buff to a soft shine, avoiding over‑polishing thin chrome. Test on an inconspicuous spot first to confirm compatibility.
- Choose a dedicated non‑abrasive metal polish.
- Verify it’s non‑ammonia and non‑acid.
- Apply sparingly with a microfiber cloth.
- Buff until the patina glows uniformly. important concept
Apply Thin, Even Layers
After confirming the polish is truly non‑abrasive and safe for your machine’s patina, work a pea‑size amount into a soft microfiber cloth and spread it in tiny circular motions with gentle pressure. You’ll notice the cloth darkening as oxide lifts—this is normal during chrome polishing. Keep each pass thin; a barely‑visible film prevents buildup that creates hazing or swirls on vintage finishes. Buff thoroughly after every layer, using a clean section of the cloth to lift residue before the next application. If the surface isn’t chrome‑plated or polished stainless, stop—different finishes need other care. Finish with a light wipe of a fresh microfiber, then consider a whisper‑thin carnauba wax coat to seal and protect the freshly revived chrome.
Apply Chrome Polish Using Gentle Circular Motions
When you apply chrome polish, use only a tiny amount and move the cloth in gentle circular motions; this prevents excessive abrasion on thin or worn plating while the polish lifts oxide, which turns the cloth black. You’ll notice the cloth darkening as oxidation removal progresses, indicating the polish is doing its job without harming the surface. Work in short bursts, applying light pressure and letting the cloth absorb the oxide. After each pass, wipe away haze with a clean microfiber to reveal fresh shine before moving to the next spot.
- Test on an inconspicuous area first.
- Apply a pea‑sized dab of chrome polish.
- Use gentle circular motions for 10‑15 seconds per section.
- Rotate the cloth frequently to avoid buildup.
Buff to a Mirror Finish With Microfiber or a Small Buffing Motor
If you want a true mirror finish on a vintage espresso machine’s chrome, start with a tiny dab of polish on a microfiber cloth or a low‑speed buffing motor’s soft wheel and work in tight, controlled circles. The microfiber cloth lets you gauge pressure, but a small buffing motor keeps the motion steady and reduces hand fatigue. Apply just enough polish to wet the surface, then move in overlapping circles no larger than a quarter‑inch. The soft wheel spreads the polish evenly, preventing streaks and minimizing heat. Check the sheen frequently; a mirror‑like gloss appears quickly if you stay light on the pressure. Test on an inconspicuous spot first, and stop before the chrome shows any underlying brass or discoloration.
Avoid Swirls, Over‑Polishing, and Heat Damage While Working
You should move the cloth in gentle circular motions, keeping the pressure light enough to prevent swirls. Choose a clean, soft microfiber pad that won’t trap grit and can absorb any heat you generate.
Work in short bursts, pause to let the surface cool, and re‑wipe if you notice haze before continuing.
Gentle Circular Motions
Gentle circular motions keep the chrome uniformly bright by minimizing swirl marks and preventing micro‑scratches. When you apply chrome polishing, use light pressure and a warm‑water‑dampened microfiber cloth. Work in small, overlapping circles on one section at a time, then buff gently to avoid uneven sheen. Keep an eye on temperature; pause if the cloth or polish feels warm to stop heat‑induced haze.
- Start with a clean, warm (not hot) cloth.
- Apply polish sparingly, letting it spread with the motion.
- Move in tight, overlapping circles, maintaining consistent pressure.
- Frequently check for heat buildup and pause to cool if needed.
Microfiber Cloth Selection
Why does the right microfiber matter when polishing vintage espresso‑machine chrome? You need high‑quality, edgeless microfiber cloths to keep swirls and micro‑scratches at bay. Choose plush, dedicated polishing towels; they lift oils with warm water without heat buildup that dulls the reflective surface. Light, gentle pressure lets you remove surface contaminants while preserving the chrome’s finish quality. After each pass, wipe dry promptly with a clean microfiber cloth to avoid water spots and any heat‑related dulling from repeated contact. The cloth’s texture and lint‑free nature ensure a smooth, even buffer, giving you a flawless sheen that showcases the machine’s classic elegance. Selecting the proper microfiber cloths is essential for optimal polishing chrome results.
Temperature‑Controlled Polishing
Ever wondered how a modest warmth can keep vintage chrome from turning into a swirl‑filled mess? You’ll find that temperature‑controlled polishing lets the chrome polish stay fluid, preventing premature drying that creates swirls. Keep the heat low by using a warm (not hot) cloth and work in small circular motions with light pressure. Pause often; a quick hand‑check of surface temperature tells you when to cool down, protecting thin plating from distortion.
- Warm your cloth with lukewarm water, never boiling.
- Apply polish with gentle, circular strokes to avoid heat buildup.
- Pause every 30 seconds, feeling the metal with the back of your hand.
- Resume only after the surface feels cool, ensuring no heat‑induced hazing.
Seal the Polish With Carnauba Wax or a Compatible Sealant
Looking to keep your vintage espresso machine’s chrome gleaming? After you’ve polished, apply a thin, even coat of carnauba wax. Let it haze, then buff with a microfiber cloth to avoid swirls. The wax forms a protective sealant that repels moisture and keeps water spots at bay. Use a non‑abrasive metal polish first, confirm the surface is chrome‑plated or polished stainless, then seal. Reapply every few months or after heavy use to preserve the reflective layer.
| Step | Action | Why |
|---|---|---|
| 1 | Clean surface | Removes debris |
| 2 | Polish with non‑abrasive metal polish | Restores shine |
| 3 | Apply carnauba wax | Creates sealant layer |
| 4 | Buff after haze | Achieves mirror finish |
Maintain Daily Shine: Quick Wipe‑Downs and Spot Checks
How can you keep vintage chrome gleaming every day without spending hours polishing? You’ll find that a disciplined routine of quick wipe‑downs and spot checks preserves the mirror finish while protecting chrome plating from wear. Keep a damp microfiber cleaning handy, use warm water with a mild pH‑neutral soap, and dry immediately with a clean microfiber towel. This prevents water spots and keeps the surface looking showroom‑ready.
Quick wipe‑downs with mild soap and a dry microfiber keep vintage chrome mirror‑bright daily.
- Wipe down after each use – gentle strokes, no pressure.
- Check for fingerprints or smudges – address them before they set.
- Use only mild soap – avoid ammonia, bleach, or abrasives.
- Dry thoroughly – a dry microfiber cloth eliminates streaks and preserves shine.
Troubleshoot Dull or Discolored Chrome After Polishing
Why does your chrome suddenly look dull or take on a dark hue after you’ve just polished it? The darkening usually means polishing residue or oxide is clinging to the surface, especially if the cloth turned black or blue. First, wipe with a fresh microfiber in light, circular motions to lift the residue.
If the hue persists, switch to a non‑abrasive chrome polish and apply it very lightly—thin plating can burn through if you press too hard.
Inspect the metal underneath; deep yellow scratches reveal plating wear, which often requires re‑plating rather than more buffing.
Finish by applying a thin coat of wax or sealant to protect the luster and keep fingerprints and moisture from dulling the shine.
Plan a Long‑Term Chrome Care Schedule and Proper Storage
Ever wonder how to keep your vintage espresso machine’s chrome gleaming for years? Follow a disciplined chrome care schedule and protect it with proper storage. Weekly, wipe with warm water and a plush micro‑fiber cloth, then dry thoroughly. Monthly, apply a non‑abrasive polish like Flitz or Mothers Mag for polishing care, and avoid steel wool. Quarterly, inspect, deep‑clean, and reapply a protective wax or sealant. Finally, store the machine in a dry, dust‑free area with stable humidity, covering it with a soft cloth to shield against environmental exposure.
- Warm‑water weekly wipe‑down
- Monthly non‑abrasive polish
- Quarterly deep clean & wax
- Consistent dry storage with soft cover
Why Chrome Polish Keeps Your Vintage Espresso Machine Valuable?
Keeping the chrome polished isn’t just about looks; it directly protects the machine’s market value. When you regularly polish the Chrome, you prevent micro‑scratches that dull the mirror‑like finish and drive down resale price. Using a non‑abrasive metal polish and gentle circular motions preserves the plating without thinning it, keeping the collectible appeal intact. Polishing also slows wear compared to painted or anodized finishes, so your espresso machine stays visually striking for years. Always verify whether the surface is chrome‑plated or stainless before you start; the wrong product can scar the finish and erode value. By treating polishing as a preservation step, you maintain both aesthetic charm and long‑term investment potential.
Frequently Asked Questions
Does WD-40 Shine Chrome?
You’ll see a brief glimmer, but WD‑40 isn’t a true polish; it leaves a thin film that fades quickly, attracts dust, and doesn’t protect the chrome long‑term. Use a proper metal polish instead.
What Is the 30 Second Rule for Espresso?
You apply a non‑abrasive polish with a soft microfiber, buff for exactly thirty seconds, watching the cloth darken, then stop to check for uniform sheen and no swirl marks before proceeding.
What Does Vinegar Do to Chrome?
Vinegar dissolves mineral deposits and light tarnish on chrome, but its acidity can etch or dull the finish if left too long; always rinse, dry, and follow with a non‑abrasive polish to protect the surface.
Can Tarnished Chrome Be Restored?
Yes, you can restore tarnished chrome by applying a non‑abrasive polish sparingly, buffing gently with a microfiber cloth, then sealing with a light wax. Work carefully to preserve the thin plating.
In Summary
By polishing the chrome, you preserve the machine’s original sparkle, protect it from rust, and keep its vintage charm intact. A well‑maintained finish not only looks great but also boosts resale value and guarantees the espresso tastes as authentic as the era it hails from. Regular care prolongs the metal’s life, so your classic brewer stays a functional centerpiece for years to come.

Leave a Reply