
You’ll revive a piece of coffee history by turning a century‑old percolator into a functional, flavorful brew‑maker while preserving its nostalgic charm. The hands‑on satisfaction of cleaning, drying, and safely replacing a non‑standard power cord gives you a tangible accomplishment. Proper safety—unplugging, cooling, and inspecting—prevents shocks, and a quick rinse removes grounds and oils. Thorough drying stops rust and mold, and a first brew tests your work. Keep it going to discover more tips on long‑term care.
Why Restoring a Vintage Percolator Matters
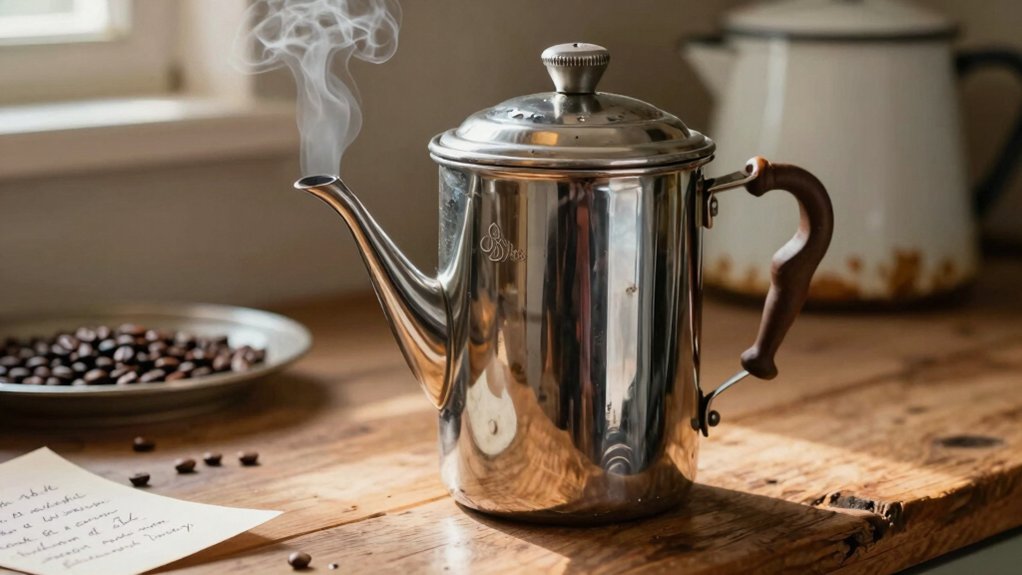
Why does reviving a vintage percolator matter? You’ll feel the thrill of turning a century‑old relic into a working coffee maker. The process also highlights how color‑coded cleaning cloths (for organization and care) can help you maintain delicate parts during restoration color‑coding/organization.
Safety First: Unplug and Cool the Appliance
Unplugging cuts the power instantly, reducing the risk of shock even when you inspect the bottom plate or gasket after the brew has finished, and you should also allow the unit to cool to touch before handling hot components like the pump tube or heating element. Safety first
Quick Rinse: Discard Grounds and Rinse the Basket
After brewing, you should cool the grounds quickly and toss them away from the basket to stop any recontamination. Then give the basket a thorough rinse, making sure water reaches every corner and perforation. This simple habit prevents oil buildup, keeps the flavor pure, and extends the life of your vintage percolator. Regularly cleaning the scale and timer area with a soft cloth helps maintain accurate measurements and reliable timing for future brews precise measurement.
Cool Grounds Quickly
How often do you let the grounds sit in the basket after brewing? You should cool them quickly to stop oil buildup and keep flavors pure. Let the pot cool, then pull out the basket and stem. A swift rinse with warm water washes away loose grounds, and a pinch of baking soda can neutralize any lingering acidity while you’re rinsing. Avoid abrasive tools; a soft sponge does the job without scratching the metal. Regular quick rinses keep the interior fresh and reduce the need for deep cleans later. Descaling regularly with a compatible solution helps maintain cleaner internals and better flavor in the long run citric acid-based formula.
- Feel the relief of a spotless basket.
- Smell the difference—no rancid odors.
- See the shine return to the metal.
- Enjoy longer‑lasting coffee flavor.
Rinse Basket Thoroughly
Why rush to discard the grounds and rinse the basket? You’ll keep flavor pure by acting fast. After each brew, pull the basket and stem, then give both a quick, thorough rinse under warm water.
The goal is to wash away every coffee particle before it dries and clings to the metal. As you rinse, inspect the tiny holes; any blockage means grounds could slip into the pot later. Regular maintenance helps preserve the consistent extraction you enjoy with your AeroPress setup and supports longer-lasting performance AeroPress maintenance. Let the basket air‑dry completely before you reassemble the percolator—this prevents trapped moisture, rust, and lingering odors.
Incorporating this simple step into your routine minimizes bitter residues and keeps your vintage machine performing at its best.
Prevent Oil Buildup
A clean basket isn’t the only thing you need to watch; the oils left behind after each brew can coat the metal and turn rancid if you let them sit. You’ll keep your vintage percolator tasting bright by treating oil buildup as a regular part of the cleaning cycle. After each pot cools, pull the basket and stem, discard the grounds, and give every interior surface a quick rinse. This habit stops bitter flavors and mineral deposits from accumulating, preserving the percolator’s performance for years. Regularly inspecting and maintaining the interior surfaces helps extend the unit’s life and maintain consistent flavor, especially when paired with a sturdy knock box-style cleanup routine non-slip base.
Mild Soap Clean‑Up for Residual Coffee Oils
You’ll want to wash the pot, basket, lid, and stem with mild soap and warm water to lift any lingering coffee oils gently. After the suds are rinsed away, dry every component completely so moisture can’t cause rust or odors. This quick, non‑abrasive step keeps the finish pristine and prepares the percolator for its next brew. Properly storing the clips also helps maintain a tight seal over time stainless steel and prevents corrosion.
Gentle Oil Removal
Ever notice that lingering coffee oils can coat the metal of your vintage percolator, turning fresh brews sour? You can banish that film with a gentle oil removal routine that keeps flavor bright without scouring the finish. Use a soft sponge and a drop of mild soap, then swirl the solution inside the chamber for a few seconds. Rinse quickly, dry, and repeat each brew to stop rancid notes before they start.
- Feel the satisfaction of a spotless interior.
- See the metal gleam as oils vanish.
- Taste the pure, untainted coffee aroma.
- Preserve the percolator’s historic charm.
This quick, non‑abrasive method protects your percolator while erasing stubborn oils, ensuring every cup stays true to its vintage character.
Rinse Before Storing
After the oil‑removal rinse, give the percolator a quick wash with a drop of mild soap to lift any remaining coffee film. You’ll notice the gentle suds break down lingering oils without scratching the brass or glass.
Rinse each component thoroughly with warm water, making sure no soap residue remains, because even a thin film can alter the next brew’s flavor.
As you finish, shake out excess water and pat the parts dry with a lint‑free cloth.
Let the pieces air‑dry completely before you place them in storage; moisture invites corrosion and mold, which shortens the vintage’s lifespan.
This simple routine preserves taste, keeps the metal bright, and ensures your percolator stays ready for the next cup.
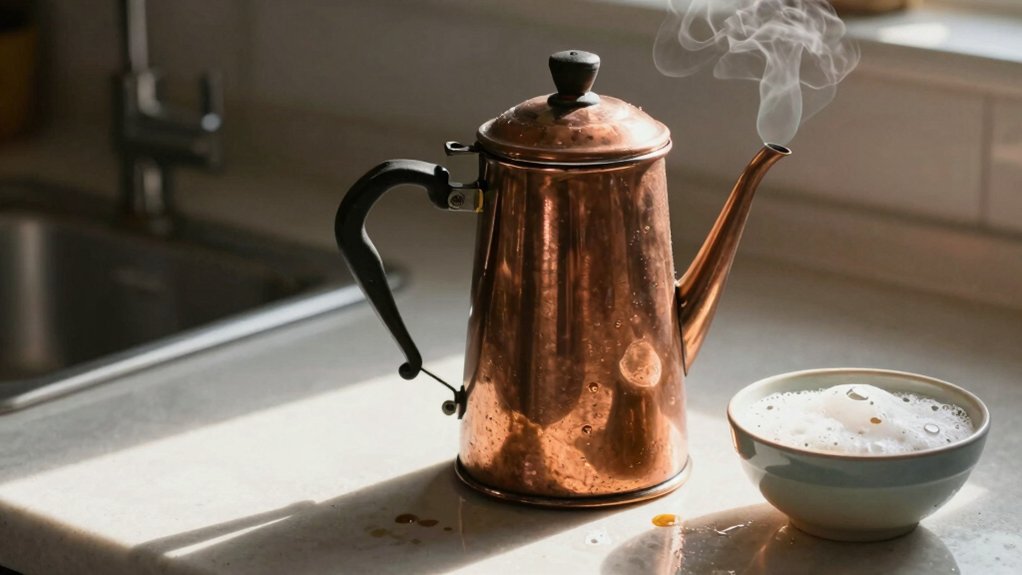
Dry Completely to Prevent Moisture Damage
Why risk rust or mold when a simple drying step can preserve your vintage percolator? After you finish rinsing, you must dry every component thoroughly. Moisture left on metal or in crevices invites corrosion, while trapped dampness fuels mold that can ruin the flavor of your brew and the look of your heirloom. Grab a lint‑free towel, wipe the base, lid, basket, and stem, then let the interior air‑dry. Separate the parts or store them fully dry to keep the unit’s electrical insulation intact and extend its lifespan.
- Pat each piece with a soft, dry cloth.
- Hold the percolator upside‑down to drain lingering water.
- Let it sit in a well‑ventilated area for at least 30 minutes.
- Place parts in a breathable container, never a sealed bag.
Deep‑Clean With Vinegar: Step‑By‑Step Cycle
Now that everything’s dry, it’s time to tackle the buildup that can dull a vintage percolator’s performance. First, mix equal parts water and white vinegar, then pour the solution into the reservoir until it reaches the usual fill line. Close the lid and start a full brewing cycle, letting the mixture flow through the grounds basket and brew tube. When the cycle ends, pause and let the vinegar sit for about ten minutes to dissolve mineral deposits and lingering oils. Discard the solution, rinse every removable part under running water, and reassemble. Run one extra cycle with only clean water to flush out any remaining vinegar taste or odor. This deep‑clean routine restores flavor and keeps the percolator humming smoothly.
Baking‑Soda Soak for Stubborn Mineral Deposits
A baking‑soda soak is perfect for loosening stubborn mineral deposits without harsh abrasives. Fill your vintage percolator with warm water, add 2–3 tablespoons of baking soda, and let it sit for 30 minutes. While it works, you’ll feel the anticipation of a grime‑free brew. After the soak, gently scrub with a non‑abrasive sponge, rinse thoroughly, and verify that basket holes stay clear. Remember to unplug the unit and wipe exterior surfaces instead of scrubbing. This routine preserves the finish and protects delicate components, keeping your percolator ready for the next coffee ritual.
- Warm water + baking soda mixture
- 30‑minute soak
- Gentle sponge scrub
- Full rinse and inspection
Removing Rust From the Heating Element
You’ll start by checking whether the discoloration is rust or just coffee residue, then choose a gentle cleaning method. A short vinegar soak followed by a thorough rinse will loosen corrosion without harming the metal, and you should avoid abrasive tools. Once you’ve rinsed, dry the element completely to prevent future rust and electrical problems.
Gent Inspection Tips
Where does the rust on your percolator’s heating element come from, and how can you tell it apart from coffee residue? You’ll notice rust as orange‑brown flakes that cling to metal, while coffee residue stays dark and powdery. Spotting rust early saves you from deeper corrosion and keeps the element efficient.
- Feel for looseness – Gently wiggle the heating element; any wobble signals a missing washer or loose screw.
- Look for surface rust – A thin, flaky layer means you can clean it; embedded rust may need replacement.
- Check alignment – Ensure the bottom sits flush; misalignment causes uneven heat and accelerates rust.
- Test after adjustment – Run a short cleaning cycle; a stable, rust‑free element will heat evenly and stay quiet.
Safe Cleaning Methods
Now that you’ve identified loose or rust‑prone spots, you can safely remove the rust from the heating element.
Fill the reservoir with equal parts water and white vinegar, then run a short cycle to let the acidity dissolve mineral buildup.
After the vinegar soak, run a plain‑water cycle to rinse out any residue and prevent lingering taste.
If you prefer a gentler alternative, mix 2–3 tablespoons of baking soda into warm water and soak the element for 30 minutes, then rinse thoroughly.
Never scrub with steel wool or abrasive pads; they’ll scratch the metal and worsen corrosion.
Finally, dry every component completely before reassembling to avoid moisture‑induced short circuits.
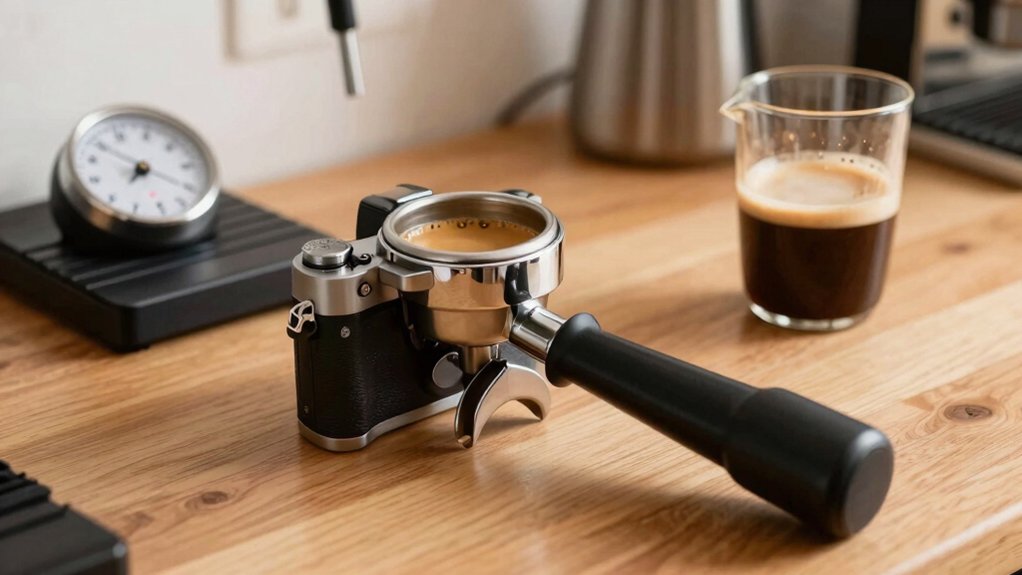
Replacing a Non‑Standard Power Cord Safely
How do you safely swap a non‑standard power cord on a vintage percolator? First, locate a tiny hardware shop that still stocks the correct gauge and prong width. Verify the new cord’s voltage rating matches the percolator’s 120 V spec, and that its insulation is intact and has a sturdy strain‑relief clamp. Disconnect the old cord, note how the wires connect, then solder or crimp the new cord securely, avoiding any loose strands. Finally, snap a photo of the finished job and jot down the part number for future reference.
- Feel the thrill of reviving a century‑old coffee ritual.
- Experience the pride of a safe, DIY fix.
- Enjoy peace of mind knowing the power cord meets modern safety standards.
- Share the restored vintage percolators with friends, sparking nostalgia.
Testing the Restored Percolator – First Brew Tips
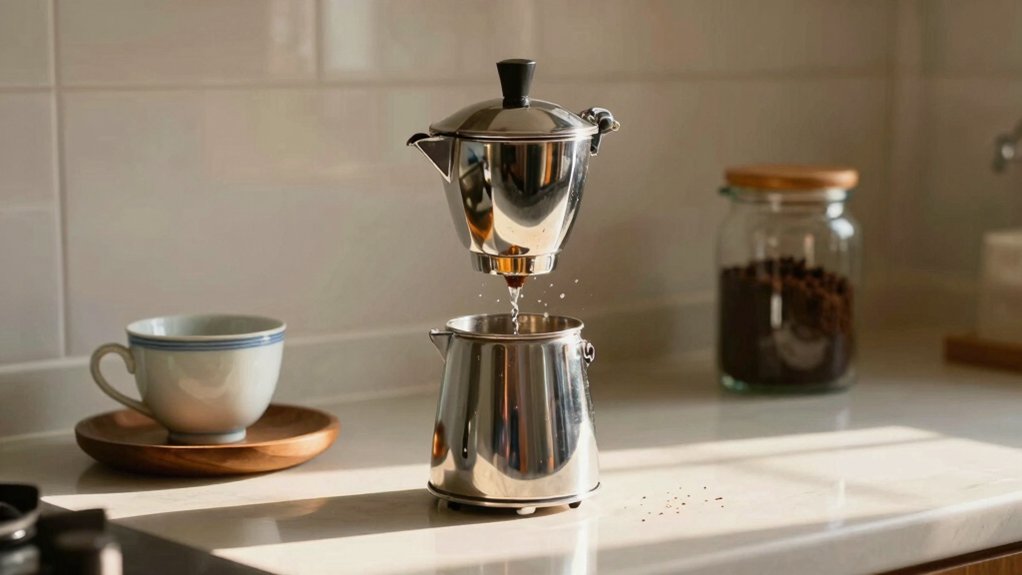
After swapping the cord, plug the percolator in and let it heat up for its first brew. You’ll hear the familiar gurgle as water climbs, then a steady drip as the coffee circulates.
Before you start, double‑check that every gasket, filter, and heating element is clean and securely seated; any residue can scorch the brew.
Fill the reservoir with fresh, cold water and add the measured coffee grounds—about one tablespoon per cup is a good baseline. Turn the knob to “brew” and watch the percolator’s cycle: the bubbling should be lively but not frantic.
When the pot fills, give the coffee a quick stir, then taste. If the flavor is balanced and the aroma nostalgic, you’ve nailed the first test brew.
Sharing the Revival: Posting to Coffee‑Collector Groups
Ever wondered how to make your vintage percolator restoration shine online? You post a crisp photo of the 1924‑patented unit, describe the tiny‑shop rescue, and tag coffee‑collector groups. Your caption should highlight the rich aroma that still drifts from the brass spout and the nostalgia that floods members’ memories of early kitchenware. When you share, you’ll spark lively identification talks about Universal Coffeematic and Landers, Frary & Clark, and invite tips on cleaning with vinegar or baking soda. The community will respond with reactions, comments, and personal stories, turning a single post into a celebration of restored heritage.
Share the gleaming 1924 percolator, its brass aroma, vintage quirks, and invite nostalgic coffee stories.
- Show the gleaming metal and glass bubble.
- Mention the original cord quirks.
- Quote a member’s nostalgic aroma memory.
- Invite questions about vintage branding.
Long‑Term Care: Storing and Maintaining Your Percolator
Wondering how to keep your restored percolator pristine for years? First, give it a deep clean—run a vinegar or baking‑soda cycle to strip oils, mineral deposits, and lingering coffee flavors. Rinse thoroughly, then dry every part: pot, basket, stem, lid, and base.
Moisture is the enemy, so store the unit in a dry, well‑ventilated space. Keep cords and plugs off the floor, tucked away from sharp edges, and protect the original cloth‑covered cord and non‑standard prongs.
Before sealing it away, label the case with the last cleaning date and note any gasket or assembly repairs. Regular percolator maintenance and these simple steps will prevent rust, mold, and corrosion, ensuring your vintage piece stays ready for the next brew.
Frequently Asked Questions
Why Are Percolators Not Used Anymore?
You don’t use percolators anymore because they’re slower, need frequent deep cleaning, have hard‑to‑find parts, and lack the convenience, consistency, and safety of modern drip or single‑serve machines.
Do Old Fashioned Percolators Make Good Coffee?
Yes, old‑fashioned percolators can make good coffee if you keep them clean and maintain the parts. You’ll get a rich, full‑bodied brew, though occasional over‑extraction can make it bitter.
Why Were Corningware Percolators Recalled?
You’re seeing the recall because the 10‑cup electric models can overheat, leak hazardous chemicals from deteriorating gaskets, and develop rusted internal parts that might cause electrical failures or contamination.
Can I Clean an Electric Percolator With White Vinegar?
Yes, you can clean it by mixing half water and half white vinegar, running a cycle, letting it sit ten minutes, discarding, then rinsing thoroughly and finishing with a plain‑water cycle.
In Summary
By restoring your vintage percolator, you’ve turned a relic into a reliable coffee companion. You’ve guaranteed safety, eliminated stale oils, and protected the machine from moisture damage. With a new power cord and a test brew under your belt, you’re ready to share the revival with fellow collectors. Keep it clean, store it dry, and enjoy countless fresh cups—proof that a little care can keep classic coffee brewing alive for years to come.

Leave a Reply