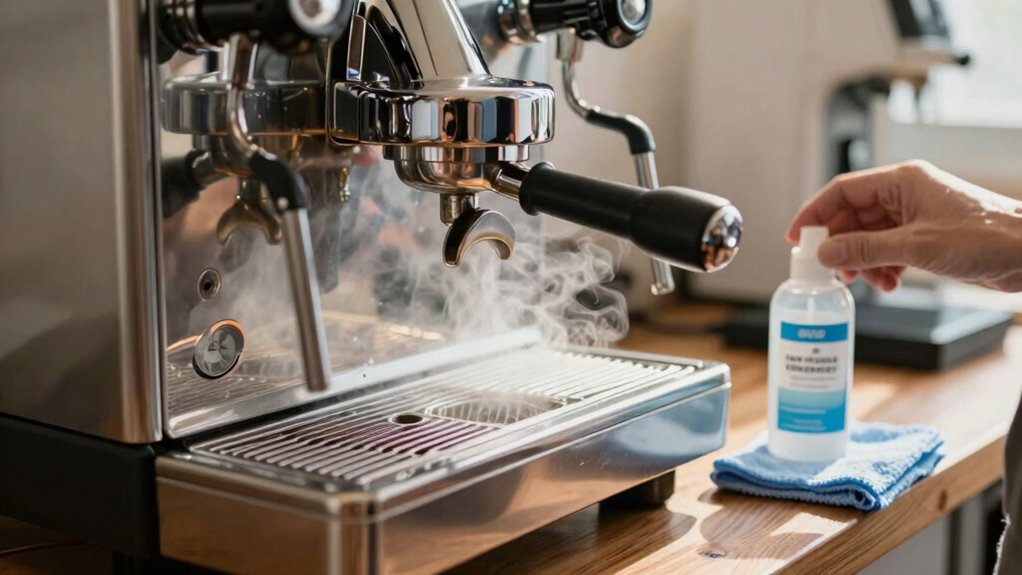
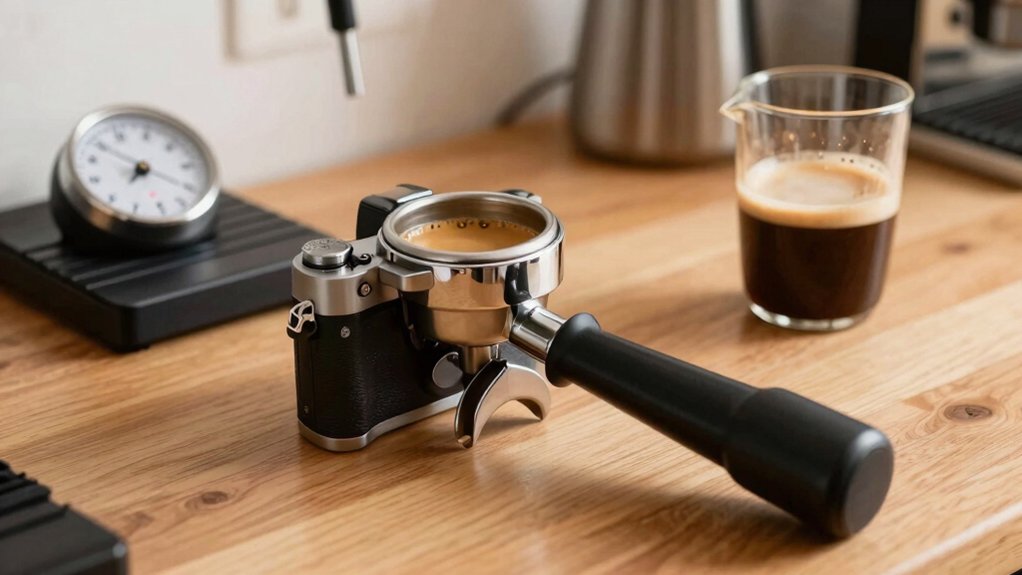
Cleaning your espresso machine regularly removes coffee oils, mineral deposits, and milk residue that clog the group‑head, valve, and steam wand. These buildups dull acidity, mask nuanced flavors, and cause inconsistent pressure, leading to bitter or flat shots. They also foster bacterial growth and accelerate wear, shortening the machine’s lifespan. By backflushing every 10‑15 shots, descaling every few months, and wiping the wand after each use, you keep each cup bright and the equipment healthy. Continue, and you’ll discover detailed steps and schedules.
How Often Should You Clean Your Espresso Machine?
How often should you clean your espresso machine? You’ll backflush every 10–15 shots or at the end of each session, and do a thorough backflush once a week or after 20–30 shots, whichever comes first. If your machine has a three‑way valve, never skip this step; otherwise, you can omit it. Regular maintenance also includes descaling roughly every six months, adjusting for water hardness, and increasing backflush frequency if you notice buildup. This routine keeps flavor consistent and prevents clogs. Programmable features in some machines can help you time these routines automatically, ensuring you don’t miss a step even on busy days.
Why Coffee Oils and Residues Spoil Every Shot
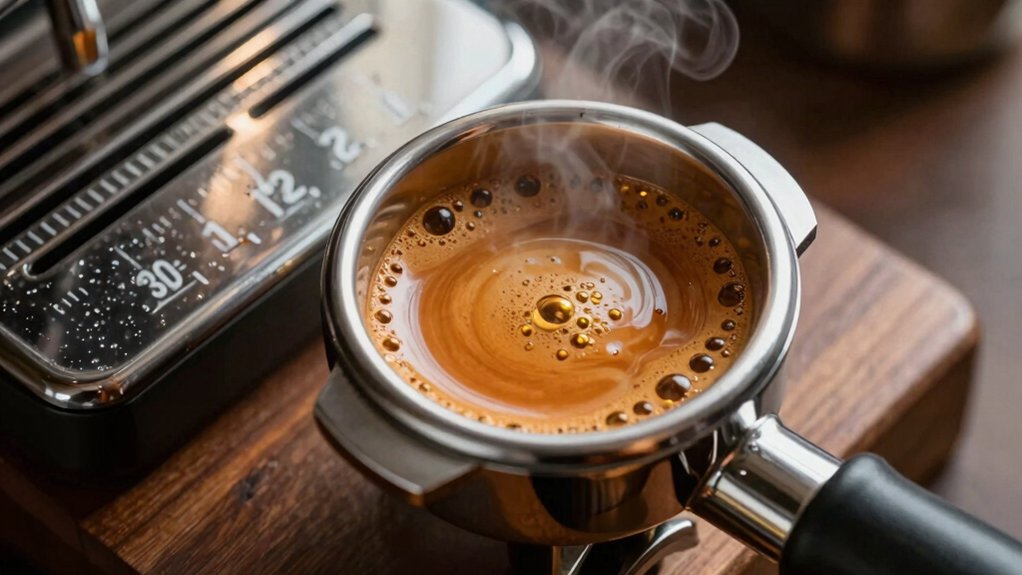
Ever wonder why your espresso suddenly tastes flat or bitter? Old coffee oils and residues cling to the group head, portafilter, and steam wand, turning each shot into a rancid experience. Those oily deposits coat water screens and brass surfaces, so every brew inherits off‑flavors no matter how fresh the beans are. When you skip routine cleaning, the grime builds, dulling acidity and masking nuanced notes.
- Oils linger on the filter basket, creating a stale base.
- Residues coat the water screen, restricting flow and extracting bitter compounds.
- Brass surfaces collect oily film, altering temperature stability.
- The group head’s tiny channels fill with grime, muting bright flavors.
Regularly scrubbing these parts removes the oily film, restoring crisp, vibrant espresso. Filter Type and other AeroPress-compatible components also benefit from routine decontamination, ensuring consistent extraction and taste across brews.
How Dirty Steam Wands Affect Milk Texture
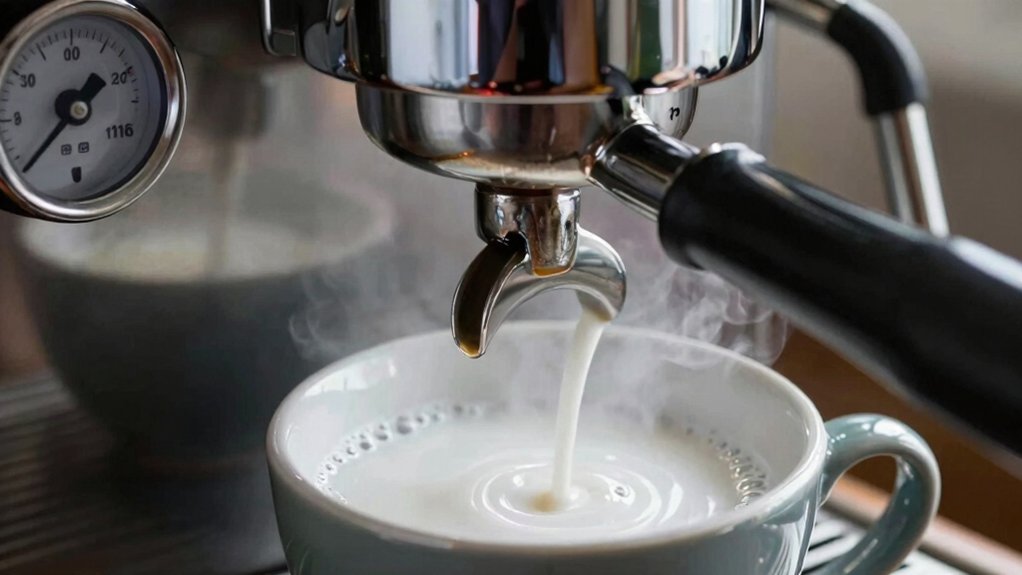
Old coffee oils and residues can ruin the shot itself, but the same grime on your steam wand sabotages the milk you’re trying to perfect.
When milk splatters onto the wand and you skip a quick purge, a crust forms that blocks steam flow. That blockage creates hot spots and uneven pressure, so the foam you pull out is thin, stringy, or dry instead of velvety microfoam.
The lingering residue also breeds bacteria, giving your latte an off‑flavor that masks the coffee’s nuance. Because the wand’s efficiency drops, you’ll need a longer steam burst to hit the ideal 55–65 °C range, risking over‑heated milk.
A damp cloth wipe, a short purge, and occasional internal brushing keep the steam wand delivering consistent texture every time. Steam wand maintenance helps sustain consistent microfoam and flavor over time.
Why Espresso Machine Backflushing Every 10‑15 Shots Keeps Flavor Fresh
Why should you backflush every ten to fifteen shots? You’ll keep your espresso tasting bright and clean by clearing oils and grounds that otherwise coat the brew group. A blind basket with detergent emulsifies residue, while a proper rinse removes any soap that could taint the next cup. The process also protects three‑way valves, preventing channeling and flow inconsistency.
- Use a blind/blank basket and detergent for each backflush.
- Follow the detergent’s timing, then rinse with clean water.
-Perform a wiggle motion to dislodge stubborn particles.
– Finish with a post‑flush rinse to ensure no detergent remains.
Doing this regularly preserves flavor integrity, avoids rancid notes, and guarantees each shot delivers the intended aroma and balance.
Spotting the Signs of a Clogged Group‑Head Valve
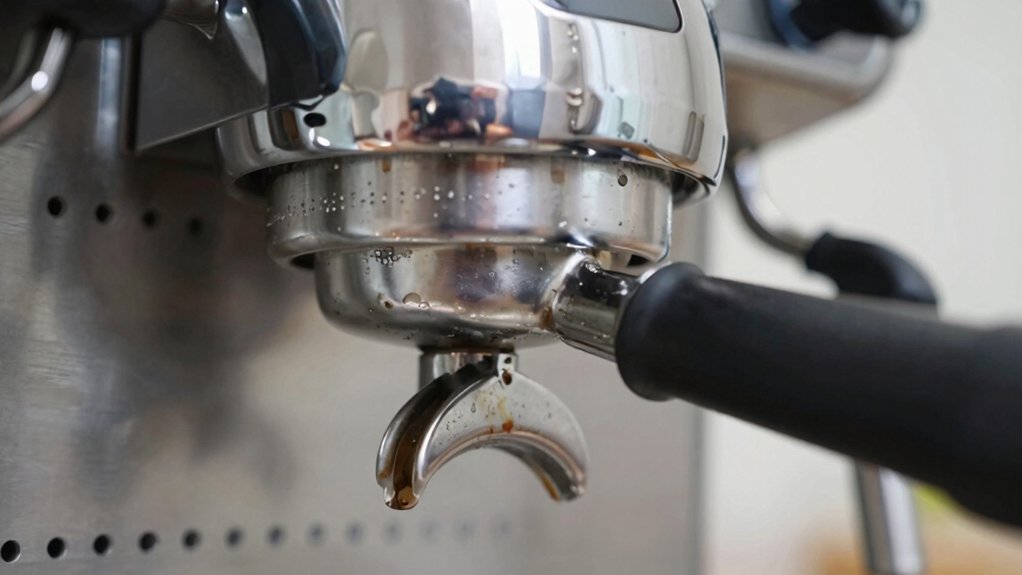
If you notice low pressure extraction, your shots will take longer and the flavor turns bitter or even rancid.
Inconsistent shot timing and uneven flow usually point to a clogged group‑head valve.
A quick visual check and a backflush can confirm the issue before it ruins your brew.
Backflushing with the right cleaning brush can help restore flow and protect the group head from buildup water deflection fins.
Low Pressure Extraction
Ever notice your espresso pulling slower than usual, with a thin crema and uneven flow from the portafilter spouts? That’s low‑pressure extraction, usually caused by a clogged group‑head valve. When the valve’s narrowed, water can’t build the pressure needed for proper extraction, so you end up with sour, under‑extracted shots and erratic pressure readings.
- Pre‑infusion drags out, taking several seconds longer than normal.
- Crema appears pale, thin, and disappears quickly.
- One spout streams faster than the other, creating an uneven pour.
- Shot consistency drops dramatically across multiple pulls.
To fix it, backflush the machine regularly using backflush detergents, and clean the group head, gasket, and three‑way valve. This restores proper pressure and brings your espresso back to its full, balanced flavor. Regular maintenance is also a core practice in ensuringquality sourcing and consistency across your coffee gear, aligning with best practices highlighted in premium coffee gift discussions.
Inconsistent Shot Timing
A clogged group‑head valve throws off water flow, so your shot timing becomes erratic and the extraction varies from pull to pull. You’ll notice longer spin‑ups, fluctuating volumes, and sudden slow‑pour moments mid‑shot. Oil and grounds build up around the group head, choking the valve and shrinking crema. When identical recipes yield different pull times, the culprit is usually a blocked group head valve.
| Symptom | Typical Time | What It Means |
|---|---|---|
| Spin‑up delay | >5 s | Valve restriction |
| Volume swing | ±10 ml | Inconsistent flow |
| Sudden slow pour | Mid‑shot | Partial blockage |
Backflush with detergent regularly to clear the passages and keep timing stable. Inspect the gasket and clean any gunk before it escalates. This simple habit preserves consistency and flavor.
Bitter, Rancid Flavor
When the group‑head valve gets clogged, the resulting pressure spikes and uneven flow force coffee oils and fine grounds to sit in the extraction channel, producing a harsh, bitter or rancid taste that masks the bean’s natural sweetness. You’ll notice the flavor shifting to sour, burnt, or flat bitterness even after a routine pull. A brown or muddy water stream during backflush tells you gunk is trapped, while uneven pre‑infusion signals the valve isn’t opening cleanly. To keep the cup bright, you must group head clean regularly, using detergent and a blind basket to dissolve oils and clear pathways. Oil film coating the valve and gasket Stain resistance helps explain why buildup matters for maintenance and flavor consistency.
Fixing a Clogged Group‑Head Valve in Minutes
You’ll first spot the blockage by feeling reduced pressure or watching uneven flow. Then you can quickly disassemble the group‑head, clean the valve and gasket, and reassemble the unit. Finally, run a short test shot to confirm the water flows smoothly again. Regular maintenance with clean, filtered water and periodic descaling helps prevent buildup and keeps your espresso tasting consistent, especially if you frequently brew with darker roasts that can leave more oils behind Swiss Water Process and flavor-retention considerations.
Detect Identify Valve Blockage
Ever notice a weak, sputtering stream or a sudden pressure spike when pulling a shot? Those symptoms usually point to a blocked group head valve. You can spot the issue before it ruins your espresso by watching the flow and listening to the pump.
- Water drips slowly instead of a steady stream.
- You hear a “click‑click” as pressure builds then drops.
- The shot pulls too quickly, yielding a pale, watery cup.
- Brownish water or tiny coffee particles emerge from the spout.
When you see any of these signs, pause the brew and inspect the valve. A quick visual check and a test flush will confirm whether the blockage is due to hardened oils, old grounds, or mineral deposits. Catching it early saves time and preserves flavor.
Disassemble Head Quickly
Quickly tackling a clogged group‑head valve starts with a simple disassembly: remove the portafilter, loosen the group‑head screws, and lift the top cover to expose the valve. You’ll see the valve seat and oil channels blocked with coffee residue. Grab a group‑head brush and a dab of greenscrubby, then scrub the seat, gasket, and surrounding passages. This cleaning removes the built‑up oils that cause the blockage. After brushing, run a short backflush using a detergent‑compatible solution; the pressure loosens any stubborn deposits. While the valve is still exposed, inspect the three‑way valve and gasket for wear—replace if they look damaged. This quick, focused cleaning restores flow before you move on to reassembly.
Reassemble and Test
Secure the group‑head cover, confirming the gasket sits evenly and the threads are free of debris; then tighten the screws just enough to hold everything in place without stripping. Reattach the three‑way valve, aligning its ports so it can vent and purge after each backflush. Slip the group‑head back onto the port, making sure the threads mesh smoothly. Finally, run a short shot to watch for steady flow, no backflow, and no pressure spikes.
- Check that the gasket seals fully, no gaps or twists.
- Verify the three‑way valve sits correctly for proper venting.
- Pull a test shot, watching for brown water or coffee particles.
- Perform a final backflush with clean water to rinse any residue.
Weekly Espresso Machine Deep‑Clean Tasks to Extend Life
How often should you give your espresso machine a deep‑clean? Once a week. Start your cleaning routine by backflushing with detergent in a blind basket, then run a thorough rinse to chase every residue. Next, grab a greenscrubby and a damp dish rag to scrub the group head gasket edges and shower screen, dislodging oils and grounds. Disassemble the portafilter, soak the basket and metal parts in hot, water for at least 30 minutes, then scrub interior surfaces and rinse clean. Wipe the steam wand exterior, clean the wand tip, and purge steam for about 30 seconds to stop milk buildup. Finally, inspect for brown water or coffee particles after the backflush, and rinse the drip tray and blank basket to ensure no undissolved detergent remains.
Pick the Right Detergent for Three‑Way‑Valve Machines
After you’ve finished the weekly back‑flush routine, the next step is choosing a detergent that won’t damage your three‑way‑valve machine. Pick a product explicitly labeled safe for espresso machines and designed for backflushing—Cafiza, PuroCaf, and JoeGlo are popular choices. Follow the manufacturer’s cycle count, typically five pump strokes in 15‑second bursts, then rinse thoroughly to banish any residue. Using the right detergent protects seals, gaskets, and the valve itself, keeping pressure stable and flavor clean.
Choose espresso‑machine‑specific detergent, follow five‑stroke 15‑second cycles, then rinse thoroughly.
- Verify the detergent is espresso‑machine‑specific.
- Confirm it’s approved for three‑way‑valve machines.
- Adhere to the prescribed backflush cycle count.
- Rinse completely after each use.
How to Safely Soak Portafilter Baskets and Steam Tips
You’ll protect the delicate parts by soaking only the metal baskets and steam tips in warm, soapy water for at least thirty minutes. Keep any plastic, Bakelite, or rubber handles out of the solution, then rinse everything thoroughly before you reassemble. Finally, run a “garbage seasoning” shot to flush out any lingering residue and lubricate the three‑way valve.
Protect Parts, Use Warm Water
Ever wondered why a quick warm‑water soak can keep your portafilter baskets and steam tips in top shape? Warm water loosens coffee oils and residue without warping plastic, Bakelite, or rubber handles. Use the detergent ratio your manufacturer recommends—like 1 Tbsp per quart for JoeGlo—and let the parts sit for at least 30 minutes. After soaking, rinse thoroughly so no cleaner reaches the brew chamber, then scrub the basket interior with a greenscrubby, avoiding the holes to preserve their size. Finally, reassemble and purge the steam wand to vent moisture and residual cleaner.
- Fill a basin with warm water and the correct detergent amount.
- Submerge baskets and tips, timing a 30‑minute soak.
- Rinse each component under running water.
- Scrub basket interiors gently, then purge the steam wand.
Avoid Submerging Handles
Wondering why you should keep plastic, Bakelite, and rubber handles out of the soak? Those handles can swell, warp, or crack when exposed to hot water and detergent, compromising grip and safety. Instead, pull the metal portafilter basket, body, and steam tip from the machine and place only those parts in your cleaning solution. Let them soak for at least 30 minutes in hot, soapy water, then give the interior a quick scrub with a greenscrubby. While the metal components are immersed, keep all handles dry and away from the bath. After soaking, wipe the basket and steam tip dry to prevent residue from re‑entering the brew group. This protects the handles and ensures a longer‑lasting espresso setup.
Rinse Thoroughly Before Reassembly
Why is a thorough rinse essential after soaking your portafilter basket and steam tip? You’ve already removed coffee oils, but lingering detergent can taint flavor and damage seals. Rinse thoroughly before reassembly ensures every nook is free of chemicals, so your espresso tastes pure and your machine stays reliable.
- Hold the basket under running water, rotating it to flush the basket and holes.
- Direct a steady stream over the steam tip, watching for clear flow.
- Use a damp dishrag to wipe the gasket groove and shower screen edge, preventing trapped residues.
- Inspect the water; if it’s brown or shows particles, repeat the rinse until it runs clear.
Step‑by‑Step Daily Cleaning Routine for Espresso Machines
Need you finish your espresso shot, you’ll want a quick, effective routine that keeps every part of the machine spotless and ready for the next brew. Start by purging the steam wand, then wipe it down to stop milk crust and sanitize the exterior. Rinse each portafilter and basket, shaking out grounds and oils. While the machine runs, brush the group heads, paying attention to the gasket and shower screen. After the day’s shots, backflush with a blind filter and espresso machine cleaner, then run a thorough water rinse. Soak the portafilters and baskets (handles aside) in hot, with cleaner, scrub the interiors, and rinse before reassembling. This espresso machine cleaning schedule ensures consistent flavor and prevents buildup.
How to Descale an Espresso Machine Without Damaging the Boiler
After you’ve finished your daily cleaning routine, the next step is to tackle mineral buildup that can choke the boiler and ruin extraction. Choose a descaling agent that your manufacturer recommends, dilute it exactly as instructed, and fill the water reservoir. Run the machine on a brew cycle, pausing halfway to let the solution soak the boiler for the prescribed contact time. Rinse thoroughly with fresh water until no cleaner taste remains. Finally, run a few plain water cycles to flush any lingering residue.
- Use the correct concentration for your machine model.
- Follow the recommended soak time—usually 15‑30 minutes.
- Rinse multiple times to eliminate all descaling solution.
- Schedule descaling every six months, or more often with hard water.
Troubleshooting Common Flavor Off‑Notes After a Clean‑Up
Ever notice a bitter or rancid after‑taste even after you’ve finished your cleaning routine? That usually means oil or residue is still hiding in the group head or portafilter, so you need a deeper backflush and a thorough rinse. If you see brown water or coffee particles during the post‑clean rinse, run another backflush with detergent and check the drainage paths. Milk‑crusted flavors signal the steam wand wasn’t fully purged; wipe it and use a brush to scrub the interior. A dull, flat shot points to stale oils or clogged basket holes—perform a targeted greenscrub on the portafilter surfaces. Finally, if off‑flavors persist, test water hardness and schedule a proper descale to eliminate mineral buildup.
Frequently Asked Questions
Should I Clean My Espresso Machine After Every Use?
Yes, you should clean it after each use. Wipe the wand, run a water shot, rinse the portafilter, and check for residue. This prevents buildup, keeps flavors fresh, and extends the machine’s life.
What Is the 30 Second Rule for Espresso?
You follow the 30‑second rule by running a quick rinse or backflush for about half a minute after each shot, then purging the steam wand for another 30 seconds to clear oils, residues, and detergent.
How Many Rinses After Descaling?
You should run at least two full rinse cycles after descaling, checking the water each time; if it’s still cloudy, keep rinsing until it’s clear, then finish with a final wipe‑down.
What Happens if You Never Clean Your Coffee Maker?
If you never clean your coffee maker, oils and mineral deposits will clog filters, brew bitter, bacteria‑laden coffee, and corrode components, causing costly repairs, poor taste, and shortened machine lifespan.
In Summary
By cleaning your espresso machine regularly, you keep every shot tasting bright and consistent. Removing oil buildup, coffee residues, and mineral scale prevents bitterness, sourness, and uneven extraction. A tidy steam wand delivers silky milk, while a clear group‑head valve ensures smooth flow. Stick to daily upkeep, backflush every 10‑15 shots, and descale as needed—your palate and your machine will thank you.

Leave a Reply