
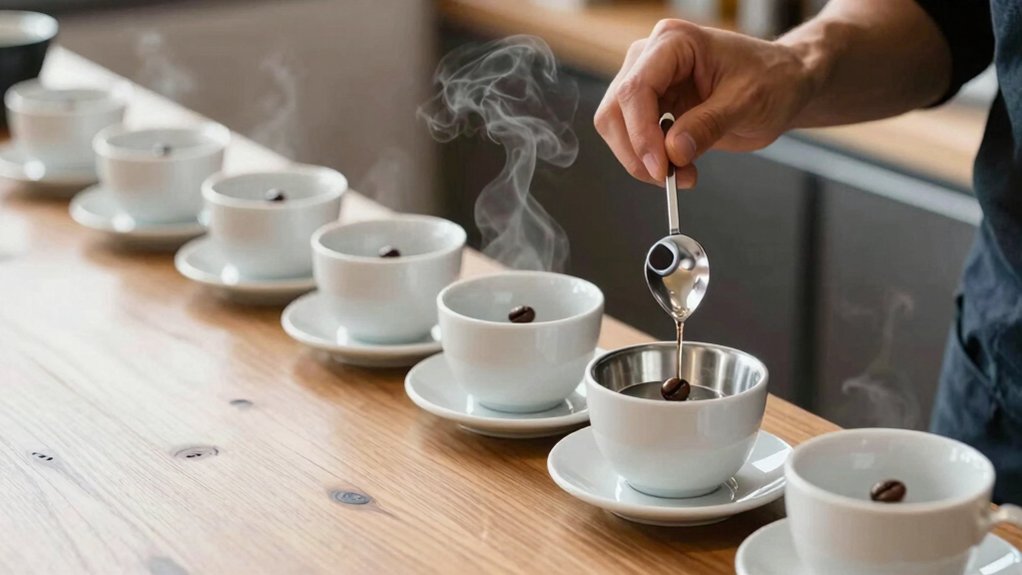
You’ll sharpen your palate by using a strict cupping protocol that controls grind size, water temperature, alkalinity, and CO₂ degassing, letting you capture aroma shifts, acidity arrival, sweetness balance, and texture in a repeatable way. Brew 8.25 g of coffee into 150 mL of 200 °F water, let it bloom four minutes, then taste at 170 °F while noting volatile changes across temperature stages. By tracking TDS, Brix, and sensory data on a 100‑point form, you’ll isolate roast effects and translate findings into precise espresso recipes, and the next steps will show you how to fine‑tune those recipes.
Why Advanced Coffee Cupping Matters for Baristas

Why does advanced cupping matter to you as a barista? It sharpens your palate beyond aroma and flavor, letting you dissect acidity arrival, sweetness balance, weight, texture, and finish resolution. By following a strict cupping protocol—grind size, water temperature, alkalinity, CO₂ degassing, and grind friction—you isolate true coffee characteristics. You’ll notice how volatile aromatics shift as the cup cools and how polysaccharide textures affect trigeminal sensation. Applying roast‑level‑aware brew ratios, such as 1:17 instead of 1:18, highlights lighter roast profiles that standard methods mute. This science‑driven approach yields repeatable data, guiding espresso and brewing decisions, and aligning chemistry, sensory perception, and roasting influences for consistent quality. It also benefits from durable, precise measurement tools and data tracking to ensure stability across sessions and roasteries, enabling more reliable calibrations during busy service. Bluetooth compatibility in scales can support seamless data capture across devices, helping you compare multiple cupping trials without losing measurements.
Master Coffee Cupping Science: Aroma, Flavor, Aftertaste
You’ll notice the aroma shift as the cup cools, revealing new volatiles that reshape the flavor profile. Pay attention to how the aftertaste builds, linking acidity, sweetness, and texture into a lingering structure. By tracking these changes, you can pinpoint the coffee’s balance and assess its overall quality, using data-driven notes from TDS and Brix measurements to support your cupping interpretation extraction yield calculations.
Aroma Evolution Over Time
Ever notice how the coffee’s perfume changes as it cools? You’ll see aroma evolution in action when the hot, bright notes fade and the subtler, roast‑derived scents emerge. Start with a dry‑nose sniff at high temperature; it reveals origin clues and the initial volatile burst.
Then stir, let the cup settle, and take a wet‑aroma sniff as the temperature drops. The cooler brew releases mid‑range compounds that were masked before, shifting the scent profile. Track these shifts across three temperature stages—sc, mid, and low—to map the full aromatic trajectory. By noting which aromas peak early and which linger, you capture the cup’s complete sensory story without moving into aftertaste analysis.
Aftertaste Structure and Persistence
What defines a cup’s finish is how the lingering sensations evolve and fade after you swallow or spit. You’ll notice that the Aftertaste structure depends on persistence, retronasal cues, temperature shifts, tactile feedback, and resolution quality. As the brew cools, volatile compounds change, altering which flavors stick around. Trigeminal sensations—heat, astringency, viscosity—shape how the aftertaste feels on later sips. A clean finish shows diminishing astringency and a gradual return to baseline, revealing balanced acidity, sweetness, and body. Retronasal perception adds complexity or cleanliness. Temperature decline reorders volatile flavor carriers. Texture and trigeminal cues modulate lingering mouthfeel. Persistence is measured by how long flavors stay audible. Proper resolution ends with a smooth, diminishing astringency. Flavor science expands the framework by linking sensory persistence to cup stability and repeatable cupping results.
Set Up a Controlled Cupping Environment

You’ll want to keep the room quiet, the walls a neutral shade, and any scents at a minimum so your palate isn’t swayed by external cues. Maintain temperature at 200°F ± 2°F and control humidity, then let the cups cool to about 170°F before tasting. Label each sample with alphanumeric codes on a standardized form to preserve anonymity and ensure consistent, comparable evaluations. Consider using refillable diffusion options to maintain a consistent aroma environment during cupping trials scent diffusion options.
Environment Controls Temperature Humidity
How can you guarantee every cup reveals the coffee’s true character? You set a stable temperature and humidity, then lock down every variable that could skew perception. Keep water at 200°F ± 2°F, use lids, and space cups evenly. Control humidity to curb static and plume effects, preventing aroma carryover and palate fatigue. Quiet, neutral surroundings eliminate background cues, while alphanumeric codes stop bias. Grind just before pouring and finish tasting within a tight window to lock in freshness.
- Maintain ambient temperature at 200°F ± 2°F
- Stabilize humidity to a consistent level
- Use lids and even spacing for each cup
- Keep the room quiet and neutral
- Label samples with alphanumeric codes only
Neutral Odor Management
Ever wondered why a single stray scent can derail a cupping session? You’ll need a neutral odor setting to protect your sensory environment. First, clear the room of food, cleaning agents, or perfume; even a faint coffee bean roast from a nearby kitchen can mask subtle notes. Keep the space quiet, temperature‑stable, and free of visual clutter, then arrange identical cups, lids, spittoons, and spoons so nothing draws attention away from the brew. Use a consistent lighting hue to avoid perception shifts. Provide water between samples and schedule short breaks to reset your palate. By eliminating distractions and standardizing every element, you preserve the integrity of each aroma and flavor assessment. To further safeguard accuracy, ensure the environment aligns with natural, high‑quality moisturizing ingredient standards often highlighted in coffee lip balm flats like vegan, cruelty‑free certifications and non‑irritating formulations, which emphasize precaution and careful sourcing neutral odor management throughout sensory work.
Consistent Sample Labeling
Why bother with random labels when a simple alphanumeric code can eliminate bias and keep your cupping results trustworthy? You’ll notice that consistent labeling drives standardization across every cup, letting you focus on flavor, not origin clues. Use a clean, neutral room, keep the water‑to‑coffee ratio steady, and grind fresh. Rinse spoons, break the crust after four minutes, and reset your palate between samples. When each sample bears a neutral code, you protect the sensory data and make repeatability effortless. Assign alphanumeric codes that reveal no roast, lot, or origin; maintain the 8.25 g : 150 mL (or 140 mL) ratio identical for every sample. Prepare five lidded cups per code, rinsing spoons each time; grind immediately before brewing, targeting 70‑75 % through a #20 sieve. Conduct cupping in a quiet, odor‑free space with scheduled palate resets foam quality and ensure the water quality is consistent to prevent skewed aromas.
Choose Grind Size and Water Temperature for Cupping

What grind size and water temperature you choose can make or break a cupping session. You should grind immediately before brewing, aiming for a medium grind that lets about 70–75 % of the particles pass a #20 sieve, per SCA standards. This consistency creates an even bed and preserves volatile aromatics. Heat your water to a stable 200 °F (93–94 °C) and keep it steady throughout the pour. Use the recommended 8.25 g of coffee to 150 mL of water (1:18.2 ratio) for each cup, then cover the bowls and let the grounds bloom for four minutes before breaking the crust. By controlling grind size and water temperature, you standardize extraction, aroma release, and ultimately, the reliability of your cupping results. The setup can be enhanced by considering appropriate storage and organization solutions for your cupping gear to maintain consistency and efficiency storage organization features.
Manipulate Water Alkalinity to Shape Acid Perception
You’ll notice that tweaking water alkalinity reshapes how the coffee’s acids present themselves, letting you soften or sharpen the perceived bite. By raising bicarbonate levels you mute sharp citric notes and boost sweetness and body, while lowering alkalinity brings out bright, lively acidity. This control over the buffer lets you isolate true acid balance and compare coffees with precision extraction yield.
Buffer Alkalinity Impact
Ever wondered how a splash of bicarbonate can mute the bright citrus zing in a cup? You control buffer alkalinity to shape acidity perception, then the coffee’s flavor profile shifts. Higher alkalinity raises buffering capacity, softening malic and phosphoric notes and nudging the palate toward sweetness and mellowness. Lower alkalinity lets sharp citric spikes shine and boosts aroma volatility, making acidity feel vivid. The pH swing also tweaks extraction, influencing TDS and body through acid‑sweetness interplay. In cupping, you use alkalinity deliberately to highlight or suppress acid‑driven flavors, sharpening your structural analysis.
- Boost alkalinity → muted acidity
- Reduce alkalinity → bright, lively acidity
- Bicarbonate buffers sharp acids
- pH changes affect extraction yield
- Adjusting buffer refines cup structure
Acid Balance Control
Can you taste how a splash of bicarbonate reshapes a coffee’s acidity? When you raise water alkalinity, the bicarbonate buffers the brew’s acids, muting bright citrus and letting sweetness and a smoother mouthfeel take center stage. Lower alkalinity lets the sharp citric and malic notes shine, increasing perceived acidity and creating tension with sweetness. In cupping, brew two identical samples—one with high‑alkalinity water, one with low.alkalinity water—to isolate how acidity shifts, how long the aftertaste lingers, and how the overall balance changes. Observe that higher alkalinity softens the cup’s edge, while lower alkalinity amplifies bright, lively acidity. Use this controlled tweak to fine‑tune flavor profiles and achieve your target acidity balance.
Control Roast Gas and Degassing for Sweetness Consistency
How does the amount of CO₂ left in a bean after roasting shape the sweetness you taste in a cup? You control sweetness by timing CO₂ degassing to match your cupping schedule. A short rest leaves excess gas, muting caramel notes and boosting astringency. A longer rest lets CO₂ escape, letting volatile sugars shine and stabilizing sweetness consistency across samples. Keep the environment constant—temperature, humidity, and storage—so each batch follows the same degassing curve. Then cup after the calibrated rest period to compare like‑for‑like.
Timing CO₂ degassing controls bean sweetness, balancing caramel notes and astringency.
- Roast to a defined CO₂ target
- Rest beans 12‑24 h before cupping
- Store in a sealed, temperature‑controlled container
- Measure cup temperature to align with degassing stage
- Record flavor notes to track sweetness consistency
How Grinder Heat Affects Mouthfeel and Texture
Why does your coffee sometimes feel gritty or overly astringent? You’ll notice that grinder heat spikes during a long grind, and that extra warmth pushes the burrs to pulverize beans into fines. Those microscopic particles slip through the filter, amplifying astringency and thinning the perceived body. When the chamber stays cool, particle size stays uniform, yielding a smoother mouthfeel. Try grinding smaller batches or pausing between doses to let the grinder recover; the temperature drops, static reduces, and clumping fades.
Low‑friction stainless‑steel burrs generate fewer fines than worn or coated ones, so replace them before they roughen particles. Controlling dwell time and noise also stabilizes texture, letting each cup deliver consistent, pleasant mouthfeel.
Map Acidity Arrival, Sweetness Balance, and Body Movement
When you sip the first drop, the acidity arrives like a bright spark, quickly peaking and then receding, while the sweetness that follows tempers that sharpness and adds mid‑palate weight. You then track Body movement as texture shifts from silky entry to fuller finish, noting how polysaccharides and temperature shape mouthfeel. Mapping these phases lets you adjust grind, temperature, and brew ratio to balance brightness, sweetness, and texture.
- Observe Acidity arrival timing and peak intensity.
- Identify the point where sweetness balances the sharpness.
- Note how Body movement evolves from entry to finish.
- Correlate grind size and water temperature with each sensation.
- Record the overall trajectory to refine future cuppings.
Interpret Retronasal Sensations for Cleanliness and Complexity
After noting how acidity peaks, sweetness balances, and body shifts, you turn attention to the aromas that emerge once the coffee reaches the back of your throat. You focus on retronasal perception, noting how volatile compounds mingle with texture and temperature to shape the aftertaste. As the cup cools, subtle notes surface—floral, nutty, or mineral—revealing complexity that high heat masks. Train your palate to link these retronasal cues with mid‑palate sweetness and acidity, judging whether the finish feels clean or muddied. Record each aftertaste impression separately from initial aroma and palate scores, then compare across samples. This disciplined evaluation highlights how nuanced retronasal flavors contribute to overall cleanliness and perceived complexity.
Translate Cupping Structure Into Espresso Shot Profiles
How can you map the three‑stage cupping framework—acidity arrival, mid‑palate sweetness, and tactile weight—directly onto an espresso shot? Treat each stage as a cue for extraction parameters. Adjust grind size, brew ratio, and temperature to let acidity surface early, let sweetness build on the mid‑palate, and finish with a body‑enhancing texture. Use the cupping finish dynamics to decide whether the shot ends clean, short, or lingering, matching the coffee’s sensory story.
- Set a higher brew temperature to amplify early acidity.
- Fine‑tune grind for a balanced mid‑palate sweetness.
- Manipulate pressure ramp to control tactile weight and body.
- Align extraction time with the cupping CO₂ degassing window.
- Monitor retronasal cleanliness to preserve texture throughout the shot.
Record Sensory Data With the 100‑Point Cupping Form
Ever wondered how to turn a fleeting tasting into reliable, comparable data? Grab the 100‑point cupping form and start with the aroma column. Smell the dry grounds, jot a brief descriptor, then repeat after adding water, noting any shift. Move to the palate section, sip at 70 °F, then at 85 °F, recording body, acidity, and flavor intensity each time. Use the benchmark descriptors—bright, muted, floral, nutty—to anchor your scores, ensuring consistency across coffees. As you fill in each line, you’re creating a numeric snapshot that ties sensory impressions to a total score between 70 and 100. This systematic capture reduces reliance on memory, lets you compare beans side‑by‑side, and builds a shared language for calibration discussions.
Compare Cupping Sessions to Isolate Roasting Effects
Grab the 100‑point cupping form you just filled out and set up a side‑by‑side comparison where the only variable is roast level. Follow a strict cupping protocol: keep grind size, water temperature, and brew ratio constant, then taste light, medium, and dark roasts in random order with rest periods between samples. Note aroma volatility, acidity arrival, sweetness, body, finish, and persistence at the same tasting temperature. Record each impression on the form, then isolate roasting effects by looking for consistent shifts across the variables.
- Keep grind, temperature, and ratio identical
- Use a 1:18 brew ratio for every sample
- Randomize tasting order, add rest periods
- Focus on aroma volatility and retronasal notes
- Compare finish length and structural perception
Refine Espresso Recipes Using Coffee Cupping Insights
Ever wondered how your cupping notes can shape a perfect espresso? You can match grind size, brew ratio, and extraction targets to the acidity phases and mid‑palate sweetness you recorded. When the cupping profile shows a bright, early acidity, dial a finer grind and a higher tamp pressure to capture that snap in the espresso’s first sip. If the sweetness lingers, increase dose and extend contact time to let the body carry it through the finish. Use the temperature curve you observed—hot aromas fading as the cup cools—to set the brew temperature a few degrees lower, preserving crema stability and aroma release at peak flavor. Finally, reference your cupping scorecard (80+ points) when choosing beans and roast levels, ensuring the espresso’s aftertaste mirrors the clean, lingering finish you love.
Frequently Asked Questions
How Does Ambient Humidity Affect Cupping Aroma Perception?
You’ll notice humidity dampens volatile compounds, so aromas seem muted and less distinct; higher moisture traps scents, while dry air lets them soar, making your cupping experience shift noticeably.
Can Cupping Results Be Standardized Across Different Water Sources?
Yes, you can standardize cupping results across water sources by calibrating mineral content, temperature, and pH, then using identical brewing parameters and a reference flavor wheel to compare scores consistently.
What Is the Optimal Cup Material for Consistent Temperature During Cupping?
You should choose double‑walled ceramic cups; they insulate well, keep the brew stable, and resist rapid heat loss. Their thickness maintains consistent temperature, letting you evaluate flavor without thermal interference.
Do Cupping Results Change When Using a Different Tasting Spoon Shape?
Yes, you’ll notice a shift: a wider spoon spreads the brew, cooling it faster and muting subtle notes, while a narrow, deeper spoon concentrates aroma and temperature, highlighting brighter flavors.
How Often Should Cupping Tools Be Calibrated for Accurate Measurements?
You should calibrate cupping tools at least once a month, or whenever you notice flavor shifts, temperature inconsistencies, or after any major equipment maintenance, ensuring reliable, repeatable measurements.
In Summary
By mastering advanced cupping, you’ll fine‑tune every espresso shot, turning subtle aroma cues into precise flavor profiles. The controlled setup, grind, temperature, and water chemistry let you isolate roast nuances and translate them into consistent recipes. Recording on the 100‑point form gives you data you can reference, compare, and improve. Ultimately, this scientific approach elevates your craft, delivering richer, more reliable coffee experiences for every customer.


