

Calibrate your scale each morning with a known weight and log temperature and humidity. Set a gravimetric dose (16‑22 g) and verify it after every grind‑size change. Adjust grind size in 0.1 mm steps, keeping dose and extraction time steady, and purge the chute after each tweak. Use a tamper that consistently applies 15‑20 kg pressure, checking it on a scale or pressure sensor. Monitor grouphead temperature (90‑96 °C) and pressure (≈9 bar) before each pull. Track yield (45‑60 ml) and extraction time (20‑22 s) for each shot, and record every adjustment in a digital log. Keep humidity and temperature readings handy, as they affect bean swelling and grind behavior. Train your team on this checklist and sync logs to a cloud dashboard for drift alerts. Continue and, and you’ll discover more detailed troubleshooting steps.
Calibrate Your Scale Daily

Usually you’ll calibrate your scale each morning before pulling a shot, ensuring the dose and yield stay spot‑on. Grab a known calibration weight, place it on the scale, and verify that the reading matches the weight’s label. If it drifts, adjust the scale or note the deviation for later maintenance. Record the result in a log, adding temperature and humidity because environmental shifts can skew readings. Consistent daily checks catch drift early, keeping your espresso dose accurate and your yield repeatable. Over time the log reveals patterns, so you know when a full recalibration or service is due. This routine Calibration habit protects flavor, saves beans, and builds confidence in every cup you serve. Pod capacity and rotation details from your Keurig pod carousel selection can influence how precisely you dose and yield across batches.
Set Consistent Dose With a Gravimetric Grinder
After you’ve logged your scale’s daily calibration, shift focus to the grinder: a gravimetric grinder lets you set the dose by weight, guaranteeing the 16–22 g range for a double shot every time. Start by selecting the target weight on the grinder’s interface, then run a short grind and weigh the output. If the weight deviates, adjust the dosing setting until it matches the recipe. After any grind-size change, purge the chute and re-measure to confirm the new dose aligns with your target. Record each adjustment in a log so you can spot trends caused by temperature or humidity shifts. Consistent gravimetric dosing speeds up workflow, locks in flavor, and ensures repeatable extractions day after day. Filter choices influence taste consistency by shaping how much oil and fines pass through during extraction.
Fine‑Tune Grind Size for Accurate Extraction

How do you lock in the perfect espresso flavor? You start by tweaking grind size while keeping dose, time, and yield constant. A finer grind extracts more quickly, so if your shot tastes bitter, back off a notch; a coarser setting slows extraction, rescuing a sour, weak brew. Use a calibrated scale to weigh both dose and yield, then purge the grinder after each adjustment to clear residual particles. Change only one variable at a time—grind size—to isolate its effect. Check your setting daily because ambient temperature and humidity shift particle behavior. Remember, a coarser grind often requires a higher dose, while a finer grind calls for less. Consistent monitoring keeps your espresso extraction accurate and repeatable. UV protection can help preserve bean quality over time, especially when storing beans between pulls.
Standardize Tamper Pressure (15‑20 kg)
You’ll want to measure your tamping force consistently, so start by using a scale or pressure sensor to verify each press.
If your tamper has an adjustable spring, set it until the gauge reads between 15 kg and 20 kg, then lock it in place.
Finally, calibrate the pressure gauge regularly to keep the window tight and your shots repeatable.
Additionally, ensure your grinder setting remains stable between shots to support consistent extraction espresso consistency.
Consistent Force Measurement
Ever wondered why a perfect espresso shot hinges on the pressure you apply with the tamper? You need to measure tamper pressure each time you pull a shot. Use a calibrated spring‑scale or digital force gauge to hit 15–20 kg. Record the reading, adjust your hand strength, and repeat until you hit the target consistently. Consistent force creates a uniform bed density, which stabilizes flow rate and extraction time. Understanding how tamping consistency interacts with dosing funnel choices can further stabilize results by reducing channeling and uneven extraction Dosing Funnel and ensuring repeatable bed density.
Adjustable Tamper Spring
Measuring tamp pressure with a spring‑scale shows you’re already tracking force, but an adjustable tamper spring lets you set that 15–20 kg target once and hit it every time without guessing. You’ll notice more uniform “mouse tail” flow and richer crema once the spring consistently delivers the right tamper pressure. Adjust the spring tension, then verify with a quick press; the feedback loop becomes instant, eliminating guesswork and hand‑strength variance. Regular calibration with an adjustable tamper can align tamping force with grinder and machine performance, preserving consistency across batches calibration consistency. Set the spring to 15 kg for lighter roasts, then test a shot. Increase to 20 kg for darker beans, watching for steady flow. Re‑check weekly to keep the tamper pressure in sync with grinder and machine calibrations.
Pressure Gauge Calibration
This Morning with Her Coffee Wall Art Print
- Subtopics: 6 (This Morning with Her Coffee Wall Art Print) and 10 (New York Newspaper Style Coffee Motivational Canvas Wall Art) is not applicable; instead Subtopic 10 is New York… so only Subtopic 6 and Subtopic 10 under 15; However for grouping, include:
- Print Size: 8×10 inches
- Frame Status: Unframed
- Print Material: Thick shimmer paper with archival inks
- Design Style: Romantic/sentimental quote
- Quantity: Single print (with transparent folder)
If you’d like, I can reorganize into a clean, reader-friendly catalog layout (sections by theme, with bullets for specs) or into a grid-friendly table. Additionally, ensure you regularly verify tamping pressure and maintain your equipment calibration for consistent extraction across shifts. Framing and Display Flexibility Across Rooms
Check Grouphead Temperature and Pressure
Wondering if your espresso machine is pulling consistently? You need to verify both temperature and pressure every day. Start by running a quick thermometer calibration on the group‑head probe, then confirm the reading sits between 90 °C and 96 °C (194 °F–204 °F).
Consistently verify espresso temperature (90‑96 °C) and pressure (≈9 bars) daily for optimal extraction.
Next, pull a shot and watch the pressure gauge; it should hover around 9 bars without spikes.
Finally, log the numbers for several shots to spot drift early and schedule maintenance before performance suffers.
- Use a calibrated thermometer to check probe accuracy.
- Measure pressure during shot pulling; aim for stable 9 bars.
- Record temperature and pressure trends across multiple extractions.
Keep in mind that maintaining a stable counter setup, including a properly organized workspace for your gear, can help ensure consistent workflow and results. Stability features
Set Espresso Yield and Extraction Time
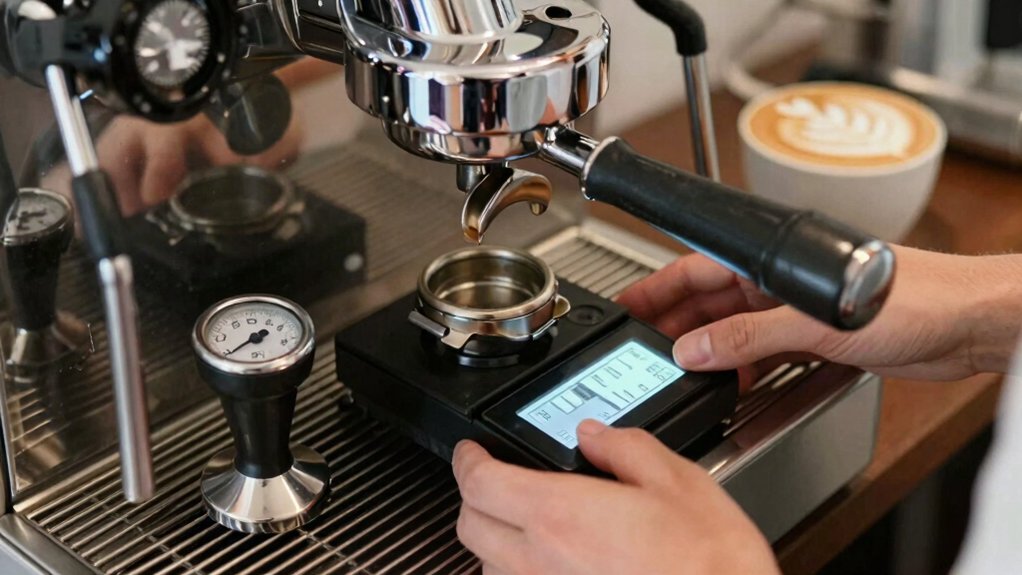
You’ll start by aiming for a consistent yield—typically 45‑60 ml for a double shot—while watching the extraction clock.
Keep the timer between 25 and 30 seconds, and verify the shot weight on a scale to confirm you hit your target.
If the brew finishes too quickly or yields too little, tweak the grind or dose one step at a time.
Yield Target Consistency
Consistent espresso yield and extraction time are the backbone of a reliable shot, so you’ll want to dial in a 45–60 ml target—often 55–60 ml—within 20–22 seconds and keep the overall extraction window between 25 and 30 seconds. To lock that yield, weigh your dose, set a timer, and watch the flow. Small grind‑size tweaks shift dose: a coarser grind bumps dose up, a finer grind pulls it down, changing yield. If you finish under 18 seconds or exceed 1 oz, adjust one variable at a time.
- Record dose and yield for each shot.
- Change grind size only after confirming dose stability.
- Re‑measure extraction time after each adjustment.
These steps keep your yield consistent shot‑to‑shot.
Extraction Time Monitoring
After locking in a stable yield, the next step is to keep the extraction time on target. You’ll want a timer built into your scale so each pull records seconds precisely. Aim for 25–30 seconds for a double shot, but note that a 19.5–20 g dose often lands at 20–22 seconds with a 55–60 ml yield. If the clock runs fast, coarsen the grind or increase dose; if it lags, go finer or cut dose. Re‑check grind calibration after each adjustment, purge the grinder, and tweak only one variable at a time to stay consistent.
| Variable | Target |
|---|---|
| Dose (g) | 16–22 |
| Yield (ml) | 45–60 |
| Extraction time (s) | 25–30 |
| Reference (Uganda) | 20–22 s, 55–60 ml, 19.5–20 g |
Shot Weight Verification
How can you guarantee that each espresso shot hits both the desired yield and the proper extraction window? Use gravimetric dosing and a scale‑assisted timer to measure dose and yield precisely. Aim for a 55–60 ml yield in 20–22 seconds; if the flow rate drops below 18–20 ml per second or the shot finishes too fast, tweak your grind calibration or dose. Purge the grinder after any size change and re‑check the weight to stay within the 45–60 ml range.
- Weigh the dose, pull, and record the final shot weight.
- Adjust grind calibration in 0.1 mm increments if the yield is off.
- Re‑measure after each tweak until the extraction time lands in the 20‑22 second window.
Troubleshoot Common Yield and Time Issues
Ever notice your espresso spilling out in under 18 seconds with a yield over 1 oz? That tells you the grind is too coarse or the dose is off. Start with grind calibration: adjust the burrs a notch finer, purge the grinder, then pull a shot. If the time still falls short, tweak the dose by a gram or two. Keep the grouphead temperature between 90–96 °C and pressure around 9 bars; any drift will skew results. Track each change, monitoring both yield (aim for 45–60 ml per double) and extraction time (25–30 seconds). By altering one variable at a time, you isolate the culprit and bring your espresso back into the sweet spot.
Log Espresso Calibration Data Digitally
Want to keep your espresso machine humming like a well‑tuned orchestra? Start logging every calibration step digitally so you can trace who adjusted what and when. A clean, searchable record cuts downtime and keeps flavor consistent.
Log each espresso calibration digitally to trace adjustments, reduce downtime, and maintain perfect flavor consistency.
- Capture date, time, personnel, and before/after readings in a standardized checklist.
- Attach photos or diagrams of gauge positions and thermometer readings for each shift.
- Sync the log to a cloud dashboard that flags drift and suggests the next calibration.
Track Humidity and Temperature for Grind Consistency
You’ll notice that a rise in humidity can make your grind a bit coarser, so you’ll need to tweak the settings to keep your shots consistent.
Keep an eye on temperature, too, because it shifts bean moisture and affects extraction time.
Ary Control Humidity
How does humidity affect your grind consistency? Moist air makes beans swell, altering flow through the burrs and shifting dose. You need to monitor ambient conditions and adjust promptly.
- Place a hygrometer and thermometer near the grinder; record readings each shift.
- When humidity jumps more than 5 %, purge the burrs and re‑test a sample grind.
- Log temperature, grind setting, dose, and yield in a calibration notebook to spot trends.
Adjust Grind Settings
Ever notice how a sudden rise in humidity or a slight temperature shift can throw off your grind consistency? Those changes alter particle size effectiveness, so you must recalibrate regularly to hit your extraction targets. Start by purging the grinder after any environmental shift, then use gravimetric dosing tied to a fixed grind setting. Adjust the grind first, keeping dose and yield constant, and record the humidity and temperature for each trial. Documenting these variables lets you anticipate when the next grind calibration is needed, keeping acidity, sweetness, and bitterness balanced.
| Condition | Humidity | Temperature |
|---|---|---|
| Low | 30% | 18 °C |
| Moderate | 45% | 22 °C |
| High | 60% | 26 °C |
| Very High | 75% | 30 °C |
| Extreme | 90% | 35 °C |
Teach Your Barista Team to Follow the Calibration Checklist
Ever wondered why a perfectly pulled shot can still taste off? You’ll find the answer in a disciplined calibration routine that every barista follows. Start by handing out a standardized checklist with visual cues, then train the crew to log each step in the digital system—date, operator, readings, adjustments, and ambient conditions. Emphasize one‑variable‑at‑a‑time tweaks so they never chase phantom issues.
- Verify daily temperature and pressure with calibrated thermometers and gauges.
- Check group‑head flow and steam‑wand performance before service.
- Perform weekly burr alignment, grind‑size distribution, and dosing accuracy checks, documenting results for traceability.
Consistent practice turns calibration from a chore into a habit, keeping every shot on point.
Frequently Asked Questions
What Is the 15-15-15 Rule for Coffee?
You follow a 15‑second pre‑infusion, then a 15‑second extraction, and finish with a 15‑second post‑infusion or rest, keeping the whole espresso shot around 45 seconds for balanced sweetness and acidity.
What Is the 80 20 Rule for Coffee?
You get that roughly 80% of flavor comes from 20% of variables—mainly grind size, dose, water quality, and temperature—so focus your tweaking on those few factors for biggest taste improvements.
How to Do Calibration in Coffee Machine?
You’ll start by checking temperature with a calibrated thermometer, then verify pressure at 9 bars while pulling a shot, record flow rates, steam wand pressure, and log all readings before adjusting any settings.
What Is the 2:1 Rule for Espresso?
You follow the 2:1 rule by aiming for a liquid espresso weight roughly twice your coffee dose—so a 20 g dose should produce about 40 g (≈40 ml) of espresso, adjusting grind or time if it drifts.
In Summary
By mastering these calibration steps, you’ll consistently pull perfect shots, keep waste low, and boost your café’s reputation. Stick to daily scale checks, gravimetric dosing, precise grind tweaks, and steady tamp pressure. Monitor grouphead temperature, pressure, and environmental factors, and log everything digitally. Train your team on the checklist, and you’ll turn every cup into a reliable, high‑quality experience that keeps customers coming back.


