

Set your machine to 9 bars and 200 °F, then weigh 18–20 g of coffee and grind it so the shot pulls in 25–35 seconds. Tamp flat with about 30 lb of pressure, keeping the puck uniform to avoid channeling. Aim for a 1:2–1:2.5 brew ratio, adjusting grind finer if the pull is too fast and coarser if it drags. Fine‑tune temperature a few degrees for light or dark roasts, and watch the flow for consistency. Keep this routine tight and you’ll reveal deeper tricks.
Core Extraction Variables

Pressure, temperature, dose, grind size, tamp, and brew ratio shape every espresso shot. You set pressure around nine bars, then adjust grind size to control flow and shot time. If the brew hits target yield in fifteen seconds, grind finer; if it drags past fifty seconds, coarsen. The dose, usually seventeen to eighteen grams, determines puck integrity and how evenly water spreads. A level tamp creates a uniform resistance, letting pressure push water consistently. Finally, the brew ratio—commonly 1:2 to 1:2.5—defines how much water extracts from the coffee, balancing strength and clarity. Together, these variables dictate flavor, body, and the perfect thirty‑second pull. Extraction science shows how small adjustments compound to dramatic taste changes.
Setting the Right Pressure & Temperature Baseline
Ever wonder why most espresso machines lock in at 9 bars and 200°F (93°C)? You’ll find that espresso pressure at 9 bars gives a steady flow, while 200°F (93°C) sets the thermal baseline for consistent extraction timing. Keep pressure stable, then tweak temperature to fine‑tune flavor intensity.
When you raise the temp, extraction speeds up and flavors intensify; lowering it slows extraction, softening bitterness. Stick to the 9‑bar target, adjust temperature as a secondary lever, and watch your shots become reliably balanced.
A well‑calibrated brew workflow also benefits from integrating data tools like refractometers or compatible kits that track extraction metrics over time, helping you verify that your target balance remains consistent across batches. ATC-enabled refractometers and multi‑parameter kits can provide precise, repeatable readings that correlate with taste outcomes.
Choosing the Ideal Coffee Dose
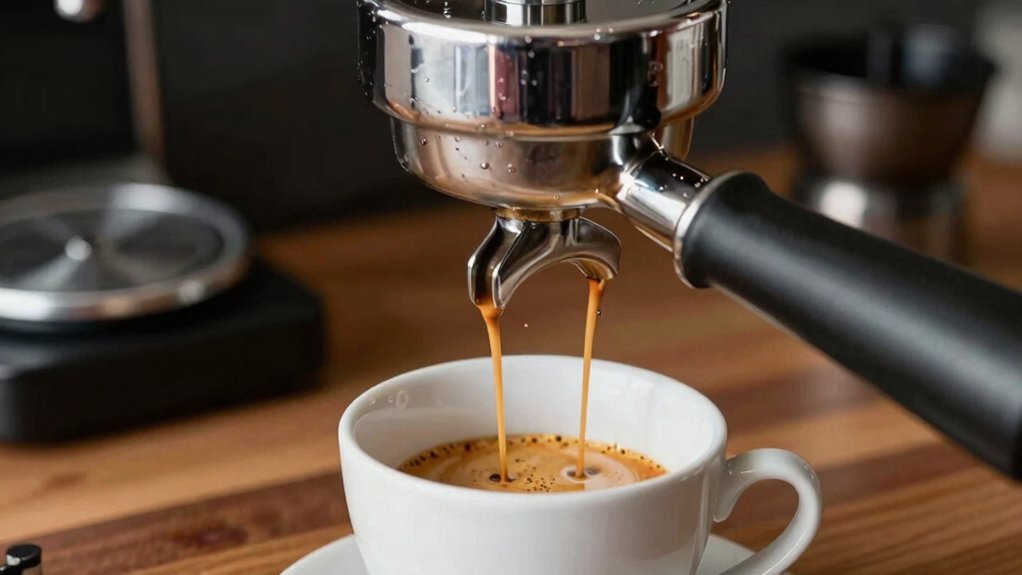
What dose should you lock in for a reliable double shot? Aim for 18–20 g of coffee in a 17–18 g basket; a 20 g dose is a solid starting point. Weigh the dose on a scale each time—precision drives consistency and steadies extraction. If you under‑dose, the water rushes through, yielding a thin, under‑extracted shot; over‑dosing can press the puck into the shower screen, causing channeling and uneven flow. In addition, ensure your setup includes a cart with built-in power outlets to keep your grinder and espresso machine ready for quick, reliable operation Power Outlets and to promote safer cable management during busy service.
Perfecting the Tamp: Pressure, Levelness & Puck Uniformity
A solid 20 g dose sets the stage, but the real key to a consistent double shot lies in how you tamp. First, wipe the portafilter dry and check for any coffee residues; portafilter cleanliness prevents a weak grip and uneven compression. Load the grounds, then apply a steady tamping pressure of roughly 30 lb. Press down until the coffee forms a smooth, flush surface, then give the tamper a gentle twist to create a level tamp. This motion eliminates creases and promotes puck uniformity. When you lift the tamper, the puck should appear compact, flat, and free of hollows. Consistently reproducing this process yields even water flow, reducing channeling and delivering reliable extraction. Regular maintenance of your grinder and portafilter helps sustain consistent grind size and tamp results over time, which supports stable extraction and flavor. portafilter cleanliness
Mastering Grind Size for a 25‑35‑Second Shot

How do you keep your espresso shot consistently within the 25‑35‑second window? Start by dialing in a dose of 18–20 g and aim for a 1:2 to 1:2.5 brew ratio. Then adjust grind size until the extraction time hovers around 30 seconds. A finer grind adds resistance, lengthening shot timing; a coarser grind reduces resistance, shortening it. If the shot pulls under 25 seconds, tighten the grind; if it drags past 45 seconds, loosen it. Keep tamp pressure, puck flatness, and water temperature (≈200 °F/93 °C) constant so the grind size directly controls shot timing. By fine‑tuning grind size you’ll reliably hit the desired extraction time and maintain a balanced brew ratio. A metal filter option can influence body and oil retention during extraction stainless steel reusable filter and may affect the perceived timing of the shot.
Spotting Under‑ vs. Over‑Extraction by Taste
Ever notice a sour, almost metallic bite that disappears as quickly as it appears? That’s under‑extraction, usually caused by a grind that’s too coarse or a shot timing under 25 seconds. The taste will be sharp, salty, and missing the caramel sweetness you expect. If the brew lingers past 45 seconds or the grind is too fine, you’ll get a bitter, astringent mouthfeel and a dry finish—classic over‑extraction. Aim for a 25‑35‑second window to hit a balanced profile. When a shot meets the 1:2 ratio but still tastes sour, tighten the grind or extend extraction a few seconds. Mixed sour‑bitter notes often point to uneven extraction, so check tamp evenness and grind consistency. Adjusting grind and shot timing lets you dial in the perfect taste. A precise espresso shot ratio and dedicated equipment alignment support consistent results across home setups and professional cafés.
Brew Ratio Calculations: Ristretto, Normale & Lungo
You’ll start by setting a ristretto ratio around 1:1‑1:1.5, which gives a dense, intense shot.
Move to a normale 1:2 ratio—say 18 g to 36 g—to hit a balanced sweetness and body.
Then stretch to a lungo at 1:2.5‑1:3 for a lighter, more acidic cup. The process benefits from precise timing using an espresso timer to maintain consistency across shots Best Portable and across machines.
Ristretto Ratio Guide
A Ristretto typically runs at a brew ratio of 1:1 to 1:1.5, meaning an 18‑gram dose yields about 18–27 grams of liquid, delivering a denser body and more concentrated flavors than a standard shot. When you dial in espresso extraction, keep the ristretto ratio low to boost flavor concentration; a tighter ratio extracts fewer bitter compounds while preserving sweet and caramel notes. Start with 1:1.5 for lighter roasts, then shift toward 1:1 if you crave an even tighter body. Adjust grind size and pressure to maintain consistent flow, and watch the weight to stay within the target range. For 58mm baskets, consider non-pressurized designs that optimize extraction consistency and reduce channeling as you experiment with tighter ratios extraction consistency.
Normale to Lungo Ratios
How do you move from a tight ristretto to a mellow lungo without guessing? Start by setting a clear espresso brew ratio. For a normale, aim for a 1:2–1:2.5 ratio—if you dose 18 g, pull 36–45 g of liquid. To stretch to a lungo, increase the ratio to 1:2.5–1:3 or higher; a 20 g dose should yield 50–60 g. This extra water dilutes the body, lifts sweetness, and reduces bitterness, but watch for over‑extraction.
Adjust grind size co bit coarser and extend the shot time to hit the target yield. By measuring dose and yield, you control flavor intensity, moving smoothly from a concentrated normale to a balanced lungo.
Fine‑Tuning Temperature for Light vs. Dark Roasts
You’ll find that a light roast thrives when you keep the brew temperature close to 200 °F and watch for any acidity spikes, so a tiny increase can sharpen sweetness. With a dark roast, you can drop the temperature a few degrees to curb bitterness and preserve body. Adjusting each roast’s temperature in this way lets you fine‑tune the shot without changing grind or timing.
Roast Temperature Adjustments
Ever wondered why a light roast sometimes needs a hotter brew while a dark roast thrives at a cooler temperature? You’ll find that temperature is the lever that shapes extraction for each roast. Start at 200 °F (93 °C) and fine‑tune: raise 2–3 °C for light roasts to brighten acidity, or lower the same amount for dark roasts to keep bitterness in check. Watch how sweetness and body shift as you adjust—higher heat extracts fuller‑bodied solubles, while cooler water preserves bright notes. A PID‑controlled machine locks in those adjustments, preventing drift and delivering consistent flavor every pull.
- Feel the surge of floral acidity when you warm a light roast.
- Taste the silky sweetness that emerges from a cooler dark roast.
- Experience the balance of body and clarity with precise temperature tweaks.
- Enjoy the confidence of repeatable, perfect extractions.
Dark Roast Temperature Adjustments
Why settle for a one‑size‑fits‑all brew when dark roasts thrive at slightly cooler temperatures? You’ll find that a brew temperature of 195–198°F (90–92°C) curbs bitterness and protects the body of a dark roast. Start with a medium‑fine grind size and watch the extraction balance; if the cup tastes sour or thin, nudge the temperature up a degree, but avoid exceeding 200°F to prevent harsh notes. Pair each dark roast adjustment with a slight grind tweak—finer if you raise temperature, coarser if you lower it—to keep flow even and prevent channeling. Remember, light roasts stay at 200°F or higher, so treat dark beans as a separate, cooler‑focused recipe for optimal espresso.
Diagnosing Extraction Issues: Channeling, Uneven Flow, Puck Contact
How can you spot channeling before it ruins a shot? You’ll see a thin, fast stream, mottled crema, or a bitter‑sour split in flavor. A puck that’s not flat or level creates micro‑gaps, letting water carve low‑resistance paths. When the puck contacts the shower screen unevenly, the flow becomes erratic, and extraction turns patchy. Check the dose, tamp pressure, and grind size; consistency is key.
- Watch the espresso plume: a thin, rapid jet signals channeling.
- Feel the puck after brewing; uneven pressure indicates uneven flow.
- Inspect the shower screen for puck edges that cling or lift.
- Taste the shot: sudden bitterness or sourness reveals partial extraction.
How to Tweak Grind, Dose, or Ratio in Real Time
Want to fine‑tune your espresso on the fly? Lock in a consistent dose—say 18 g—then watch the extraction time. If it pulls in 15 seconds, turn the grind size finer; if it drags past 50 seconds, go coarser. Aim for a brew ratio between 1:2 and 1:2.5, meaning an 18 g dose yields 36–45 g liquid. Start with a 1:1.5‑1:2 ratio, taste, and tweak the ratio to balance sourness and bitterness. Make only tiny grind adjustments between pulls, re‑measure yield with a scale, and note how each change shifts flavor without dramatically altering dose or extraction time. This incremental approach isolates the impact of grind size, dose, and brew ratio, letting you dial in the perfect shot in real time.
Espresso‑Based Milk Drinks: Texturing for Latte Art
After dialing in grind, dose, and ratio, the next step is shaping the milk that will carry your latte art. You’ll steam the milk to about 130 °F (54 °C) in 8‑10 seconds, keeping the wand tip just below the surface and off‑center. Start with a brief air infusion, then close the valve and swirl to create a glossy, velvety microfoam. The steady 1.5–1.7 bar pressure lets you control texture without forcing high pressure, preserving the silky sheen that blends seamlessly with the espresso extraction. When you pour, use a controlled wrist motion and steady speed to sculpt your design, letting the microfoam rise into perfect latte art.
- The hiss of steam awakens anticipation.
- A whirlpool of milk mirrors the espresso’s depth.
- Silky microfoam feels like liquid silk on the tongue.
- Each pour becomes a brushstroke of flavor and art.
Repeatable Espresso Routine: Checklist for Consistently Great Shots
Before you pull, run through your pre‑pull checklist: dose, grind, temperature, and pressure. After the shot, do a quick post‑shot review to taste, timing, and any adjustments needed. This routine keeps every pull consistent and lets you fine‑tune one variable at a time.
Pre‑Pull Checklist
Ever wondered how a simple, repeatable routine can lock in consistency shot? shot? Before you pull, you’ll lock the dose, set grind size, and preheat the portafilter so the machine stays at 9 bars and 200 °F. You’ll tamp with even pressure, creating a flat, level puck that guarantees a smooth flow. Then you start the timer the moment the first drop hits, aiming for a 25–35 second shot time that balances flavor and body.
- Verify 20 g dose in a 20 g basket, targeting 1:1.5 brew ratio.
- Adjust grind size to hit 25–35 second shot time; finer slows, coarser speeds.
- Purge group head and preheat portafilter for stable temperature.
- Apply consistent tamping pressure for a level puck.
Post‑Shot Review
Now that the shot’s finished, you’ll evaluate the results to lock in consistency. Begin your post‑shot evaluation by checking shot timing; a 25‑35‑second pull signals proper grind consistency and dose alignment. Record the exact yield and compare it to the 1:2‑1:2.5 ratio. Taste the espresso and jot down flavor notes—acidity, sweetness, bitterness, any sour edge or burnt edge. Observe the puck for channeling or uneven extraction, noting any irregularities. Log temperature and pressure baselines, then decide if you need a finer or coarser grind for the next shot. Keep this checklist tight; each entry guides subtle tweaks, ensuring every espresso meets your repeatable standard.
Frequently Asked Questions
Do I Need to Pre‑Heat the Portafilter Before Brewing?
Yes, you should pre‑heat the portafilter; it stabilizes temperature, prevents heat loss, and ensures consistent extraction, giving you richer flavor and proper crema every time you pull a shot.
How Does Water Hardness Affect Espresso Flavor?
Water hardness changes mineral balance, so you’ll taste more bitterness and less sweetness when it’s high, while softer water highlights acidity and nuanced flavors, letting the espresso’s character shine.
Can I Use a Different Tamping Technique for Single‑Origin Beans?
You can try a lighter, more even tamp for single‑origin beans to preserve their nuanced flavors, but guarantee the pressure stays consistent and the bed remains uniform for proper extraction.
What Impact Does Ambient Humidity Have on Grind Consistency?
You’ll notice that high humidity makes beans retain moisture, so the grind clumps and becomes uneven; low humidity dries them out, giving a drier, more consistent grind, but you may need to adjust dose and tamp pressure accordingly.
Should I Adjust Extraction Time When Using a Pressurized Portafilter?
Yes, you should tweak the extraction time with a pressurized portafilter; shorten it a few seconds to avoid over‑extraction, because the built‑in pressure already intensifies flavor and can make the shot too bitter.
In Summary
Now you’ve got the pressure, temperature, dose, tamp, and grind dialed in, you can pull consistent 25‑35‑second shots every time. Spot channeling or uneven flow quickly, adjust grind, dose, or ratio on the fly, and your milk‑based drinks will texture perfectly for latte art. Follow the checklist, trust your senses, and keep refining—great espresso becomes routine, not a mystery.


