

You need precise steam wand positioning because it directly balances air incorporation with heat transfer, shaping a stable vortex that creates silky micro‑foam without scorching. Keeping the tip 0.5–1 cm below the surface and tilting the pitcher 15–30° produces a whirlpool that stretches the milk, giving a 20–30% volume rise and a glossy, latte‑art‑ready texture. Adjust depth and tilt for whole‑milk or plant‑based milks, and watch the paper‑tearing hiss and temperature cues—these details will guide you to even better results.
How to Position Your Steam Wand for Perfect Milk Foam
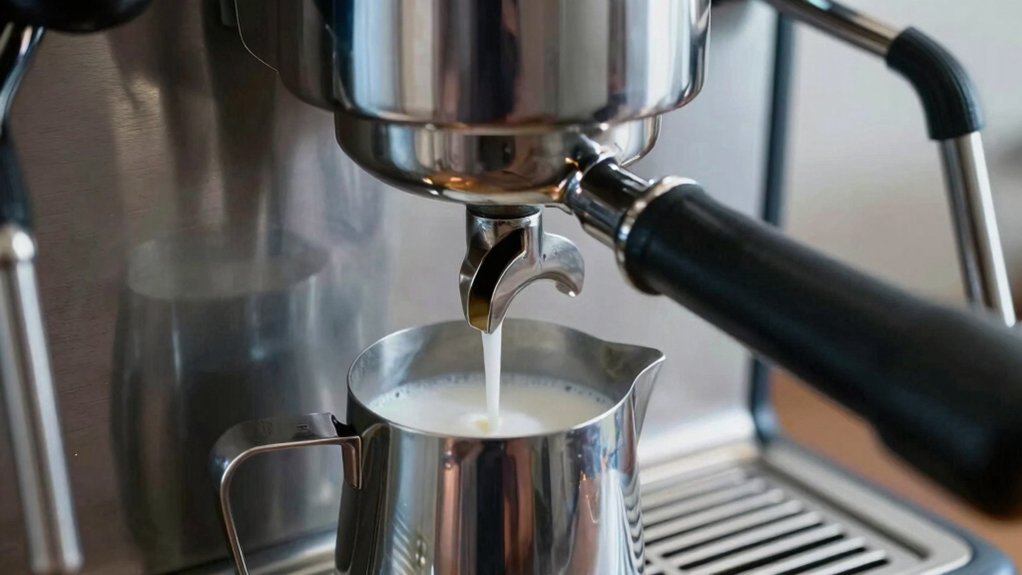
Ever wondered why the perfect milk foam starts with a single tilt? You tilt the pitcher, set the steam wand just below the surface, and watch a whirlpool form as you introduce air. Keep the wand at a pitcher depth of 0.5–1 cm while you hear a gentle paper‑tearing hiss—this is the right moment for air incorporation. After 3–5 seconds, or when the milk reaches about 100 °F, plunge the wand halfway in to heat without destroying the microfoam. Position the wand off‑center, maintaining a slight tilt to sustain the vortex and avoid a stagnant center. Adjust depth, angle, and tilt gradually, listening to sound cues and watching the velvety, glossy microfoam develop. This approach aligns with ensuring stable pH conditions during brewing processes, which can influence texture and flavor outcomes calibration buffers.
Steam Wand Depth: Air Incorporation vs. Heating Efficiency
After setting the wand just below the surface to create a vortex, you now need to balance how deep you plunge it for heating. The steam wand depth you choose directly trades air incorporation for heating efficiency. Keep the tip about 0.5–1 cm below the milk to form microfoam during the stretching phase, where a steady 3–5 second stretch yields a 20–30 % volume increase. If you plunge deeper, heating speeds up but the foam texture degrades; a shallower position preserves texture but slows heat transfer. Adjust depth for different milk types—non‑dairy milks often need a slightly higher immersion to match the same incorporation and even heating. Consistency during the stretch ensures uniform surface positioning and predictable results. This approach aligns with achieving precise temperature control and texture in steam processing, much like how gooseneck kettles provide controlled pouring for consistent brews temperature control.
Steam Wand Pitcher Tilt for a Stable Vortex
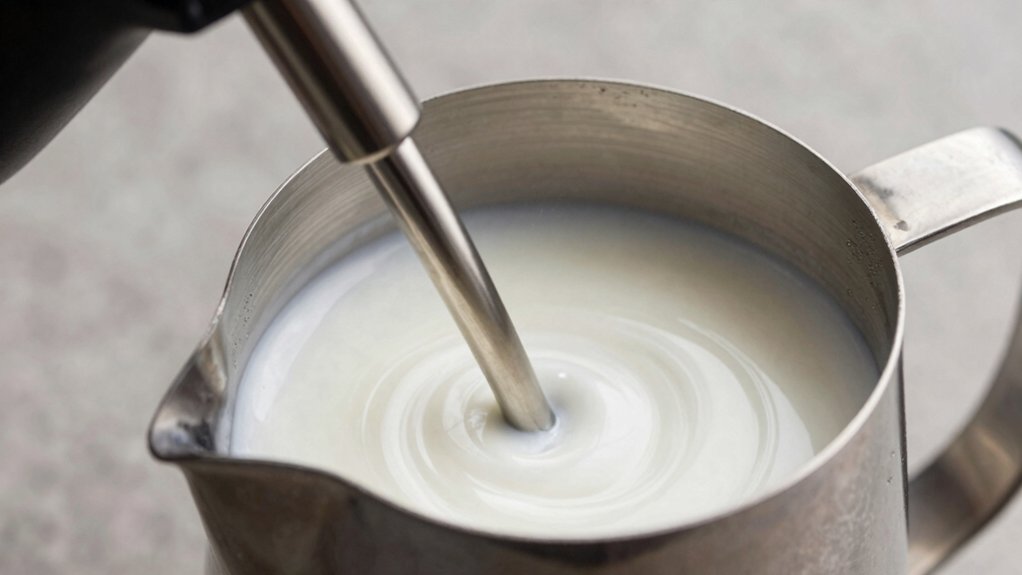
Why does the pitcher’s tilt matter when you’re chasing a steady vortex? Tilting the pitcher 15‑30° shifts the steam wand position just under the surface, letting you stir a stable vortex that pulls air in smoothly. Aim the wand halfway between the pitcher’s center and wall; this prevents an uncontrolled whirlpool and keeps surface agitation gentle enough for consistent microfoam. When the wand barely grazes the liquid, you’ll hear a paper‑tearing hiss— sign of proper air incorporation. Keep the wand angle slight, not vertical, so steam circulates downward‑forward, heating evenly and preserving foam texture. Adjust depth and tilt gradually while stretching, but hold depth steady to sustain the vortex and avoid sudden foam collapse. Double‑layer insulation helps maintain even heat during long pours and preserves foam stability across batches.
Steam Wand Angle to Prevent Splash and Keep Pressure Steady
How does a slight tilt of the steam wand keep splatter at bay and maintain steady pressure? You keep the steam wand angle just off‑vertical, positioning it halfway between the pitcher center and the wall. That creates a tight whirlpool, which prevents splash and holds steady pressure. Start with the wand barely below the surface—about 0.5–1 cm—and use a gentle pitcher tilt to drive steam downward. The angled flow pulls air in smoothly, forming microfoam without explosive bubbles. If the wand drifts too far to the side, the whirlpool becomes chaotic; if it’s dead‑center, you’ll get jacuzzi‑like bubbles that ruin texture. Consistent angle, depth, and gradual depth changes keep the steam pressure steady and the foam silky. Foam texture
Heat Milk to 140‑150 °F After the Stretch Phase
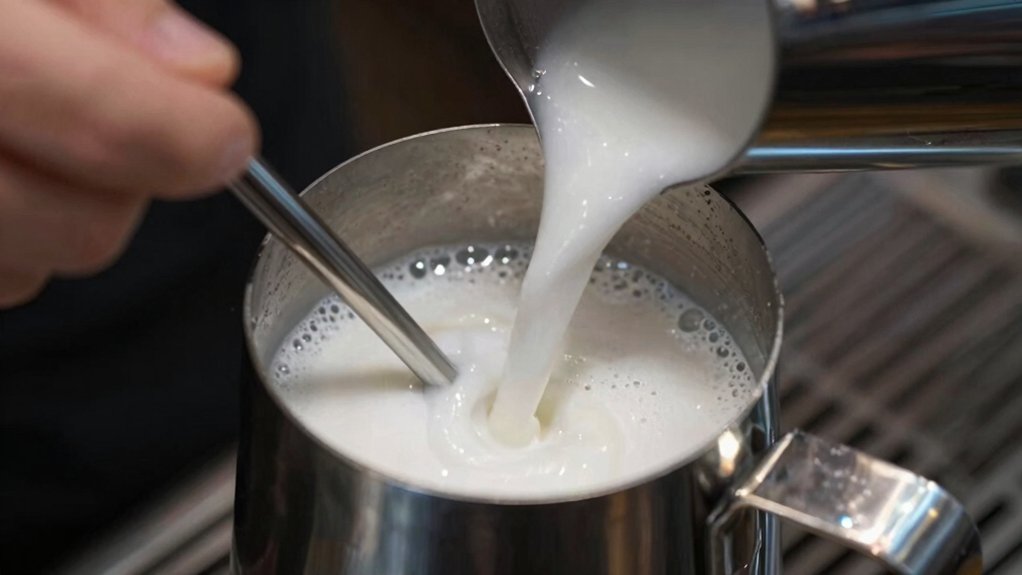
After you finish the stretch, keep the wand deeper in the pitcher and start the whirlpool, letting the milk transition smoothly toward 140‑150 °F. This timing lets the heat spread evenly, preserving the microfoam while you feel the pitcher’s bottom for cues. Temperature control helps maintain consistent warming during the whirlpool without overheating.
Temperature Transition Timing
Ever wondered when to shift from stretching to heating? You’ll know the moment the pitcher feels warm, around 100 °F, and you begin the heating stage. Keep the steam wand depth shallow enough to preserve microfoam stability, yet deep enough for swift temperature control. Watch the thermometer and feel the pitcher—once you hit 140–150 °F you’ve reached the sweet spot. Consistent steam pressure fuels whirlpool circulation, spreading heat evenly. For non‑dairy milks, stay on the lower end of the range to honor their unique behavior and avoid curdling.
Ever wondered when to shift from stretching to heating? You’ll know the moment the pitcher feels warm, around 100 °F, and you begin the heating stage. Keep the steam wand depth shallow enough to preserve microfoam stability, yet deep enough for swift temperature control. Watch the thermometer and feel the pitcher—once you hit 140–150 °F you’ve reached the sweet spot. Consistent steam pressure fuels whirlpool circulation, spreading heat evenly. For non‑dairy milks, stay on the lower end of the range to honor their unique behavior and avoid curdling. The timing of temperature transitions is essential to maintaining steam wand positioning and overall texture.
Whirlwind Heat Distribution
Wondering why the whirlpool matters once you’ve stretched the milk? After the stretch, dip the steam wand deeper—about halfway down the pitcher—so the whirlpool forms and drives heat distribution.
Keep the wand off‑center; this steam wand motion steam wand that consistent and spots spots heating. hot steady pressure and slow, controlled movements to achieve even heating while preserving microfoam.
Use the hand‑on‑pitcher technique to feel the temperature rise and stop at 140–150 °F. Watch the glossy, uniform microfoam as a cue that the whirlpool is working. By mastering steam wand position and whirlpool dynamics, you guarantee thorough heat distribution and a velvety texture without overshooting the target. Digital Milk Frothing Thermometer with Beep Alerts
Listen for Paper‑Tearing and Hissing Sounds
Why listen for that paper‑tearing sound? When you dip the steam wand just 0.5–1 cm below the milk surface and tilt it slightly, a gentle vortex forms. That vortex creates a paper‑tearing sound, confirming proper surface contact and correct aeration timing.
If the sound shifts to a harsh hiss or disappears, you’ve gone too deep or too shallow, and the foam will suffer. Keep the wand at a consistent depth during the stretching phase; the paper‑tearing cue, paired with a gradual volume rise of 20–30 %, signals you’re building a stable microfoam texture.
Trust the auditory feedback to fine‑tune your positioning, and you’ll achieve glossy, velvety milk every time.
Spot Wet‑Paint Foam and Volume Rise
You’ll notice the foam taking on a wet‑paint texture as the milk expands, a clear sign that the volume is rising. When the surface level climbs about a fifth to a third of the original amount, you know the stretching phase is ending. If the rise stalls, shift the wand slightly deeper or off‑center and keep a gentle swirl to restore smooth, uniform foam.
Wet‑Paint Texture
How does a wet‑paint texture feel when you nail the wand’s depth? You set a shallow steam wand depth just under the surface, feeling the tip’s surface contact as a paper‑tearing hiss. That gentle sound cue signals vortex formation, which churns the milk into a glossy microfoam texture. You watch the temperature progression climb from around 100°F while the wand hovers, then deepen to finish at 140‑150°F, ensuring even heat and uniform tiny bubbles. Your hand on the pitcher bottom confirms the heat spreads evenly, preventing large pockets. The result is a smooth, velvety foam that looks and feels like wet paint, ready for latte art without any split or stiff foam.
Volume Expansion Indicators
The wet‑paint texture you just created is only the first sign that your wand is in the right spot; the next cue appears as the milk’s volume climbs 20‑30 % while you stretch it. You’ll notice a smooth volume expansion when you keep the steam wand position shallow—about 0.5–1 cm below surface—and maintain a gentle whirlpool effect. A slight off‑center wand placement combined with a pitcher tilt creates a steady vortex that stretches the microfoam texture without forming large bubbles. After 3–5 seconds of stretching, plunge the wand halfway into the pitcher to preserve the foam while heating, avoiding overheating or too deep a wand depth.
- Shallow wand depth below surface
- Off‑center steam wand position
- Pitcher tilt for whirlpool effect
- Timed plunge to sustain microfoam texture
Adjust Position for Whole Milk vs. Plant‑Based Alternatives
Why does wand placement matter when switching between whole milk and plant‑based alternatives? With whole milk, you keep the steam wand positioning shallow—about 0.5–1 cm below the surface—and tilt slightly to generate a tight whirlpool/air injection that yields smooth microfoam and a 20–30 % volume rise.
Plant‑based milks need deeper wand depth and a different angle because they lack the protein that stabilizes foam; you’ll stretch longer and adjust the whirlpool to avoid large bubbles. Oat and soy respond well to prolonged aeration, while almond may require a more aggressive position. Start with cold milk, purge the wand, then fine‑tune each milk type to keep the whirlpool steady and the foam texture consistent.
Fix Common Positioning Mistakes and Account for Ambient Conditions
Ever noticed your milk turning watery or scorching despite perfect wand depth? You’re probably missing subtle cues. Fix common positioning mistakes and account for ambient conditions by treating each brew as a dynamic system. Adjust the steam wand position with intent, and you’ll consistently hit the ideal whirlpool, foam texture, and air incorporation.
- Purge the wand first; steady pressure prevents soggy or burnt milk.
- Set depth and angle just below the surface (0.5–1 cm) and tilt 15–30° to keep the whirlpool off‑center.
- Watch ambient conditions—room temperature and humidity shift foam development, so tweak tilt or depth accordingly.
- Listen for the paper‑tearing sound during air incorporation and feel the foam texture change; let these cues guide fine‑tuning.
Adapt Positioning for Ambient Temperature and Milk Freshness
Is your milk consistently too thin or too thick when the room’s temperature shifts? You can fine‑tune the steam wand position to match ambient temperature and milk freshness, keeping texture progression smooth. In cooler rooms, deepen the wand and stretch a bit longer to build a stable vortex; in hotter spaces, pull the wand up near the surface for gentle aeration. Fresh, cold milk holds a tighter vortex, so adjust wand depth to avoid over‑stretching. Listen for the paper‑tearing hiss and watch the foam thickening; those cues tell you when to shallow or deepen placement, preserving your microfoam technique.
| Condition | Recommended Wand Depth |
|---|---|
| Cold room, fresh milk | Deeper, near bottom |
| Warm room, fresh milk | Shallow, near surface |
| Cold room, aged milk | Slightly deeper, moderate |
| Warm room, aged milk | Shallow, gentle tilt |
| High humidity | Adjust angle, maintain vortex |
Use Positioning to Achieve Consistent Latte‑Art Results
Ever wondered how a tiny shift in wand placement can turn a shaky pour into a flawless rosette? You’ll notice that precise steam wand positioning creates a steady whirlpool effect, giving you a silky microfoam texture that holds its shape when you pour. By mastering pitcher technique—tilting just enough, keeping the wand 0.5–1 cm below the surface—you control milk stretching and avoid large bubbles. Adjust the angle for non‑dairy milk handling, letting the foam develop longer for the same glossy finish.
- Keep the wand slightly off‑center for a stable whirlpool.
- Tilt the pitcher to submerge the wand just beneath the surface.
- Listen for a gentle paper‑tearing sound as you stretch the milk.
- Extend stretching time for non‑dairy milks to match microfoam quality.
Frequently Asked Questions
How to Position a Steam Wand?
Place the wand 0.5–1 cm below the milk surface, tilt the pitcher slightly, and keep it midway between center and wall. Adjust depth and angle as you hear hissing and watch the foam texture.
What Are Common Steam Wand Problems?
You’ll see sputtering, large bubbles, thin microfoam, burnt flavor, and uneven temperature when the wand’s too shallow or deep, you skip purging, or you overheat the milk beyond 160°F.
What Are Some Common Steamed Milk Mistakes?
You often over‑heat, insert the wand too deep, neglect purge, or aerate too late—causing weak microfoam, large bubbles, burnt flavor, and watery texture. Keep the wand shallow, purge briefly, and stop steaming once 130‑150°F is reached.
What Are Common Milk Frother Mistakes?
You often plunge the wand too deep or too shallow, forget to purge before steaming, keep an inconsistent depth, aerate at the wrong moment, or use the wrong milk type or temperature, ruining foam texture.
In Summary
Mastering wand‑wand placement lets you control air, heat, and texture in one smooth motion. Keep the tip just below the surface, tilt the pitcher for a tight vortex, and angle the wand to avoid splashing. Adjust depth for dairy or plant milks, and tweak for room temperature and freshness. By fine‑tuning these variables you’ll hit the perfect 140‑150 °F temperature, create silky foam, and consistently pull flawless latte art.


