

Start with cold whole milk, filling a stainless‑steel pitcher a third full, then purge the wand. Tilt the pitcher 45°, dip the tip just below the surface, and hiss for 3–5 seconds to expand volume about 20 %. Keep a steady vortex, watching the hiss turn low and steady as the milk climbs to 140 °F (60 °C). Stop, tap, swirl, and let it rest a few seconds before pouring a smooth, glossy microfoam that’s ready for latte art—more tips await if you keep going.
Microfoam 101: Definition & Latte‑Art Role

Microfoam is a silky, glossy layer of ultra‑fine bubbles that you create by steaming milk, and it’s the foundation of any good latte‑art. When you introduce steam, you trigger aeration that forces tiny air pockets into the liquid. Milk proteins then denature, forming a network that traps those microbubbles and yields a glossy texture. You must keep temperature control tight—around 140‑150 °F—so proteins stabilize without curdling. The result is a smooth, paint‑like surface where each microbubble stays under 1 mm, allowing you to pour rosettas, tulips, and swans without the foam breaking apart. Mastering this balance lets you turn steamed milk into the perfect canvas for latte art. ATC
Choosing the Right Milk: Whole vs. Non‑Dairy for Microfoam
After mastering the basics of microfoam, the next step is picking the milk that will give you the best texture. Whole milk, with its 3‑4% fat content and ~3.2 g protein per 100 ml, creates glossy, velvety microfoam and strong stability. Its balanced sweetness helps you achieve a smooth texture without over‑steaming. When choosing, consider how your chosen milk interacts with the brewing method and the overall flavor profile you’re aiming for, particularly if you’re using a machine with precise temperature control temperature control options.
What Gear You Really Need for Perfect Microfoam
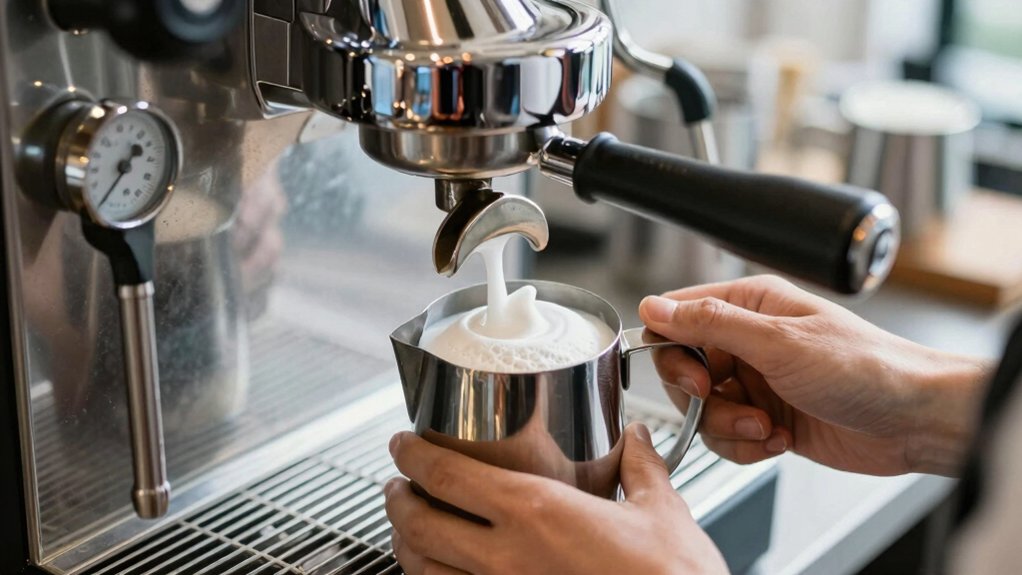
You’ll want a reliable espresso machine with a precise steam wand, a sturdy stainless‑steel pitcher (350–600 ml), and a thermometer to keep the milk in the 55–65 °C sweet spot. The wand design should enable easy, accurate control of texture, and a robust steam wand for high‑pressure frothing can enhance crema quality. PID temperature control helps maintain consistent extractions and steaming performance across sessions.
Quality Pitch
Ever wonder which tools truly make a difference when crafting silky microfoam? You need a stainless‑steel pitcher (300‑600 ml), a reliable steam wand, and a thermometer. Fill the pitcher a third full with cold milk, purge the wand, then tilt it 45° and dip the tip just below the surface. A four‑hole tip spins a steady vortex, injecting air evenly for a glossy texture. Aim for 60 °C (140 °F) to lock in sweetness and maintain foam consistency. The setup can be organized with a compact, modular storage solution that keeps your essential barista gear accessible in tight spaces compact storage.
Steam Wand Precision
How can you turn a simple steam wand into a microfoam‑making powerhouse? Grab a quality espresso machine with a precision steam wand and a stainless‑steel pitcher. Purge the wand, then tip it just below the milk surface and about 1 cm from the pitcher’s side to start a gentle vortex. Begin aeration by dipping the wand slightly, listening for a steady hiss, and aim for 2–5 seconds of air to form fine microbubbles. Lower the wand deeper, maintaining the vortex, to heat and texture the milk while blending air evenly. This pitcher technique creates a smooth milk texture and surface microfoam with bubbles under 1 mm. Stop steaming around 60 °C (140 °F) to preserve sweetness and achieve glossy, paint‑like microfoam perfect for latte art precision steam wand and keep the texture consistent across sessions.
Thermometer Usage Guidance
Why settle for guesswork when a simple thermometer can lock in the perfect microfoam temperature? You’ll find thermometer usage the fastest route to a reliable milk temperature and that sweet spot. The right thermometer also supports consistent results across multiple batches 1:1 substitution in your technique, ensuring uniform texture every time. Aim for a steaming temperature of 131‑149 °F (55‑65 °C), but keep dairy milk around 140 °F (60 °C) to preserve flavor and texture. A digital thermometer lets you hit the temperature guide each time, guaranteeing consistency across batches.
Purge the wand, then monitor as you steam; stop before the milk hits 70 °C (158 °F) to avoid scalding. Non‑dairy milks often heat differently, so use a separate probe or watch for visual cues to prevent separation.
This disciplined approach ensures every latte, cappuccino, and flat white starts with perfectly textured microfoam.
Preparing the Pitcher: Fill Level, Position & Pre‑Steam Purge
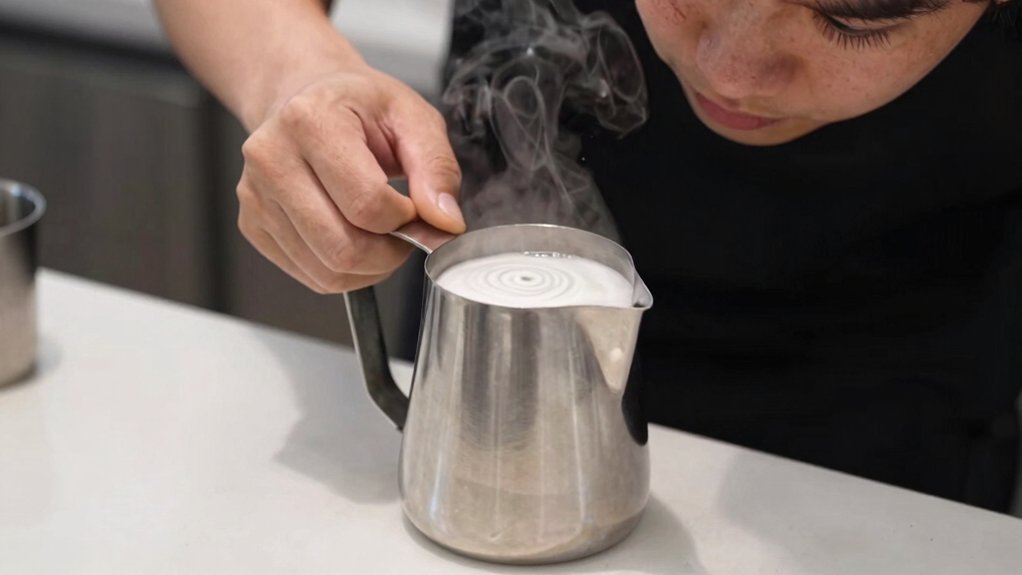
What’s the secret to a silky latte? It starts with careful pitcher preparation. Fill a stainless pitcher with cold milk to about one‑third full, leaving space for expansion. Before you touch the milk, perform a pre‑steam purge on the steam wand to clear condensation and guarantee dry steam. Tilt the pitcher roughly 45° and position the wand tip just below the surface, near the side, to create a gentle, squared‑off swirl. Begin the stretching phase, letting a steady hiss signal the aeration. After this short aeration, re‑check the milk level to ensure it hasn’t risen too high, keeping the wand submerged for even heating and a smooth microfoam texture. This method aligns with how espresso-focused brewing and precise measurements are emphasized for consistent results in dedicated facilities accurate espresso measurements.
Aerate the Milk: First Micro‑Bubble Step
Ever wondered how a perfect micro‑bubble base forms? Start with cold milk, tilt the pitcher about a 45‑degree angle, and place the wand tip just below the surface. Your frothing technique relies on gentle steam hiss for 3–5 seconds, creating aeration that expands the volume by roughly 20 %. Keep wand positioning close to the pitcher side so a subtle vortex forms, and listen for a steady hiss—not a loud screech. This controlled aeration builds the foundation of microfoam, giving the milk texture a light, airy quality without large bubbles. Stop before the wand submerges fully; you’ll move to heating and shaping in the next step.
Texture the Milk: Create a Silky Vortex
Tilt the pitcher to spin the milk into a whirlpool, letting the steam wand create a steady vortex that distributes microfoam evenly.
Keep the wand just below the surface at first to introduce about 30% air, then submerge it deeper once the milk warms to room temperature, maintaining the spin as you heat toward 60 °C (140 °F).
A four‑hole tip will accelerate the vortex, giving you a glossy, fine‑bubbled texture.
Vortex Creation Technique
How does a silky vortex transform your milk? You start with a gentle aeration, placing the steam wand tip just below the surface at a slight angle. The hiss introduces tiny bubbles, then you plunge the wand deeper, letting the pitcher technique spin a smooth vortex. This swirling motion breaks larger bubbles, distributes microfoam evenly, and yields glossy microfoam that coats the cup like wet paint. A four‑hole steam tip accelerates the spin, giving a more robust vortex and consistent texture. Keep the swirl alive as the milk heats, stopping around the sweet spot of 55–65 °C for perfect textured milk ready for latte art.
- Position wand tip just below surface, slight angle
- Transition to submerge wand for continuous vortex
- Use four‑hole steam tip for faster, stronger spin
- Stop aeration at 55–65 °C for glossy microfoam
Temperature Control Tips
A steady hand and a reliable thermometer keep your milk in the 55‑65 °C sweet spot, where natural sweetness and a glossy microfoam shine. While you steam, watch the temperature climb and pause at 60°C—this is the sweet‑spot where lactose sweetness blooms and the microfoam stays velvety. Use a thermometer or built‑in gauge to gauge the heat, feeling the pitcher warm up as you approach the target. If the milk spikes above 65°C, the texture will turn grainy and the gloss will fade. Keep the steam wand just below the surface, allowing a gentle whirl to incorporate air without overheating. When the thermometer reads 60°C, turn off the steam, tap the pitcher, and swirl to lock in that silky texture.
Hit the Sweet Spot: 120‑140 °F (55‑60 °C) Without Scalding
Ever wonder why your latte’s foam sometimes tastes flat or burnt? You’re probably missing the sweet spot of 120‑140 °F (55‑60 °C). That range preserves dairy milk’s natural sweetness and yields a silky microfoam, while keeping scald prevention top of mind. Use a thermometer and watch the milk temperature climb slowly; stop before it hits 158 °F (70 °C) to avoid bitterness. A steady steaming technique—submerging the wand just below the surface, then gradually lowering it—creates a proper texture without over‑heating. Consistency is key: every cup should hit the same temperature band for reliable flavor and foam stability.
- Aim for 120‑140 °F, not higher
- Use a reliable thermometer for accuracy
- Keep the wand just below the surface initially
- Stop steaming before reaching 158 °F for scald prevention
Listening for the Right Steam Pitch to Gauge Microfoam Texture
You’ll hear a steady, even hiss when the wand creates a smooth vortex just below the milk surface, and that sound signals proper aeration.
If the pitch turns high‑pitched or drops into a loud rumble, you’re either too close to the surface or too deep, and the microfoam will be off‑texture.
Keep the hiss calm and continuous, and you’ll know the foam is forming without large bubbles.
Hiss Sound Cues
Ever wondered how a simple hiss can tell you whether your milk’s turning into silky microfoam or a flat, dense mess? You’ll notice that a steady, even hiss during the steaming phase signals proper aeration and texture development. A high‑pitched hiss means you’re adding too much air or holding the wand too close to the surface, while a loud, low rumble tells you the wand is too submerged or the milk is overheating, producing dense, less creamy microfoam. When the sound drops to a gentle tss‑tss, you’ve hit the sweet spot for balanced aeration and a smooth vortex, giving you fine microfoam and consistent steamed milk dynamics.
- Steady hiss → correct aeration
- High‑pitched hiss → excess air, surface proximity
- Low rumble → over‑submersion, overheating
- Gentle tss‑tss → optimal vortex, texture development
Vortex Formation Indicators
How can you tell if the steam is forming the perfect vortex for microfoam?
Listen for a steady, gentle hiss as the steam wand creates a smooth vortex formation. The hiss should be subtle, not a loud roar, indicating proper aeration and balanced surface tension.
Keep the tip position just beneath the milk surface; a “tss‑tss” pitch lasting 2–5 seconds signals that microbubbles are spreading evenly.
A high‑pitched screech means the wand is too close, while a deep rumble shows it’s too deep—both disrupt texture development.
As the vortex stabilizes, the sound softens and nearly disappears, confirming that fine microfoam is forming and you’re ready to submerge the wand for final texture refinement.
Finishing Moves: Tap, Swirl & Rest the Milk
Ready to perfect your latte art? After steaming, let the milk rest briefly so the foam stabilizes. Then give the pitcher a firm tap to burst any large bubbles, creating a silky microfoam texture. Bring the spout close, swirl gently to spread the foam evenly, and you’ll see a smooth crema ready for design. These finishing moves set the stage for crisp rosettas and hearts.
After steaming, let milk rest, tap the pitcher, then swirl gently for silky microfoam and smooth crema.
- Tap the pitcher to release big bubbles and refine milk texture.
- Rest the milk a few seconds for microfoam to settle.
- Swirl the pitcher to distribute foam uniformly and enhance gloss.
- Aim for a wet‑paint look: microbubbles under 1 mm for clean latte art.
Pouring Microfoam: Circular Motion, Timing & 2/3‑Full Pause
After the tap‑swirl‑rest routine stead the milk is smooth and ready, start pouring the microfoam in a steady circular motion. Keep the spout close and the flow near‑horizontal so the glossy foam slides into the espresso without breaking the surface. As the pitcher reaches about two‑thirds full, execute a brief pause. This pause lets the denser milk settle while the airy microfoam stays on top, priming the cup for latte art. During the pause, maintain pitcher control; a gentle swirl helps align the foam for a clean latte art pour.
When you resume, keep the circular motion, allowing the remaining microfoam to flow smoothly and form the desired pattern. This timing and motion give you a silky, glossy finish and a solid foundation for any latte art design.
Beginner Latte‑Art Designs: Hearts, Rosettas & Simple Swans
A steady, well‑defined swirl sets the stage for beginner latte‑art designs, letting you create hearts, rosettas, and simple swans with confidence. First, steam the milk to 60 °C, using a brief aeration phase to inject just enough air for glossy microfoam. Tilt the pitcher 45° and pour a circular stream until the cup is two‑thirds full, then pause. For hearts, keep the pour steady and draw a quick, gentle line through the center. For hearts, keep the pour steady and draw a quick, gentle line through the center. To craft a rosetta, narrow the stream, wiggle the pitcher, and let leaf‑like petals unfurl. Simple swans emerge by forming a heart, then extending a thin tail with a controlled flick of the wrist.
- Position steam wand off‑center for a tight vortex
- Aim for 60 °C for balanced sweetness and texture
- Use 3–5 seconds of aeration before submerging wand
- Practice rosetta by wiggling pitcher after central line is poured
Top 5 Microfoam Mistakes & Fast Fixes
A steady swirl sets the stage for beautiful latte‑art, but the same technique can trip you up if you overlook common microfoam pitfalls.
| Mistake | Quick Fix |
|---|---|
| Over‑aerating (2‑5 s) | Shorten aeration, listen for steady hiss |
| Overheating (>70 °C) | Stop at 55‑65 °C, aim ~60 °C |
| Wand too deep or too high | Keep tip just below surface for gentle vortex |
| Insufficient swirl after texturing | Lower pitcher while maintaining strong vortex |
| Non‑dairy milk collapse | Reduce aeration, boost vortex, rest milk briefly |
You’ll notice a smoother microfoam when you control the wand’s depth, keep aeration brief, and watch temperature. A steady vortex while lowering the pitcher distributes bubbles evenly, and non‑dairy milks need a tighter timing window. Apply these fixes, and your steaming will stay consistent, delivering silky, pour‑ready foam every time.
Frequently Asked Questions
How to Steam Perfect Microfoam?
You start with cold milk, fill a third, purge the wand, position tip just below the surface, aerate 3‑5 seconds, then submerge deeper, heat to 55‑65 °C, tap, swirl, and pour.
What Temperature Do You Steam Microfoam?
You should steam microfoam at about 60 °C (140 °F). Keep it between 55–65 °C (131–149 °F) for ideal sweetness and texture, using a thermometer to avoid scalding or under‑steaming.
What Is the Best Steam Tip for Microfoam?
You should use a four‑hole steam tip; it creates a stronger, faster vortex, giving you finer, more stable microfoam. Submerge the tip just below the surface, aerate to about 30% air, then texture.
What Milk Is Best for Microfoam?
Whole dairy milk’s the top choice for microfoam—its protein‑fat balance creates smooth, stable foam. If you prefer plant‑based, go with barista‑formulated oat milk, which includes stabilizers for better texture.
In Summary
Now you’ve got the basics, you can turn any milk into silky microfoam and pull stunning latte art every time. Keep the pitcher low, steam just enough to create those tiny bubbles, and finish with a firm tap and swirl. Practice the circular pour and the 2‑‑‑full pause, and you’ll avoid the common pitfalls. With a little consistency, those hearts, rosettas, and swans will become second nature. Enjoy the process and keep perfecting your craft.


