

You’ll transform inconsistent espresso into reliably excellent shots by mastering ten fundamental techniques. Start with fresh beans, dial in your grind to fine table salt texture, and weigh both coffee and water for precise 1:2 ratios. Tamp with even 30-pound pressure, pull shots between 25–35 seconds, and clean your machine after each use. Document your shots, identify whether they’re sour or bitter, then adjust one variable at a time. Each disciplined trial brings you closer to mastery’s repeatable excellence.
Start With Fresh Beans for Consistent Espresso Flavor
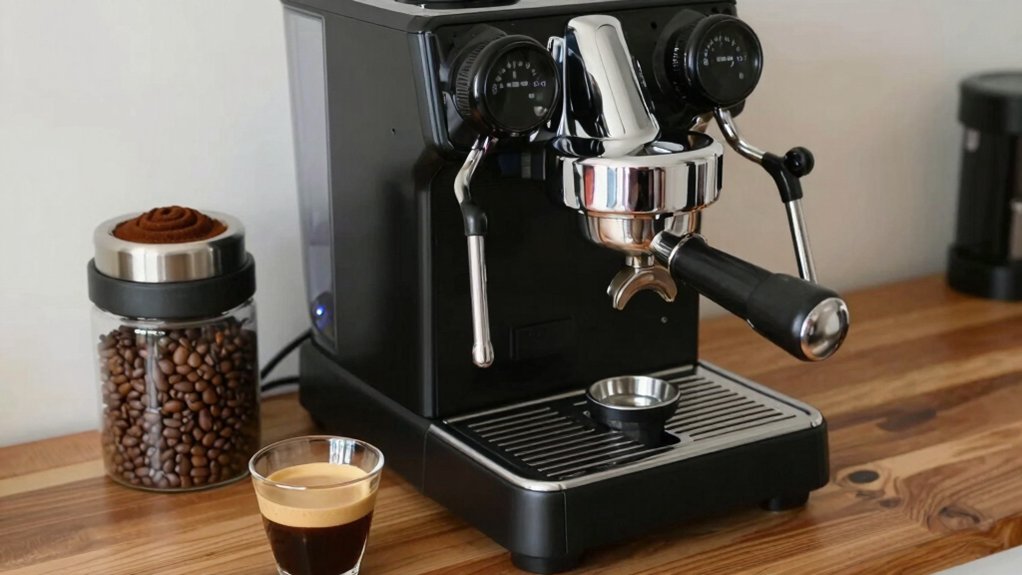
Why does your espresso taste inconsistent? The answer often lies in your beans. You’ll achieve espresso consistency by starting with fresh beans and grinding them just before brewing. This preserves the aroma and flavor that stale grounds lose.
Fresh beans ground just before brewing preserve the aroma and flavor that stale grounds lose, ensuring consistent espresso quality.
Store your fresh beans in airtight storage away from light and heat to maintain quality. Choose a medium to dark roast level for balanced acidity and sweetness in your shots.
Your grind size matters significantly—adjust it alongside your dose to reflect your bean’s origin and roast profile. This ensures optimal flavor extraction every time.
Replace your beans within two to four weeks of the roast date. This simple practice guarantees you’re always working with premium coffee, delivering the consistent espresso quality you deserve.
Dial in Your Grind for Consistent Extraction
Getting your grind size right is fundamental to consistent espresso extraction. You’ll find that coarse grinds produce sour, under-extracted shots, while fine grinds create bitter, over-extracted results. Aim for a texture resembling fine table salt to achieve even extraction. Thicker-walled cups and heat-retaining designs can help maintain consistency during brewing, as maintaining optimal beverage temperature supports reliable extraction in practice grind consistency. Dialing in requires patience and multiple adjustments. You’ll need to fine-tune your grinder in small increments, considering both bean origin and roast level. This iterative process directly impacts shot consistency across pulls.
Combine proper grind size with consistent tamping pressure to maintain extraction balance. Once you’ve dialed in your grinder for a specific bean, you’ll notice immediate improvements in flavor reliability and quality. This foundation transforms your espresso routine from guesswork into precision brewing.
Weigh Coffee and Water for Consistent Ratios
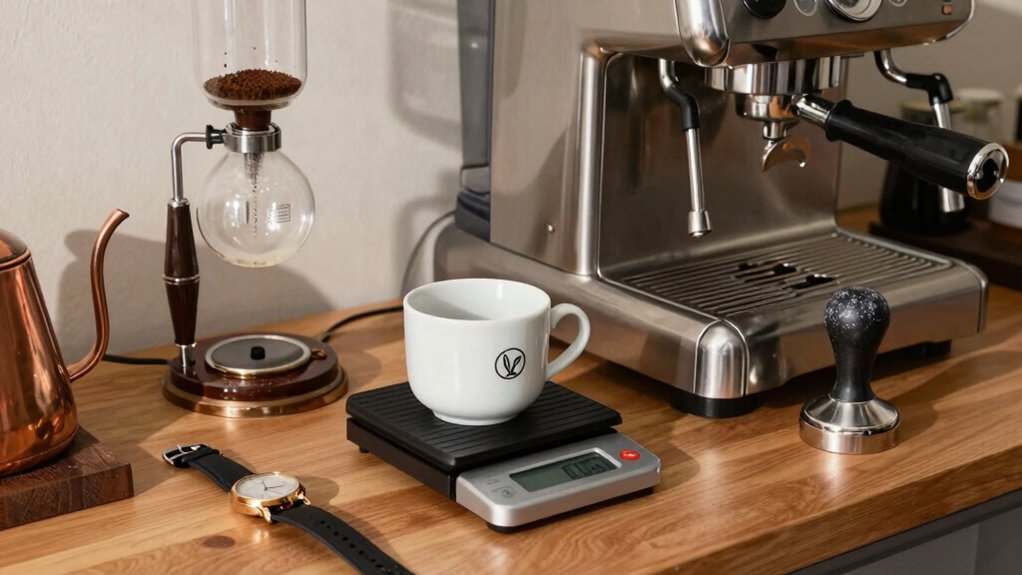
You’ll achieve consistency by weighing your coffee grounds and water rather than eyeballing amounts, which eliminates guesswork from your brewing routine. A kitchen scale lets you dial in precise ratios—typically 1:2 coffee to water—and track whether you’re hitting your target dose of 18–20 grams with ±0.5 grams of accuracy. In addition, selecting coffees with Fair Trade certifications from trusted brands helps ensure sustainable sourcing and consistent quality across batches Fair Trade certifications.
The Importance of Precise Measurements
How do you nail espresso consistency shot after shot? You’ll master the craft by treating measurement as non-negotiable. Weigh your coffee grounds precisely—18–20 grams for a double shot—and dial in your grind size accordingly. This dose directly impacts your extraction time and final cup quality. Additionally, using a refractometer to monitor TDS or Brix can help verify extraction yield and contribute to more repeatable results ATC temperature compensation across variable brewing conditions.
Tools for Accurate Weighing
Precision scales are your foundation for espresso consistency. You’ll achieve reliable results by investing in the right tools that measure both your coffee dose and extraction output accurately.
Here’s what you need:
- Digital kitchen scale – Measures grounds in grams for consistent dosing
- Scale with timer – Synchronizes dose measurement and extraction timing simultaneously
- High precision readout – Displays measurements to 0.1g for accurate ratios
- Calibration weights – Guarantees your scale stays accurate between sessions
Before each brewing session, calibrate your scale and tare it with your empty portafilter. This eliminates measurement variables that compromise your shots. By weighing your coffee grounds and monitoring extraction output, you’ll nail the 1:2 ratio (18–20g grounds to 36–40g espresso) consistently within 25–30 seconds, transforming your espresso game entirely. NIST-certified accuracy and auto-rotate display features from top instant-read thermometers emphasize reliability in measurement, which is crucial when dialing in precise ratios for repeatable results. NIST certification
Ratio Guidelines for Espresso
Weighing both your coffee grounds and brewed espresso is the foundation for consistency that volume-based measurements can’t match. You’ll eliminate variability by tracking your brew ratio precisely, ensuring each espresso shot delivers reliable results.
Start with the standard 1:2 coffee-to-water ratio—18 grams of ground coffee producing 36 grams of liquid espresso. This baseline provides excellent accuracy and extraction balance for most beans.
| Roast Level | Recommended Ratio | Expected Result |
|---|---|---|
| Light | 1:2.5 | Brighter, delicate cup |
| Medium | 1:2 | Balanced sweetness & acidity |
| Dark | 1:1 to 1:1.5 | Intensified body & concentration |
When dialing in your grind, adjust your brew ratio by ±0.1–0.2 to optimize extraction. Tighter ratios intensify flavor concentration, while longer ratios lighten body and complexity. Weigh consistently for mastery.
Tamp With Even Pressure Every Time
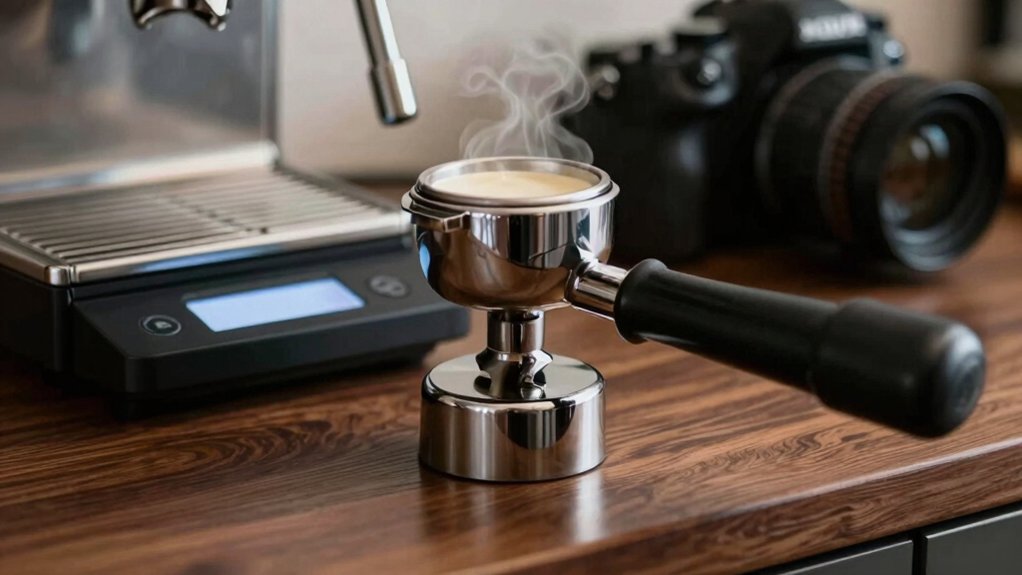
You’ll need to master consistent pressure application to achieve the flat, level coffee beds that promote uniform extraction.
Developing proper tamper technique means using a tamper that fits snugly in your portafilter and applying firm, controlled pressure—typically around 30 pounds of force—with even contact across the entire surface.
Check your puck’s integrity after each tamp; a compact, flat result indicates you’ve eliminated the channeling that ruins inconsistent shots. In practice, using a tamper with a comfortable grip and a stable surface can help maintain consistent pressure across tamping sessions pressure consistency.
Achieving Consistent Pressure Application
The foundation of balanced espresso extraction rests on tamping with uniform pressure every single time. You’ll achieve consistent results by mastering proper tamping technique and understanding how pressure affects your puck.
To develop reliable tamping pressure:
- Use a tamper that fits snugly in your portafilter to eliminate tilting and ensure full contact
- Apply steady downward pressure of 10–15 pounds vertically across the entire coffee surface
- Maintain grind consistency so tamper pressure remains predictable shot to shot
- Inspect your puck after tamping for a flat, uniform surface with no ridges or edge gaps
Practice on a dry puck or tamper mat to build muscle memory. This rehearsal strengthens your ability to deliver identical tamper pressure repeatedly, creating level pucks that extract evenly and consistently.
Developing Proper Tamper Technique
Once you’ve built muscle memory for consistent pressure application, refining your actual tamping technique becomes the next step toward balanced extraction. You’ll want to select a tamper that fits snugly in your portafilter, ensuring uniform pressure across the entire coffee bed. Center the tamper and maintain a perpendicular angle to prevent uneven compaction and channeling at the edges. Apply approximately 30 pounds of force without twisting or shimming. Your goal is creating a flat, level bed with smooth surface compression that promotes consistent water flow. After tamping, wipe the portafilter rim to remove excess grounds, guaranteeing a tight seal when locking into the group head. This disciplined approach eliminates extraction inconsistencies. Stainless steel bases provide durability and corrosion resistance, supporting long-term consistency in your tamping routine.
Creating Level Coffee Beds
A level coffee bed is fundamental to extraction consistency, and achieving one requires deliberate attention to how you distribute and compress your grounds.
You’ll create a puck flat enough for optimal extraction by following these steps:
- Even distribution: Spread grounds uniformly across your portafilter before tamping to eliminate density variations
- Consistent pressure: Apply approximately 30 pounds of force with level, deliberate motion across the entire surface
- Proper tampers fit: Use one that contacts the full width of your portafilter, preventing gaps that cause channeling
- Post-tamp verification: Check your puck for a smooth, flat top without ridges or hollow spots
Practice this repeatable technique until it becomes automatic. Your tamping motion directly determines whether you’ll achieve the even distribution and consistent pressure needed for a truly level bed that extracts evenly every time. Understanding accuracy
Pull Shots Between 25–35 Seconds
Why does timing matter so much in espresso brewing? Your pull time directly determines extraction quality. You’ll achieve balanced espresso by pulling shots between 25–35 seconds from extraction start.
| Pull Time | Grind Size | Result |
|---|---|---|
| Under 25 seconds | Too coarse | Under-extraction |
| 25–35 seconds | Optimal | Balanced shot |
| Over 35 seconds | Too fine | Over-extraction |
You’ll adjust grind size, dose, and tamp pressure gradually, making minimal changes between pulls. Use a timer consistently to measure shot timing and correlate flavor shifts with your adjustments. Each variable affects extraction differently—refining one element at a time prevents confusion. Track how modifications to tamp pressure or grind size shift your pull time, then taste the results. This methodical approach builds your understanding of how shot timing influences the final cup’s complexity and balance.
Keep Your Water Between 195–205°F
While you’re perfecting your pull time, water temperature works alongside timing to unlock balanced extraction. You’ll want to maintain your brew water between 195–205°F (90–96°C) for optimal results.
Temperature directly impacts your espresso’s flavor profile:
Temperature directly impacts your espresso’s flavor profile—master this variable to transform your shots from mediocre to exceptional.
- Above 205°F: You’ll risk over-extraction and bitter notes that overwhelm your palate
- Below 195°F: Under-extraction occurs, leaving sour, thin shots lacking body
- At 200°F: This baseline consistency lets you isolate variables when adjusting grind, dose, or timing
- Stability matters: Fluctuations during extraction alter crema formation and mouthfeel
Many espresso machines offer adjustable temperature controls—use this feature to dial in the best setting for your specific beans. Preheat your equipment thoroughly and use stable water sources to maintain temperature stability throughout your brewing process.
Clean Your Machine After Each Use
You’ll remove residual coffee grounds by rinsing your group head and portafilter with hot water after every shot, which prevents them from accumulating and degrading your next brew.
Oil buildup naturally occurs during extraction, so you must wipe down your steam wand and exterior surfaces regularly to keep residue from hardening and tainting your espresso’s flavor.
Backflushing with a blind filter clears internal passages and maintains the pressure stability you need for consistent shots.
Remove Residual Coffee Grounds
How quickly can old coffee grounds compromise your next shot? Residual grounds and oils degrade your espresso’s flavor profile rapidly. You’ll need systematic grounds removal to maintain extraction quality.
Here’s your essential cleaning routine:
- Remove used grounds from the basket immediately after each shot
- Rinse your portafilter and basket thoroughly with hot water to dissolve lingering oils
- Clean the group head meticulously to prevent oil buildup and flavor contamination
- Execute a backflush cycle if your machine supports it for deeper residue elimination
This disciplined approach prevents particles from settling in hard-to-reach crevices. Consistent group head cleaning ensures proper pressure distribution during extraction, directly supporting crema maintenance. By eliminating old grounds systematically, you’ll experience noticeably brighter, cleaner shots with superior crema production every time you brew.
Prevent Oil Buildup Accumulation
Every shot you pull leaves behind stubborn coffee oils and fine grounds that, if left unattended, will compromise your next extraction. You’ll run a full cleaning cycle after each use with water or recommended cleaning solution to remove residue from the group head and portafilter.
Weekly backflush sessions with cleaning solution prevent stubborn oil layer formation. You’ll use a dedicated espresso cleaning brush to remove fine grounds from shower screens and gaskets, ensuring consistent water flow and crema formation.
Don’t overlook the steam wand—wipe and purge it immediately after texturing milk to prevent buildup. Rinse your portafilter, basket, and seal thoroughly with hot water before reassembling to stop oil and grounds from accumulating. This disciplined maintenance protects your machine’s performance and your espresso’s quality.
Identify the Problem: Sour vs. Bitter Shots
Why’s your espresso tasting off? You’re likely experiencing either sourness or bitterness—two sides of the extraction problem. Here’s how to identify and fix each:
Sour shots stem from under-extraction. Your grind’s too coarse, shot time’s too brief, or dose is too low. Insufficient contact time prevents proper flavor development.
Bitter shots result from over-extraction. You’re pulling too fine a grind, running shots too long, or using excessive dose, which extracts harsh tannins.
Fix sourness by:
- Grinding finer
- Increasing dose toward 18–20 g
- Extending shot time to 25–30 seconds
Fix bitterness by:
- Grinding coarser
- Reducing dose
- Shortening shot time to 20–25 seconds
Always adjust one variable at a time and retaste. Document your changes to pinpoint the precise combination delivering balanced flavor.
Document Your Shots in a Brewing Journal
Once you’ve identified whether your shots run sour or bitter, you’ll need a system to track what’s actually working—and that’s where a brewing journal comes in. Your espresso journal becomes invaluable for shot logging and identifying patterns. Record your dose consistency, grind setting, and extraction timing for every pull. Document bean origin, roast level, brew temperature, and pressure adjustments. Log sensory notes—flavor profiles, crema quality, and mouthfeel—alongside any technique changes you’ve made.
| Date | Dose (g) | Grind Setting |
|---|---|---|
| 1/15 | 18 | 5 |
| 1/16 | 18 | 4.5 |
| 1/17 | 19 | 4.5 |
This chronological record transforms scattered observations into actionable data, helping you troubleshoot inconsistencies and replicate your best shots consistently.
Change Just One Thing, Then Brew Again
The most common mistake espresso enthusiasts make is tweaking multiple variables at once, which muddies the waters and makes it impossible to know what actually improved your shot.
Instead, isolate each element systematically:
Isolate each element systematically: adjust one variable at a time while documenting results to identify what truly improves your espresso.
- Adjust grind size alone while keeping dose and brew time constant
- Modify dose in grams without changing your baseline grind or timing
- Alter brew time incrementally to observe flavor extraction changes
- Test one parameter, document tasting notes, then revert to baseline
You’ll quickly identify what drives your desired flavor profile. If sourness emerges, increase contact time or use finer grind. Bitterness signals you should shorten extraction or adjust grind coarser. By changing just one variable per trial and recording exact numbers, you’ll build reliable data that transforms your espresso consistency and quality.
Frequently Asked Questions
How Long Should Espresso Beans Rest After Roasting Before Grinding and Brewing?
You should wait 5-14 days after roasting before grinding and brewing your espresso beans. This resting period, called degassing, lets CO2 escape so you’ll achieve better extraction and more balanced flavor in your final cup.
What Grinder Type Produces the Most Uniform Particle Size for Espresso?
You’ll achieve the most uniform particle size using a burr grinder, specifically a flat burr model. It’s superior to blade grinders because it crushes beans consistently rather than chopping them randomly, ensuring even extraction.
How Often Should I Replace My Espresso Machine’s Gaskets and Seals?
You should replace your espresso machine’s gaskets and seals every 6-12 months, depending on usage frequency. If you’re brewing daily, replace them annually. You’ll notice degradation when you experience water leaks or inconsistent pressure.
Can I Use Pre-Ground Coffee, or Must I Grind Immediately Before Brewing?
You can use pre-ground coffee, but you’ll achieve superior results by grinding immediately before brewing. Freshly ground beans preserve volatile oils and aromatics that dissipate quickly, delivering richer, more complex espresso shots consistently.
What’s the Ideal Altitude or Environmental Condition for Optimal Espresso Extraction?
You’ll achieve ideal espresso extraction at sea level with 65-70°F temperatures and 45-55% humidity. You’ll need to adjust your grind and pressure if you’re at higher altitudes due to lower atmospheric pressure affecting water boiling points.
In Summary
You’ve now got the tools to master consistent espresso brewing. By implementing these ten strategies—from selecting fresh beans to documenting your shots—you’ll eliminate guesswork and develop a reproducible process. Remember, you’re not just making coffee; you’re refining a skill that requires patience and attention. Start today, track your progress, and you’ll soon pull exceptional shots every single time.


