

You need dense micro‑foam because its fine, uniform bubbles form a stable canvas that holds the intricate patterns of latte art without blurring or collapsing. At 60–63 °C the whey proteins unfold and create a strong interfacial film that locks those tiny bubbles in place, while too much fat or overheating weakens the structure. This balance gives you smooth, pourable foam that supports sharp designs, and the next sections will show you how to achieve it.
Why Foam Density Matters for Latte‑Art Designs

Why does foam density matter for latte‑art designs?
You need milk foam density that’s high enough to hold fine, evenly sized bubbles, because those bubbles form the canvas for latte art. When steam temperature hits 60‑63 °C, protein stabilization creates a strong viscoelastic film that locks bubbles in place, giving you pourable foam that streams smoothly. Temperature Control helps ensure you hit the optimal range without overheating, which preserves foam structure and consistency.
How Protein, Fat, and Temperature Determine Milk Foam Density
Milk fat melts around 50 °C, forming a thin film that supports bubbles; too much fat, however, drags them down, lightening microfoam. Temperature is the catalyst: heating to 60–63 °C unfolds whey proteins, exposing hydrophobic ends that lock bubbles, while exceeding 65 °C causes over‑denaturation and collapse. Balancing milk composition lets you craft dense, glossy microfoam perfect for latte art. Acknowledge that 50–63 °C range specifically optimizes density and stability for the best latte art outcomes protein interactions and consider using a precise thermometer for repeatable results.
Selecting Milk That Maximizes Foam Density for Baristas
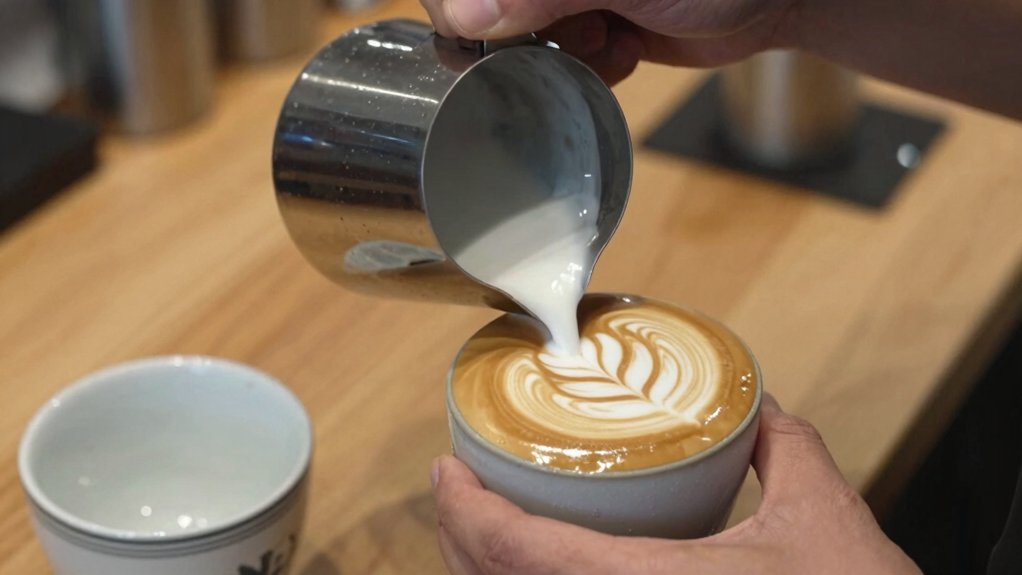
What’s the best milk for barista‑grade microfoam? Choose a product with a high protein‑to‑fat ratio and low pH, because those traits boost milk foam density and foaming stability. Whole milk provides a richer, creamier surface, while skim milk creates firmer microfoam that holds precise latte art outlines. Pasteurized milk preserves the proteins that form small, uniform bubbles better than UHT. Barista blends engineered for foaming often combine the best of both worlds, delivering consistent foam density optimization. When you evaluate milk selection, prioritize a balance of protein, modest fat, and proper acidity to ensure your microfoam stays dense, stable, and ready for intricate latte art. Removable tanks can simplify the cleaning process, helping you maintain consistent water-related performance across your brewer and supporting better overall beverage quality.
Controlling Milk Foam Density With Proper Steaming Technique
When you steam milk to the sweet spot of 60–63 °C (140–145 °F), the whey proteins denature just enough to form a sturdy interfacial film that locks air into tiny, uniform bubbles, giving you a dense, pourable microfoam ideal for latte art. Strix temperature control helps monitor and maintain precise heat during frothing, reducing the risk of over‑denaturation that can thin the interfacial film. To keep that milk foam density high, use a steady steaming technique that creates a tight vortex; the swirling motion pulls milk into the wand, forming a consistent bubble size distribution.
Watch the steam temperature—stay below 65 °C to avoid over‑denaturation that thins the interfacial film.
Adjust milk fat content: whole milk adds a creamy layer that supports larger bubbles, while skim milk yields tighter, denser foam.
Mastering these variables ensures a stable vortex and perfect microfoam for sharp latte art.
Troubleshooting Common Foam‑Density Problems to Keep Latte‑Art Sharp

Ever notice your latte art blurring or falling apart? You’re likely battling foam‑density issues that ruin microfoam stability. Warm milk (≈60‑65 °C) triggers protein denaturation, strengthening the air‑water interface and keeping bubbles tiny. If steam temperature spikes, bubbles enlarge, cap‑density rises, and designs lose latte‑art sharpness. Below is a quick reference for troubleshooting foam density. Additionally, selecting the right biscotti serving pieces can enhance guest presentation when you serve alongside latte art-inspired desserts or beverages, ensuring a cohesive table setting throughout your gathering Heat‑resistant design and careful display can complement your latte‑time moments.
Frequently Asked Questions
How Foamy Should Milk Be for Latte Art?
You want the milk to be velvety, with a glossy, micro‑foam texture—no big bubbles, just a thin, dense layer that swirls easily and holds the pour, roughly sixty‑percent froth.
Is Whole Milk or 2% Better for Latte Art?
You’ll find whole milk better for latte art because its higher fat creates denser, creamier micro‑foam that holds patterns, while 2% yields lighter foam that’s harder to shape and less stable.
Is Foamed Milk Better for Latte Art?
Yes, you’ll get better latte art with foamed milk because its microfoam creates a stable, smooth surface that lets you pour precise designs, while un‑foamed milk lacks the texture needed for crisp patterns.
What if Milk Is Too Frothy for Latte Art?
If milk’s too frothy, you’ll struggle to pour clean designs; the thick foam won’t blend with crema, so patterns blur, collapse, and you lose the smooth surface needed for crisp latte art.
In Summary
Now that you know how protein, fat, and temperature shape foam density, you can fine‑tune your steam, pick the right milk, and keep your latte‑art crisp. Mastering these variables lets you consistently pour smooth, defined designs, turning every cup into a miniature masterpiece.


